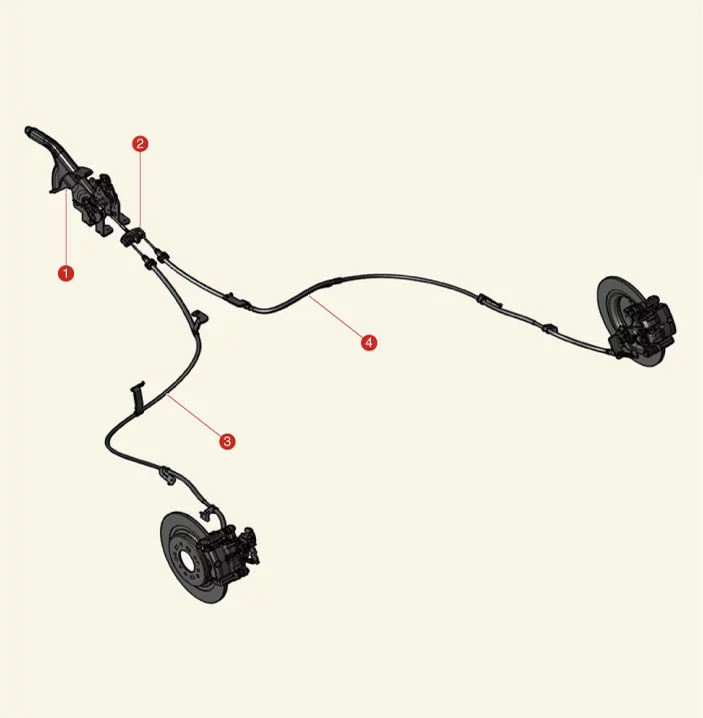
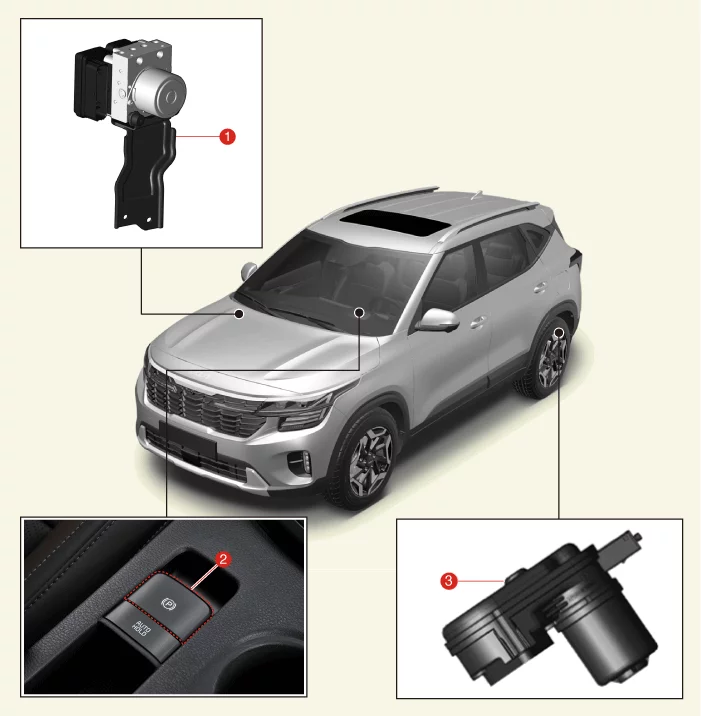
1. ESC (Electronic Stability Control) Control Unit 2. EPB Switch
3. Electronic Parking Brake (EPB) Actuator
Parking Brake Lever Removal and Installation
Removal
Disconnect the battery negative (-) terminal.
Remove the floor console. (Refer to Body - “Floor Console Assembly”)
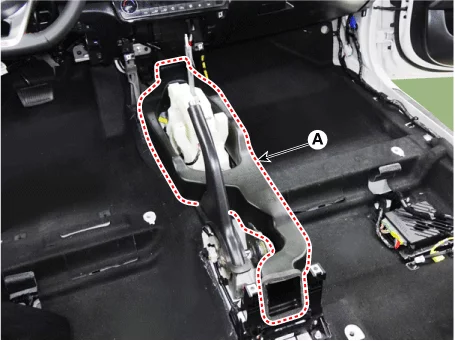
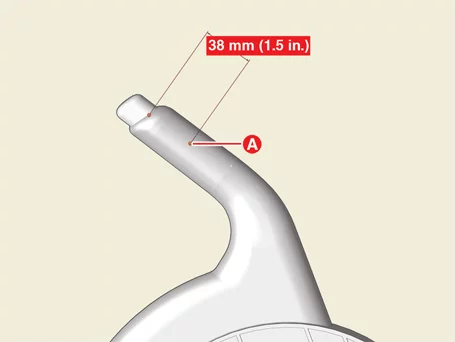
Remove the floor air duct (A) after removing the screws.
Remove the floor console bracket (A) after removing the nuts.
Tightening torque : 3.3 - 4,2 N·m
Disconnect the parking brake switch connector (A).
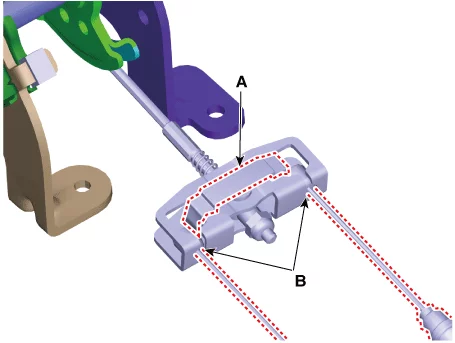
Remove the cable retainer (A) and the parking brake cables (B).
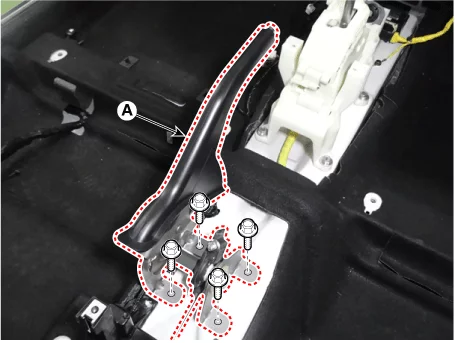
Remove the parking brake lever (A) after removing the bolts.
Tightening torque : 19.6 - 29 N·m
Installation
Install in reverse order of removal.
Adjust the parking brake cable and check it operating normally. (Refer to Parking Brake Lever - "Adjustment")
Parking Brake Lever Adjustment
Inspection
After disassembling/assembling the torque member or replacing the caliper, parking brake cable or brake disc, re-adjust the parking brake.
To fit the cable, follow one of these procedures before adjusting.
Apply a parking brake fully more than 3 times
With full operation, hold the parking brake for 1 to 2 hours.
Remove the floor console assembly. (Refer to Body - "Floor Console Assembly")
After fitting the cable, adjust the parking brake cable so that the stroke is 5 - 6 notch when operating the pedal with 30kgf at point (A).
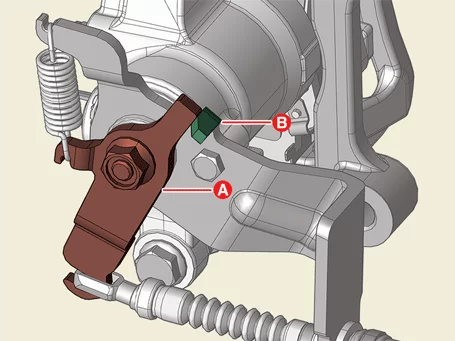
For the BIR type, adjust the adjustment nut of the lever assembly so that the sum of the O / P lever (A) and the stopper (B) (LH / RH) angle is within 3.0 mm (0.11 in).
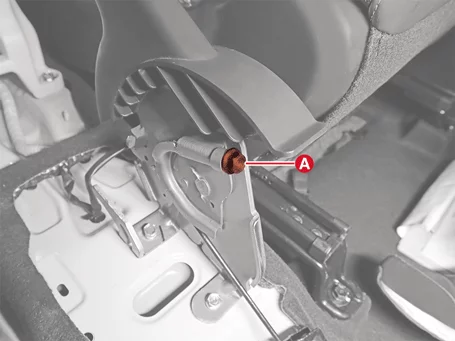
Adjust the parking brake cable by tightening or loosening the adjusting nut (A).
Make sure that there is no gap between adjustment nut and clip after adjusting the parking brake.
Make sure that the brakes are not drag.
Make sure that the parking brake switch is 'ON' before the parking lever is operated by 1 notch and 'OFF' when released.
Check whether the wheel operates smoothly.
Perform driving test.
Parking Brake Cable Removal and Installation
Removal
Disconnect the battery negative (-) terminal.
Remove the floor console. (Refer to Body - “Floor Console Assembly”)
Remove the floor air duct (A) after removing the screws.
Remove the floor console bracket (A) after removing the nuts.
Tightening torque : 3.3 - 4,2 N·m
Remove the cable retainer (A) and the parking brake cables (B).
Remove the rear wheel and tires. (Refer to Suspension System - "Wheel")
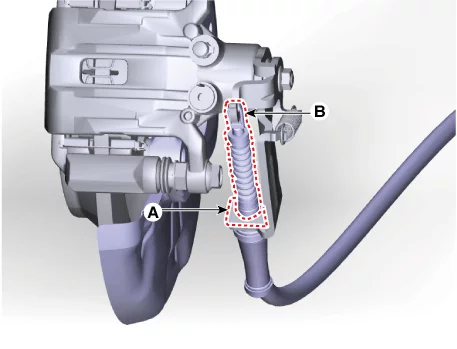
Remove the clip (A), and the parking brake cable (B). [2WD] [4WD]
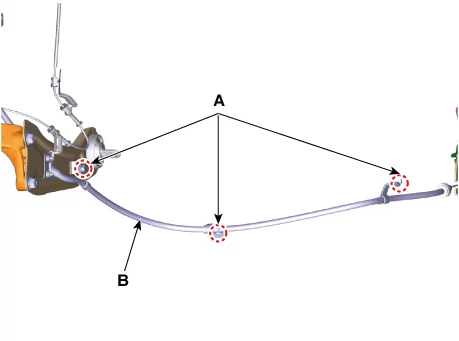
Remove the parking brake cable (B) after removing the bolts (A).
Tightening torque : 19.6 - 29 N·m
Installation
Install in reverse order of removal.
Adjust the parking brake cable and check it operating normally. (Refer to Parking Brake Lever - "Adjustment")
Parking Brake Cable Adjustment
Inspection
After disassembling/assembling the torque member or replacing the caliper, parking brake cable or brake disc, re-adjust the parking brake.
To fit the cable, follow one of these procedures before adjusting.
Apply a parking brake fully more than 3 times
With full operation, hold the parking brake for 1 to 2 hours.
Remove the floor console assembly. (Refer to Body - "Floor Console Assembly")
After fitting the cable, adjust the parking brake cable so that the stroke is 5 - 6 notch when operating the pedal with 30kgf at point (A).
For the BIR type, adjust the adjustment nut of the lever assembly so that the sum of the O / P lever (A) and the stopper (B) (LH / RH) angle is within 3.0 mm (0.11 in).
Adjust the parking brake cable by tightening or loosening the adjusting nut (A).
Make sure that there is no gap between adjustment nut and clip after adjusting the parking brake.
Make sure that the brakes are not drag.
Make sure that the parking brake switch is 'ON' before the parking lever is operated by 1 notch and 'OFF' when released.
This function operates the EPB actuator to release the electronic parking brake before replacing the brake pads. (S/W Management → Brake → Brake Pad Change Mode)
Refer to the KDS screen for operating conditions and details.
Electronic Parking Brake (EPB) On Vehicle Inspection
On Vehicle Inspection
The electronic parking brake system driving can be more quickly diagnosed for problems with the KDS (Refer to "DTC guide"). (1) Self Diagnosis : Inspect the Diagnostic Trouble Code (DTC) with the KDS (2) Sensor data : Checks the system input/output values (3) Forced operation : Checks the system operating status (4) Additional function : Controls system options, zero adjustment, and other functions
Electronic Parking Brake (EPB) Removal and Installation
Removal
EPB Switch
Remove the console upper cover. (Refer to Body - "Console Upper Cover")
Remove the EPB actuator (rear caliper body). (Refer to Brake System - "Rear Brake Caliper")
Remove the ESC Control Unit. (Refer to ESC (Electronic Stability Control) System - "ESC Control Unit")
EPB Actuator EPB Control Module (ESC (Electronic Stability Control) System)