Single-Use Parts
ESC (Electronic Stability Control) System
In this manual: Single-Use Parts
45steps
~305min
5/5difficulty
7special tools
Done 0 of 45
Contents:
Components and Components Location
Component
[2WD]
| 1. ESC Control Unit |
2. Front wheel speed sensor 3. Rear wheel speed sensor |
[4WD]
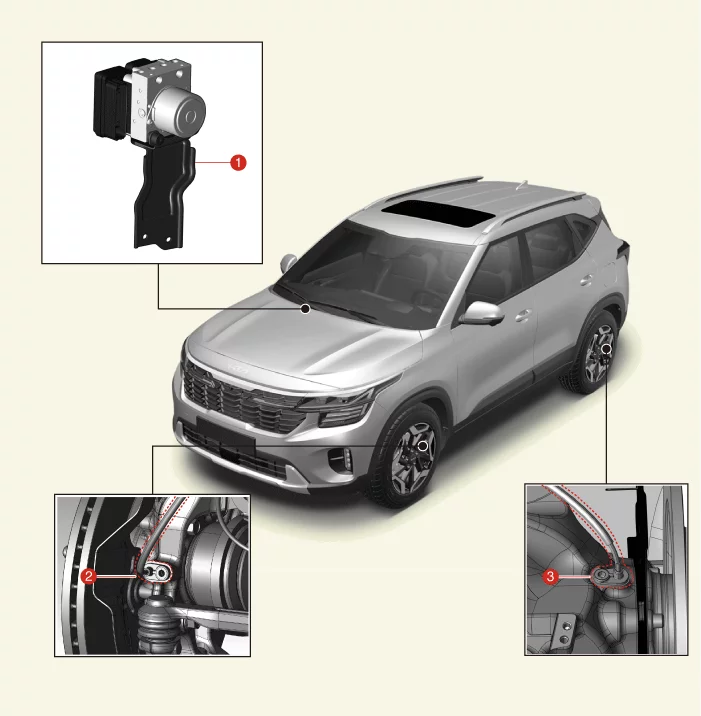
| 1. ESC Control Unit |
2. Front wheel speed sensor 3. Rear wheel speed sensor |
Description and Operation ➤
Troubleshooting ➤
ESC Control Unit Components and Components Location
Component
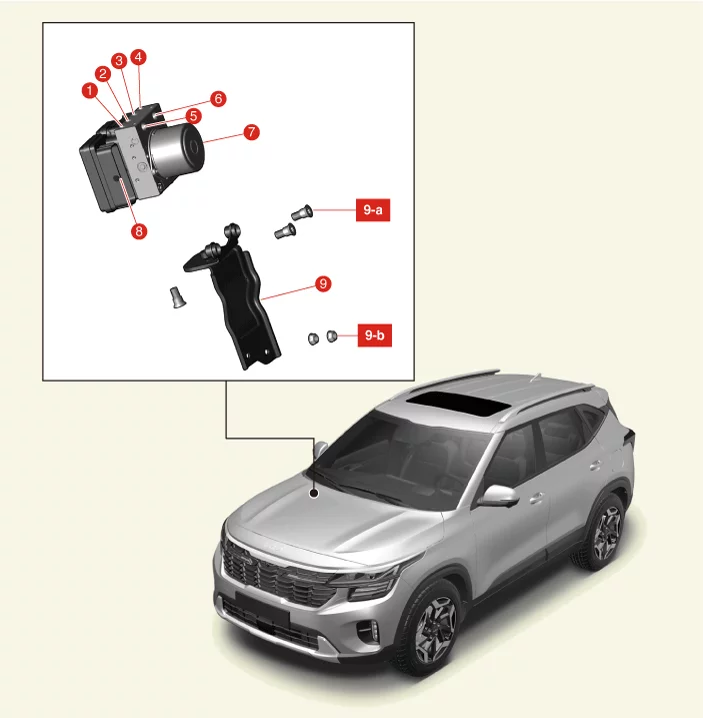
| 1. Front Right (FR) 13.7 - 16,7 N·m 2. Rear Left (RL) 13.7 - 16,7 N·m 3. Rear Right (RR) 13.7 - 16,7 N·m 4. Front Left (FL) 13.7 - 16,7 N·m 5. Master Cylinder 2 18.6 - 23 N·m |
6. Master Cylinder 1 18.6 - 23 N·m 7. ESC Control Unit (HECU) Motor 8. ESC Control Unit (HECU) Connector 9. ESC Control Unit (HECU) Bracket 9-a. 10.8 - 13,7 N·m 9-b. 16.7 - 26 N·m |
ESC Control Unit Removal and Installation
Removal
|
- Disconnect the battery negative ( - ) terminal.
- Remove the engine and transaxle assembly [ "Engine and transaxle detachment applied only in the case of the 1.6 T-GDI GAMMA II engine."] (Refer to Engine Mechanical System - "Engine and Transaxle Assembly")
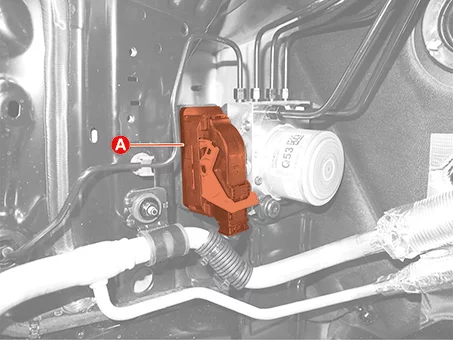
- Disconnect the ESC Control Unit (HECU) connector (A).
- Remove the brake tube flare nut (A), (B), and then disconnect the brake tube.
Tightening torque : A : 13.7 - 16,7 N·m B : 18.6 - 23 N·m


- Be careful not to damage the brake tube when connecting or disconnecting.
- Check the brake tube position and install the flare nut correctly.
- Remove the ESC control unit after removing the nuts (A).
Tightening torque : 16.7 - 26 N·m
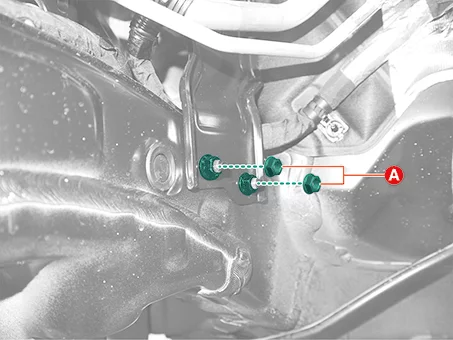
Be careful not to impact the ESC control unit. - Remove the screws, and then remove the ESC control unit bracket (A).
Tightening torque : 10.8 - 13,7 N·m
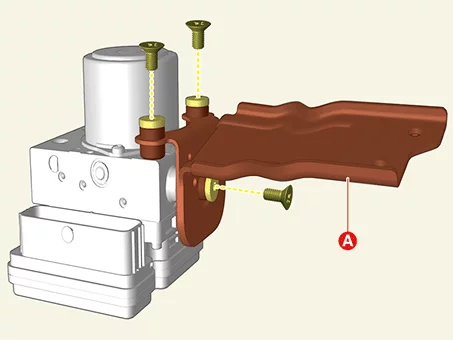
Installation
|
- Install in reverse order of removal.
- Fill the brake reservoir with brake fluid and perform air bleeding. (Refer to Brake System - "Brake Bleeding Procedures")
- Perform 'ESC Variant Coding', 'Longitudinal G Sensor Calibration', 'Auto Detected Configuration (ESC Only)' by using KDS. (Refer to ESC Control Unit - "Adjustment")
ESC Control Unit Adjustment
Diagnostic procedure by using KDS
Perform below procedures using KDS after or before replacing the ESC Control Unit (HECU). ESC Variant Coding Perform this function to optimize Electronic Stability Program (ESP) in accordance with equipped system (ABS/ESP, HAC, SPAS, etc.) on the vehicle. (S/W Management → ABS/ESP or Brake → ESC Variant Coding or Auto Variant Coding)
|

|
|
|
Front Wheel Speed Sensor Removal and Installation
Removal
- Disconnect the battery negative (-) terminal.
- Remove the front wheel and tires. (Refer to Suspension System - "Wheel")
- Remove the front wheel guard. (Refer to Body - "Front Wheel Guard")
- Disconnect the sensor connector (A) and remove the wiring fasteners (B).
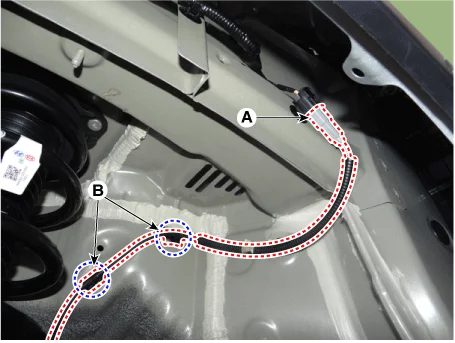
- Remove the wheel speed sensor (A) after removing the bolt.
Tightening torque : 6.9 - 10,8 N·m
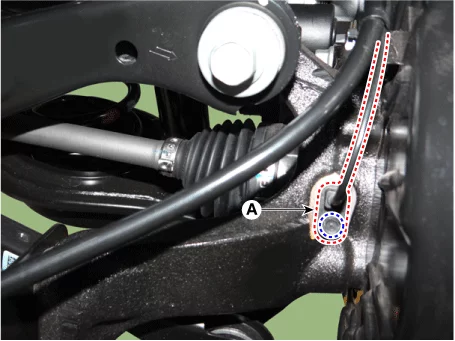
- Remove the wheel speed sensor (A) after removing the bolts.
Tightening torque : 8.8 - 13,7 N·m
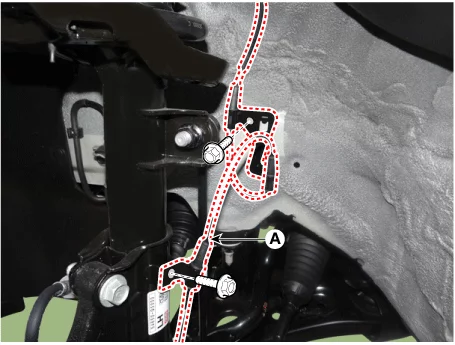
Installation
- Install in reverse order of removal.
Rear Wheel Speed Sensor Removal and Installation
Removal
Rear Wheel Seed Sensor Wiring [2WD]- Disconnect the battery negative (-) terminal.
- Remove the luggage side trim. (Refer to Body - "Luggage Side Trim")
- Disconnect the rear wheel speed sensor wiring connector (A).
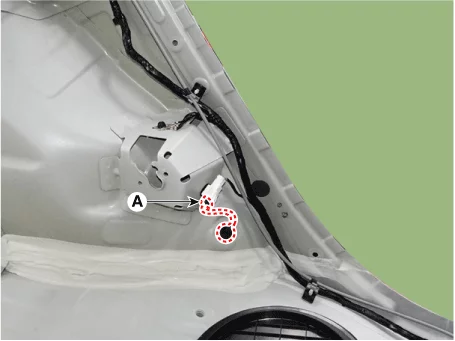
- Remove the rear wheel and tires. (Refer to Suspension System - "Wheel")
- Remove the rear wheel guard. (Refer to Body - "Rear Wheel Guard")
- Disconnect the rear wheel speed sensor connector (A).
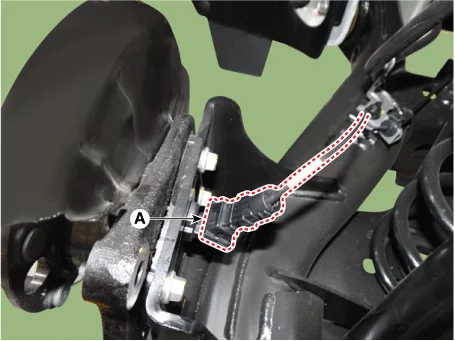
- Remove the mounting nut (A).
Tightening torque : 8.8 - 13,7 N·m
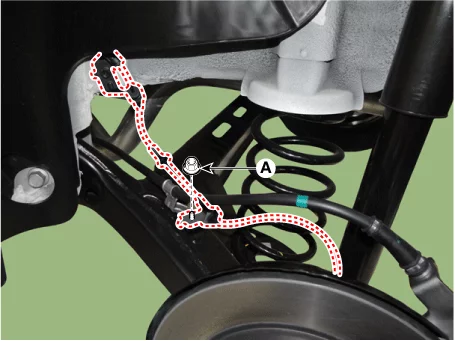
- Remove the wheel speed sensor wiring (C) after removing the bolt (A) and fastener (B).
Tightening torque : 7.8 - 11,8 N·m

- Disconnect the battery negative (-) terminal.
- Remove the rear wheel and tires. (Refer to Suspension System - "Wheel")
- Remove the rear brake disc. (Refer to Brake System - "Rear Brake Disc")
- Disconnect the rear wheel speed sensor connector (A).
- Remove the rear hub bearing and dust cover assembly (A) after removing the bolts.
Tightening torque : 49.0 - 59 N·m
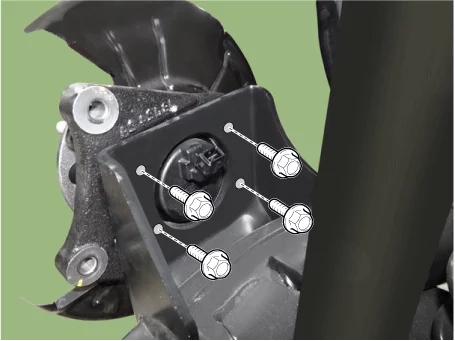

When removing the rear wheel hub bolts, support the rear wheel hub bearing to prevent it from falling off. - Disconnect the battery negative (-) terminal.
- Remove the luggage side trim. (Refer to Body - "Luggage Side Trim")
- Disconnect the rear wheel speed sensor wiring connector (A).
- Remove the rear wheel and tires. (Refer to Suspension System - "Wheel")
- Remove the rear wheel guard. (Refer to Body - "Rear Wheel Guard")
- Remove the rear wheel speed sensor (A) after removing the bolt.
Tightening torque : 6.9 - 10,8 N·m
- Disconnect the EPB actuator connector (A).[EPB]
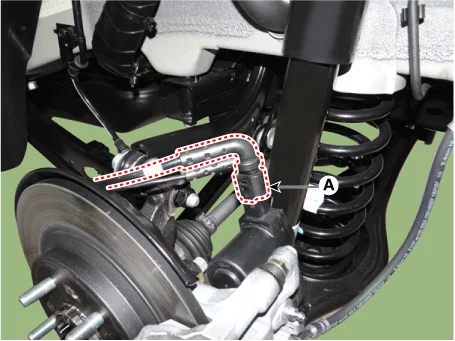
- Separate the wiring bracket after removing the nut (A).
Tightening torque : 6.9 - 10,8 N·m
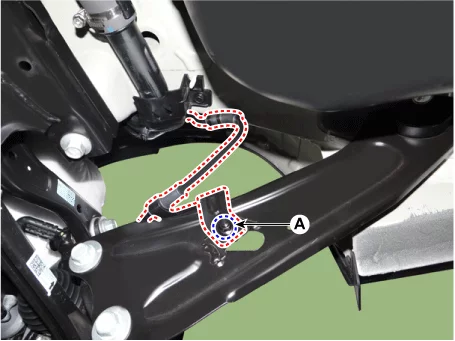
- Remove the wheel speed sensor wiring (C) after removing the bolt (A) and fastener (B).
Tightening torque : 7.8 - 11,8 N·m
Installation
- Install in reverse order of removal.
Rear Wheel Speed Sensor Replacement - 2WD
Special Service Tool
| Tool Name / Number | Illustration | Description |
| Sensor cap installer 09527 - AL300 |
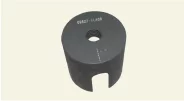 |
Used for installing wheel speed sensor cap (for outer diameter : 67.2 mm, 2.64 in.) |
Replacement
Rear Wheel Speed Sensor Cap- Remove the rear wheel hub bearing assembly. (Refer to Driveshaft and Axle - "Rear Hub Assembly)
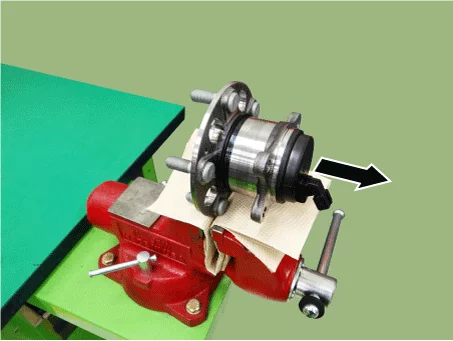
- Fix the rear hub bearing assembly (A) with a vise.
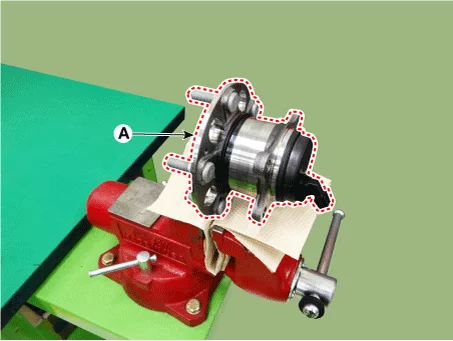
- Use a clean cloth to avoid damaging the hub bearing assembly.
- Be careful not to apply excessive force when fixing it to the vise, the hub bearing assembly may be damaged.
- Check the installation position of the sensor cap (A).
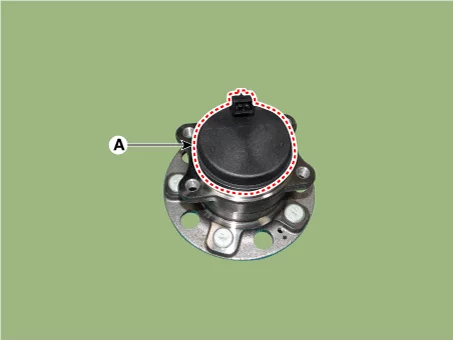
Check the installation position of the sensor cap connector (A) before removing the sensor cap.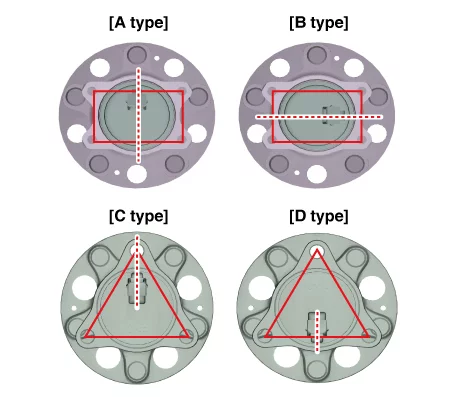
- Remove the sensor cap by hammering on a gap between the sensor cap and hub bearing assembly using a scraper (A).
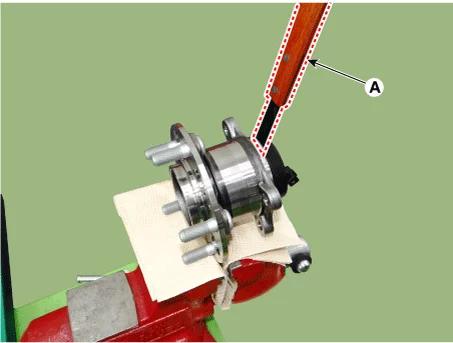
- Tap around the bearing cap 10 to 20 times to widen the gap little by little.
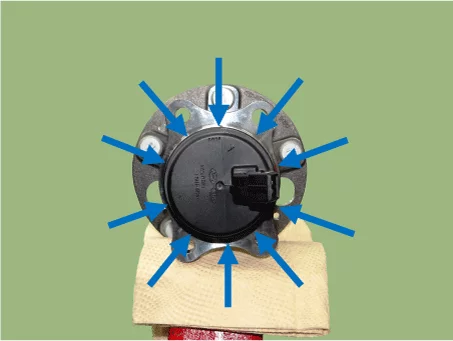
- When removing the sensor cap, remove it in a straight direction not to damage the tone wheel or encoder.
- Be careful not to damage the hub bearing assembly when using the hammer.
- Tap around the bearing cap 10 to 20 times to widen the gap little by little.
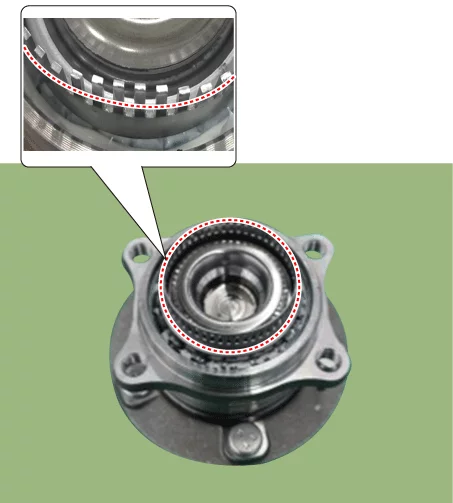
- Check for distortion of damage of the tone wheel or encoder (A).
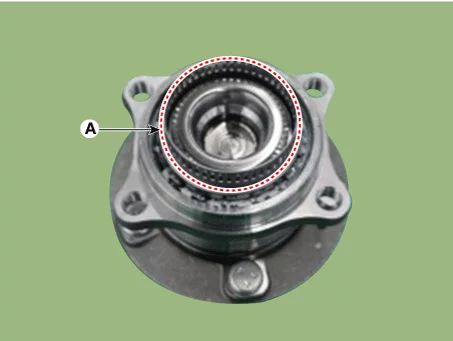
- Check if damaged the tone wheel or encoder after removing the sensor cap and replace the hub bearing if it was deformed.
- If the tone wheel is deformed, it may trigger the MIL ON or other problems.
- Position the sensor cap to the same direction of sensor cap connector (A) as you checked before removing.
Before installing the sensor cap, do not let any foreign material and contaminant into the hub bearing assembly. - Install the sensor cap (A) with the special service tool (09527 - AL300).
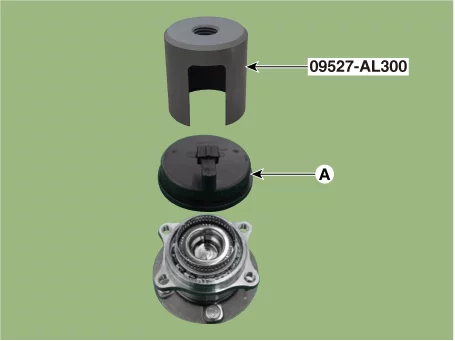
- Be careful not to tilt to one side when installing the sensor cap as it may damage the tone wheel or encoder.
- When sensor cap installation, hammering it until the gap disappeared between the sensor cap and hub bearing assembly.
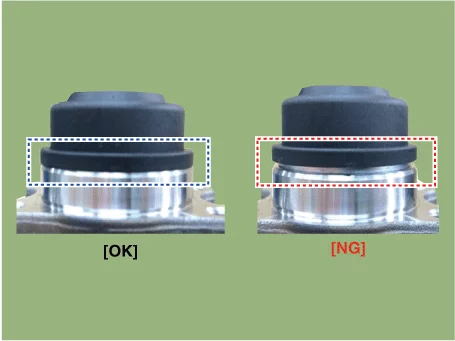
- Refer to the below table for selecting the proper SST.
SST No. SST Inner Diameter Sensor Cap Outer Diameter 09527-2W110 Φ82.1 Φ81.2, Φ81.4 09527-1S010 Φ58.9 Φ58.4 09527-AL100 Φ60 Φ59.5 09527-AL200 Φ65.9 Φ65.3 09527-AL300 Φ67.4 Φ67.2 09527-AL400 Φ73.2 Φ72.6 09527-AL500 Φ87.2 Φ86.6
- Install the rear wheel hub bearing assembly. (Refer to Driveshaft and Axle - "Rear Hub Assembly)
ESC OFF Switch Components and Components Location
Component
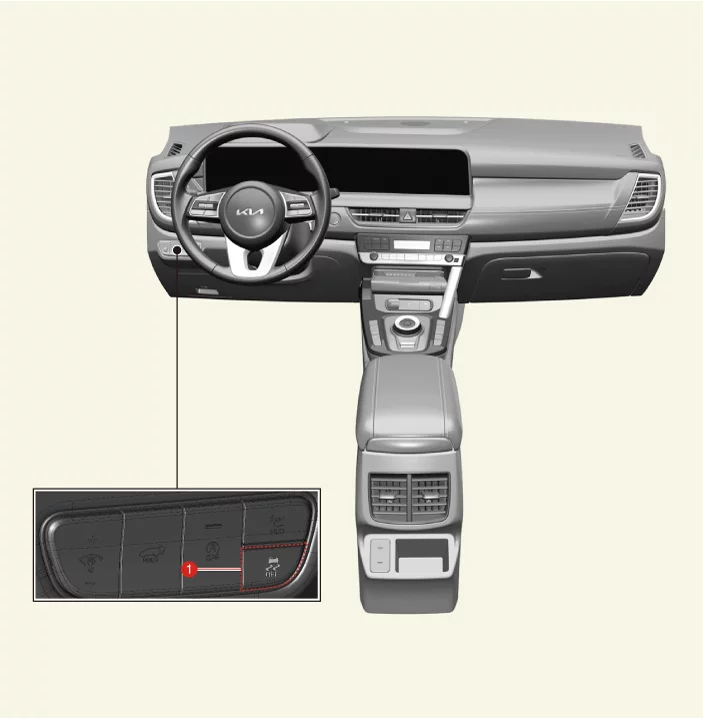
| 1. ESC OFF switch |
ESC OFF Switch Removal and Installation
Removal
- If the ESC OFF switch needs to be replaced, replace the headlamp leveling switch. (Refer to Body Electrical System - "Head Lamp Leveling Switch)
Installation
- Install in reverse order of removal.
Was this page helpful?