Compressor
Description and Operation
Description
The compressor is the power unit of the air conditioning system.
It is located on the side of the cylinder block and is driven by the engine drive belt.
The compressor converts low-pressure, low-temperature gaseous refrigerant into high-pressure, high-temperature gaseous refrigerant.
Variable Swash Plate Compressor
The compressor has a swash plate that rotates to reciprocate the pistons, which compress the refrigerant.
The variable displacement swash plate compressor adjusts the swash plate angle to change refrigerant displacement. It provides precise control of cooling capacity according to the vehicle interior and driving conditions.
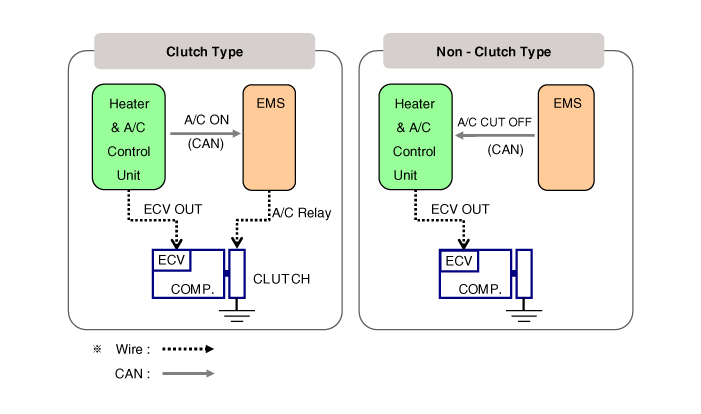
The internally controlled variable displacement compressor changes the swash plate angle using the MCV (Mechanical Control Valve) in accordance with fluctuations in suction pressure.
The externally controlled variable displacement compressor changes the swash plate angle using the ECV (Electronic Control Valve) according to the electrical signal from the heater and air conditioner control unit.
This provides stable temperature control and improves driving feel.
ECV Control Circuit
Components and Component Location
Components
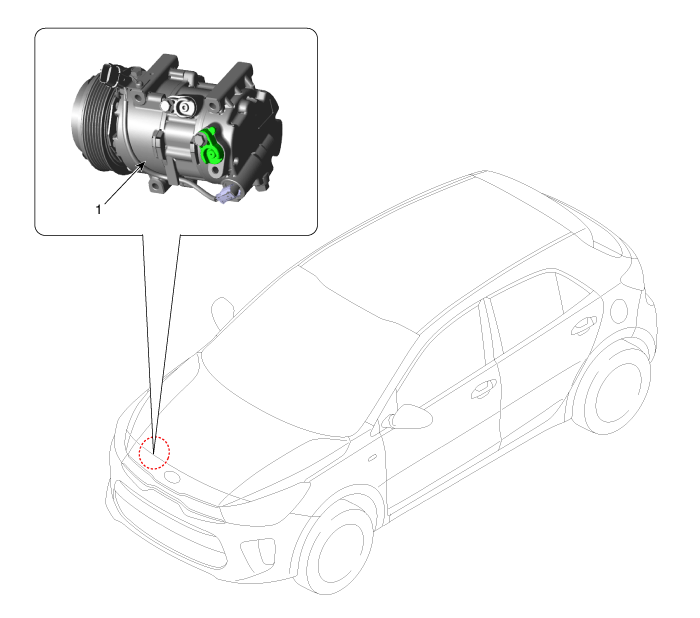
| Compressor |
Repair Procedures
Removal
If the compressor is operating at its limit, run the engine at idle and let the air conditioner operate for several minutes, then stop the engine.
Disconnect the negative battery cable.
Recover the refrigerant using a recovery/recharging station.
Remove the front wheel [RH].
(See Suspension System — Wheel)
Remove the front wheel guard [RH].
Loosen the drive belt.
D 1.4 TCI-U2 (Refer to Engine Mechanical System - "Drive Belt")
G 1.0 T-GDI-KAPPA (Refer to Engine Mechanical System - "Drive Belt")
G 1.2 MPI-KAPPA (Refer to Engine Mechanical System - "Drive Belt")
G 1.4 MPI-KAPPA (Refer to Engine Mechanical System - "Drive Belt")
Disconnect the suction line (A) and discharge line (B) from the compressor.
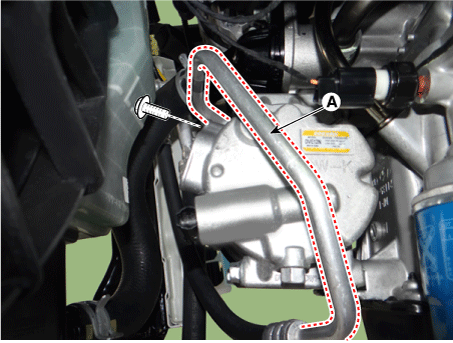
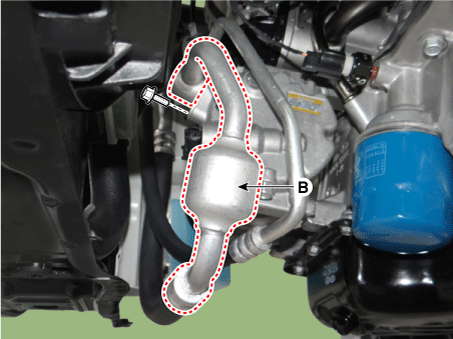
Disconnect the compressor switch connector (A).
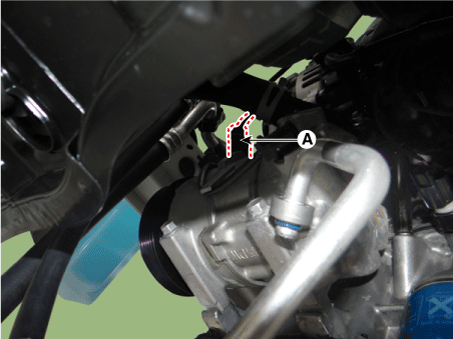
Remove the compressor by loosening the mounting bolts.
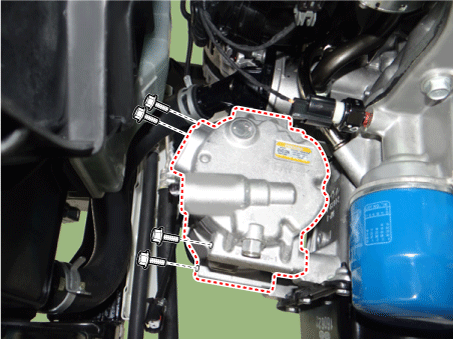
Installation
Check the length of the compressor mounting bolts, then tighten them in the specified tightening sequence.
Tightening Torque: 21.6–32 N·m
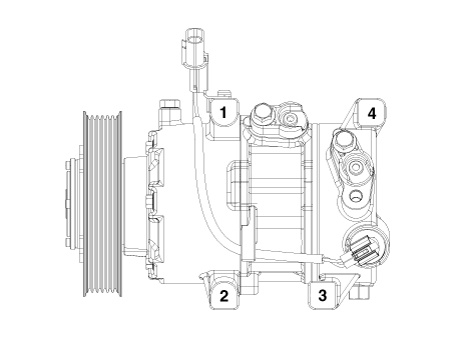
Installation is the reverse of removal.
If installing a new compressor, drain all the refrigerant oil from the removed compressor and measure its volume. Subtract the drained oil volume from the original compressor oil capacity (120 cm3). The result is the amount of oil that must be drained from the new compressor (through the suction port).
Replace the O-rings with new ones at each fitting and apply a thin coat of compressor oil before installation. Be sure to use O-rings suitable for R-134a to prevent leakage.
To prevent contamination, do not return oil to the container after dispensing and never mix it with other refrigerant oils.
Immediately after using the oil, close and seal the container cap to prevent moisture absorption.
Inspection
Inspect the galvanic parts of the disc and hub assembly (A) for discoloration, flaking, or other damage. If damaged, replace the clutch kit.
Check the pulley bearing play (B) and rotate the pulley by hand. Replace the clutch kit if it is noisy or has excessive play/drag.
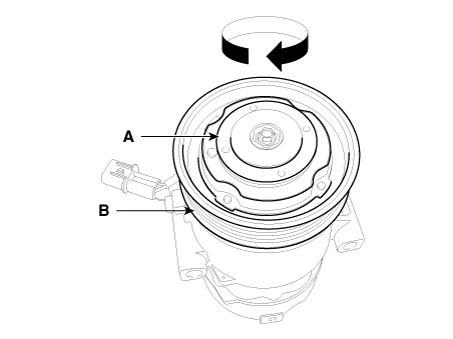
Check the operation of the magnetic clutch.
Connect the compressor-side terminal to the battery positive (+) terminal, and connect the battery negative (-) terminal to the compressor body. Check the magnetic clutch operating noise to determine its condition.
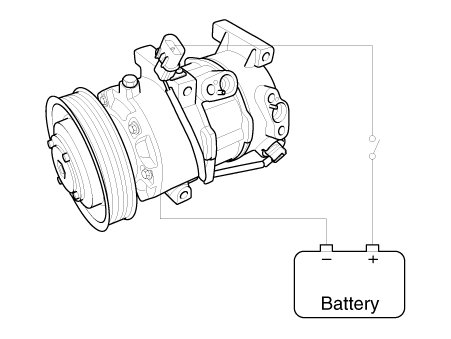
Inspection of External Control Valve Compressor (GDS)
Compressor Type: Fixed-type compressor, External control valve, Internal control valve.
For the fixed type and internal control valve type, the compressor operation can be checked by the clutch engagement sound.
However, for the external control valve type, it cannot be checked this way because it does not have a clutch.
Therefore, the ECV should be checked using GDS, as shown below.
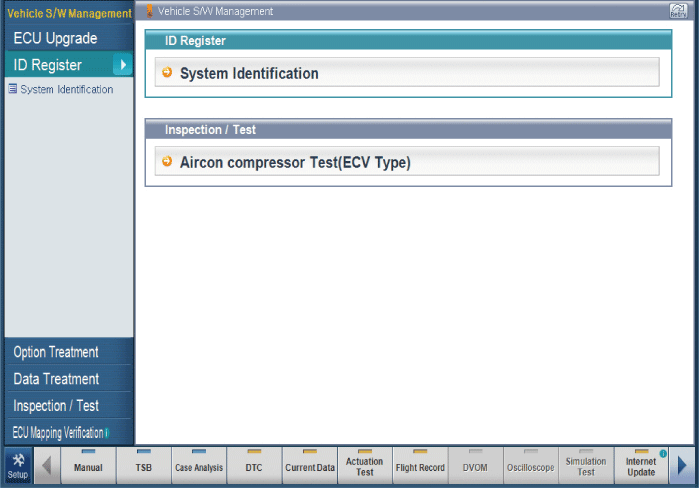
Connect GDS to the vehicle and select "Air Conditioner Compressor Test (ECV Type)".
[ECV1]
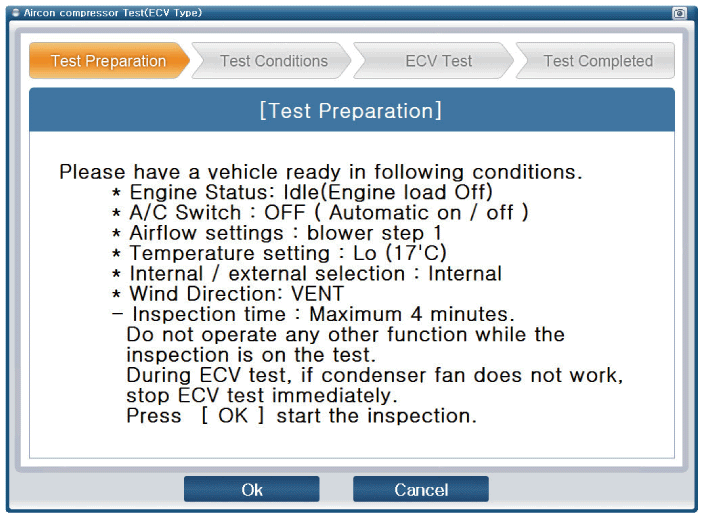
Prepare the vehicle according to the GDS instructions on the monitor. (Turn off only the air conditioner switch)
[ECV2]
[ECV3]
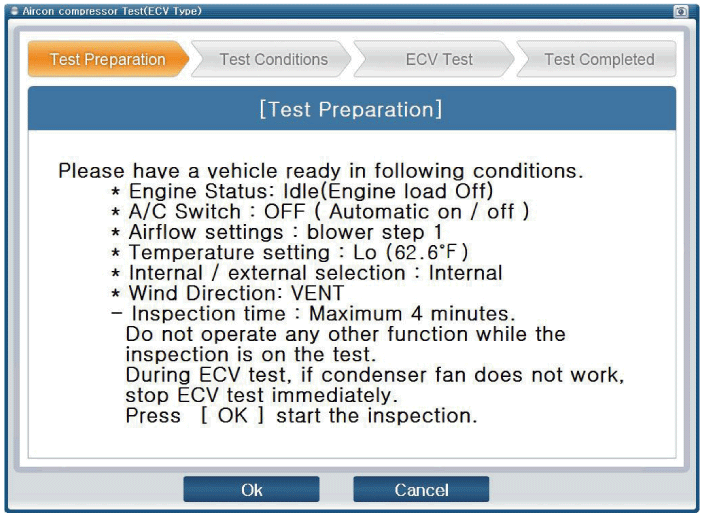
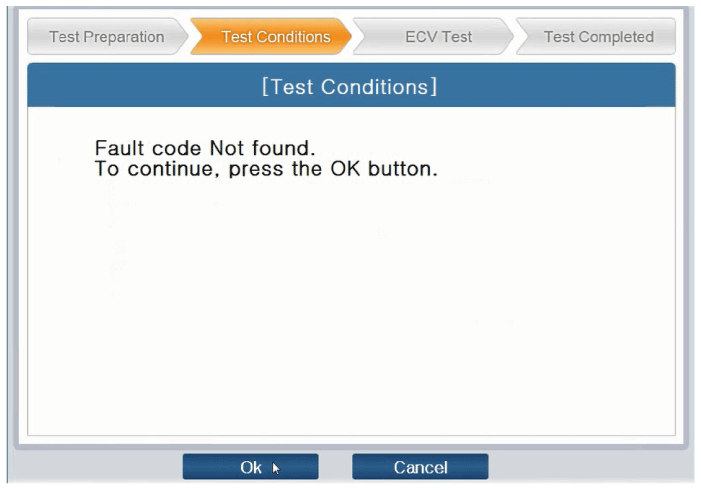
Before inspecting the ECV compressor, check whether other DTCs are present. If so, resolve those issues first. If not, press the "OK" button to continue.
[ECV4]
Start Inspection
[ECV5]
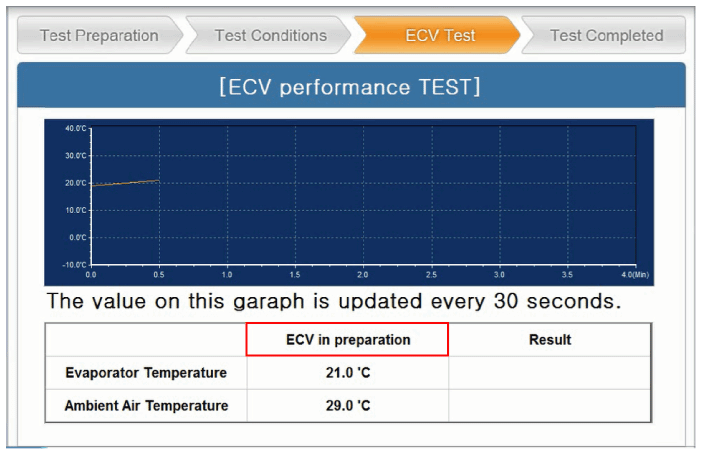
[ECV6]
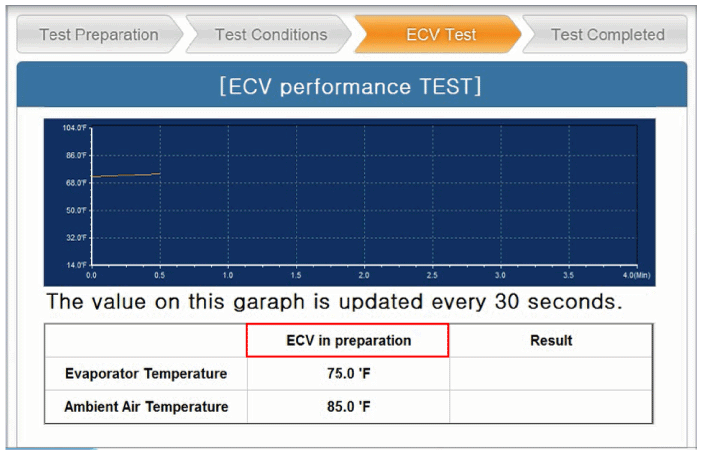
Check the inspection result.
[ECV7]
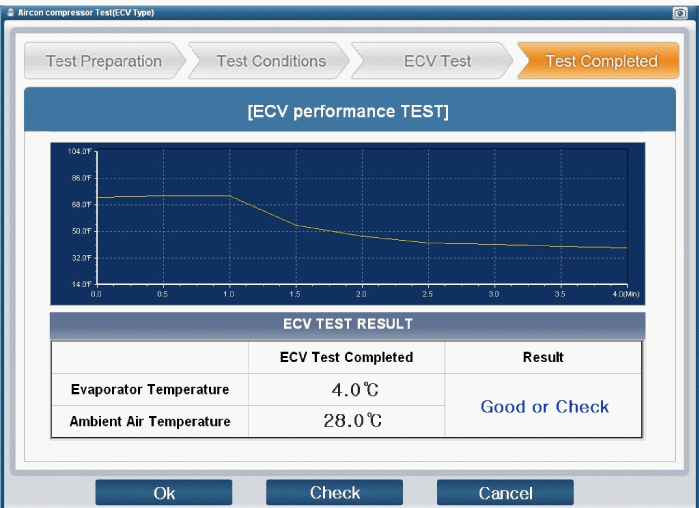
[ECV8]
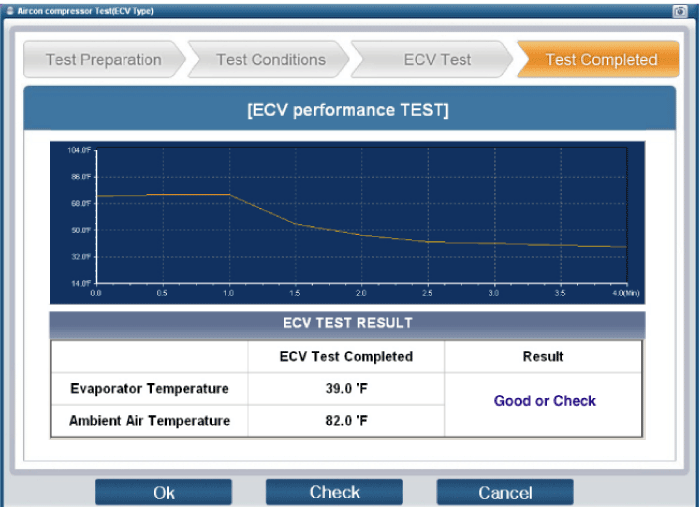
If the result displays "Check", press "Check" and follow the instructions.
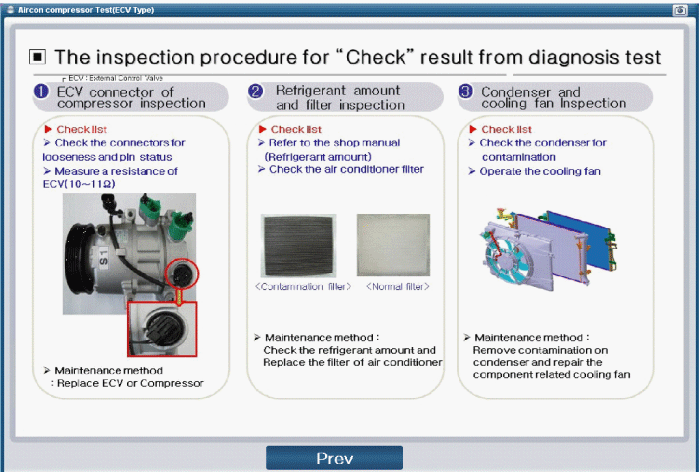
Recheck the ECV from the first step.
Disassembly
Remove the right front wheel.
(Refer to Suspension System - Wheel).
Remove the front wheel guard [RH].
(Refer to Body - "Front Wheel Guard")
Loosen the drive belt.
D 1.4 TCI-U2 (Refer to Engine Mechanical System - "Drive Belt")
G 1.0 T-GDI-KAPPA (Refer to Engine Mechanical System - "Drive Belt")
G 1.2 MPI-KAPPA (Refer to Engine Mechanical System - "Drive Belt")
G 1.4 MPI-KAPPA (Refer to Engine Mechanical System - "Drive Belt")
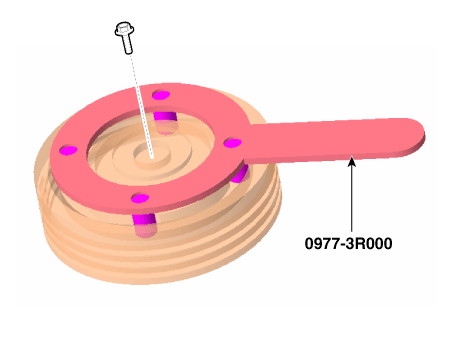
Remove the center bolt (A) and hub bolts (B) while holding the pulley with the pulley and hub bolt holder (0977-3R000).
Tightening torque: 15 - 21 N·m
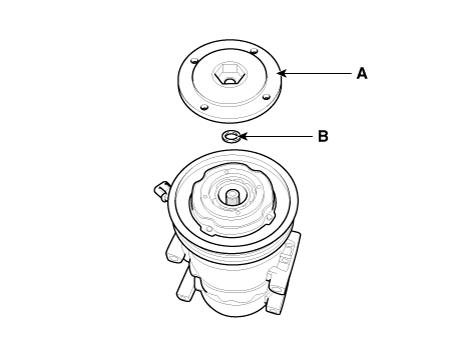
Remove the hub assembly (A) and the shim (slotted washer) (B), taking care not to lose the shims.
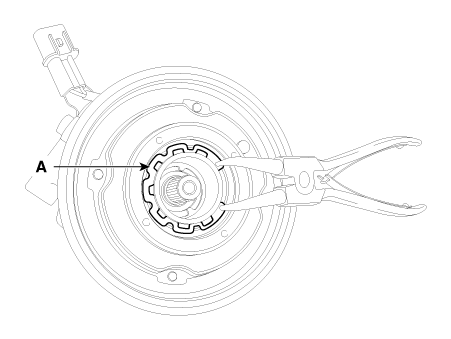
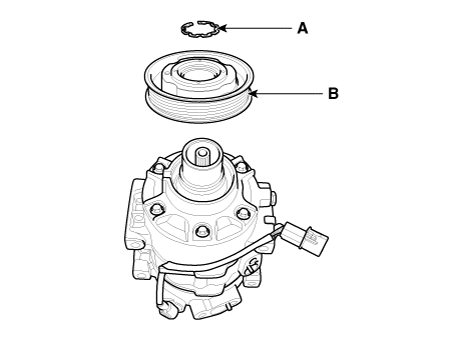
Remove the pulley (B) after removing the snap ring (A) with snap ring pliers.
Installation is performed in the reverse order of removal.
Test yourself
A quick Kia Rio YB quiz: every answer comes with an explanation and a link to the manual page.