Heater
Components and Component Location
Component Location
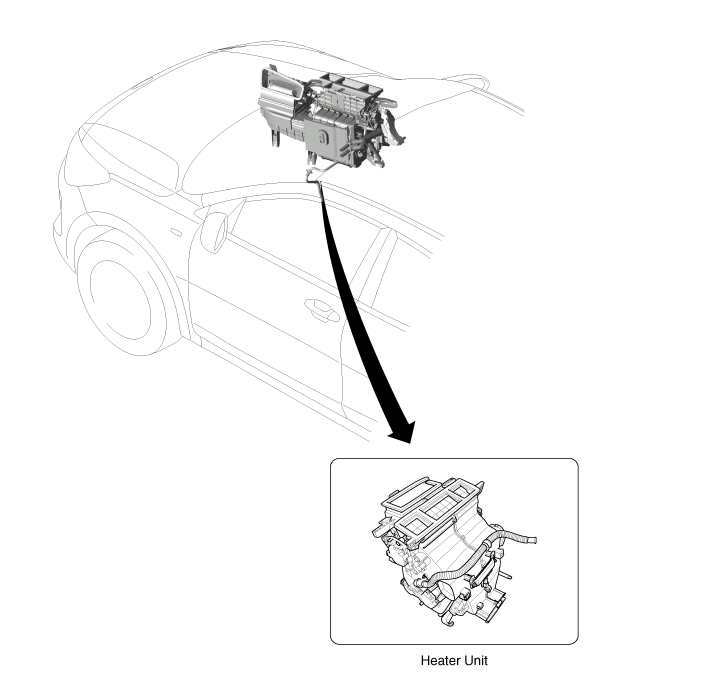
Components
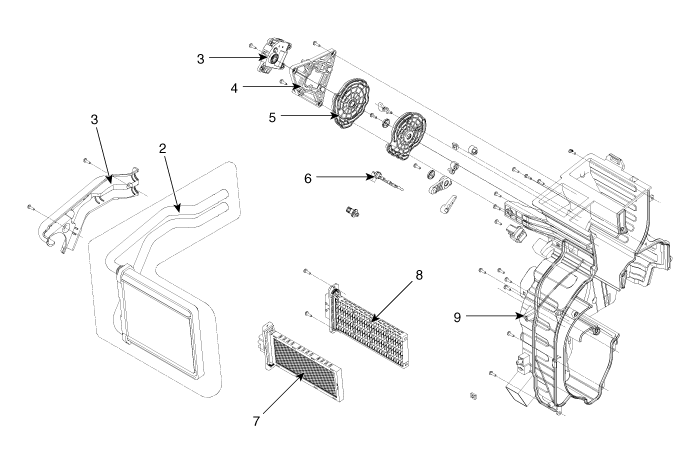
| 1. Heater pipe cover 2. Heater core 3. Mode control actuator 4. Mode control actuator bracket 5. Main mode control lever |
6. Evaporator sensor 7. PTC heater core (350 W) 8. PTC heater core (1000 W) 9. Heater housing |
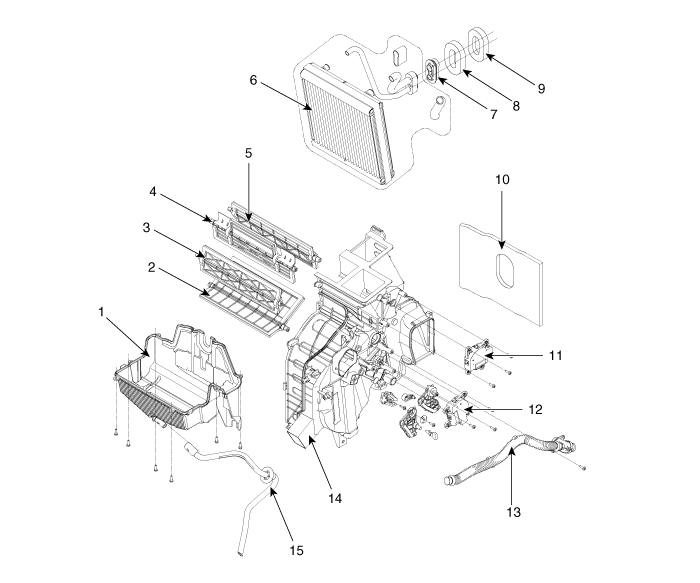
| 1. Heater lower case 2. Door assembly (TEMP) 3. Door assembly (FOOT) 4. Door assembly (VENT) 5. Door assembly (DEF) 6. Evaporator core 7. Evaporator flange 8. Seal |
9. Seal (without A/C) 10. NVH pad 11. Defrost door actuator 12. Temperature control actuator 13. Aspirator hose 14. Heater housing (right) 15. Drain hose |
Repair Procedures
Replacement
Disconnect the negative (-) battery terminal.
Recover the refrigerant using a recovery/recycling/charging station.
Drain the engine coolant.
D 1.4 TCI-U2 (refer to Engine Mechanical System – Coolant)
G 1.0 T-GDI-KAPPA (refer to Engine Mechanical System – Coolant)
G 1.2 MPI-KAPPA (refer to Engine Mechanical System – Coolant)
G 1.4 MPI-KAPPA (refer to Engine Mechanical System – Coolant)
Remove the expansion valve (A) from the evaporator core.
Tightening torque: 8.8–13.7 N·m
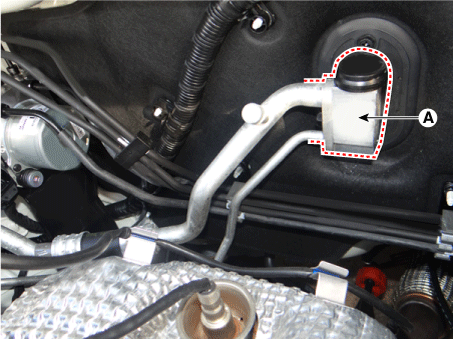
Disconnect the heater inlet (A) and outlet (B) hoses from the heater unit.
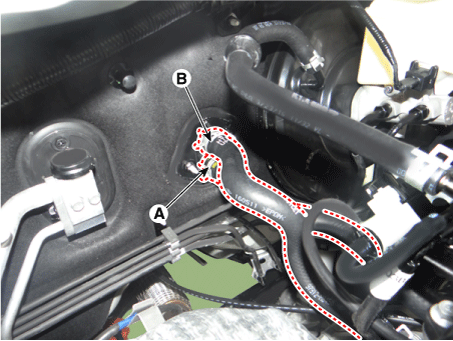
Remove the console assembly.
(Refer to Body - Floor Console Assembly)
Remove the shift lever assembly.
(Refer to Manual Transaxle System – Shift Lever Assembly.)
Lower the steering column after loosening the mounting bolts and nuts.
(Refer to Steering System - "Steering Column and Shaft")
Remove the wiper motor.
(Refer to Body Electrical System - "Front Wiper Motor")
Loosen the hood cross member bolts.
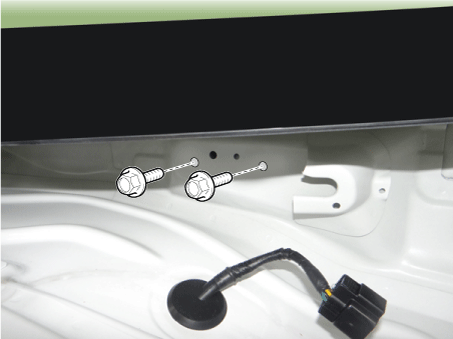
Remove the airbag.
(See Body — "Main Airbag Assembly")
Loosen the hood crossmember mounting bolts, then remove the crash pad and heater and blower unit assembly.
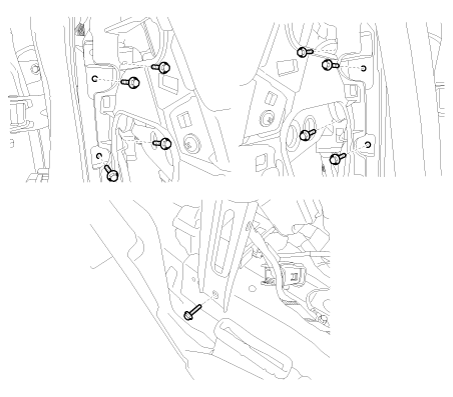
Loosen the clamp securing the drain hose under the vehicle.
Disconnect the heater unit connectors.
Remove the heater and blower unit (A) from the protector after loosening the mounting nuts.
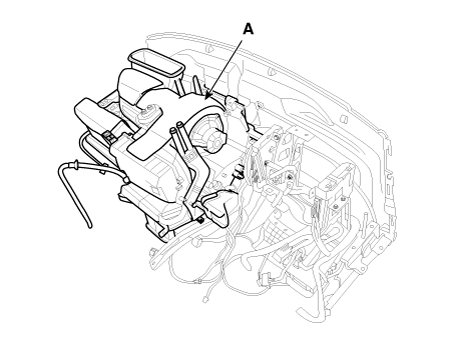
Disconnect the blower unit from the heater unit after loosening the screws.
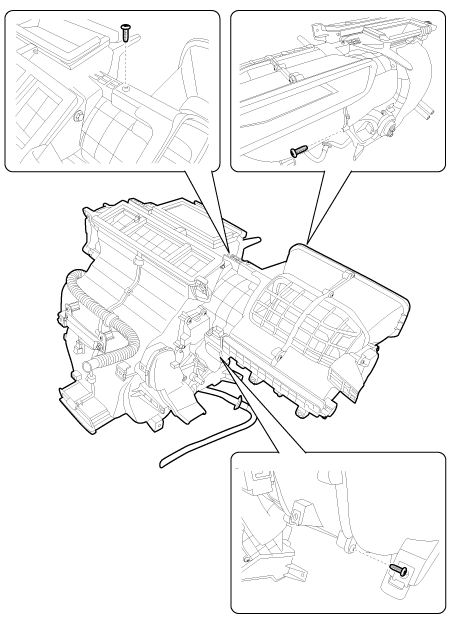
Remove the heater core cover (A) after loosening the mounting screws.
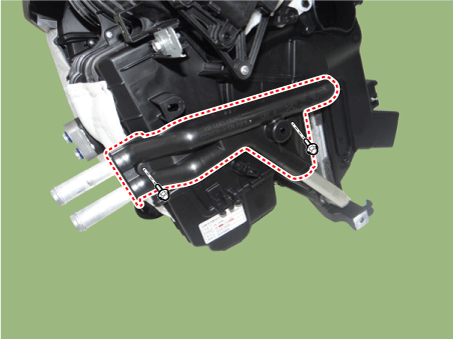
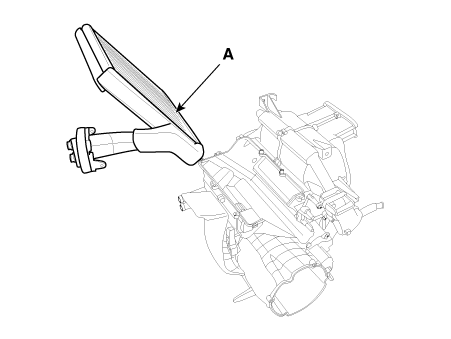
Pull the heater core (A) out of the heater unit.
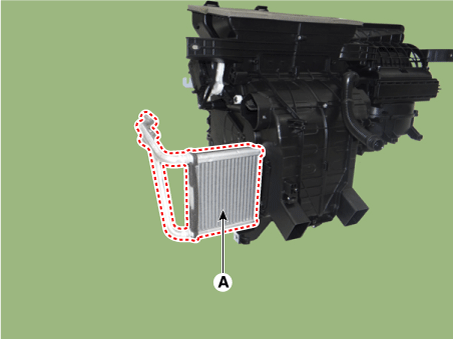
Remove the heater lower case (A) after loosening the mounting screws.
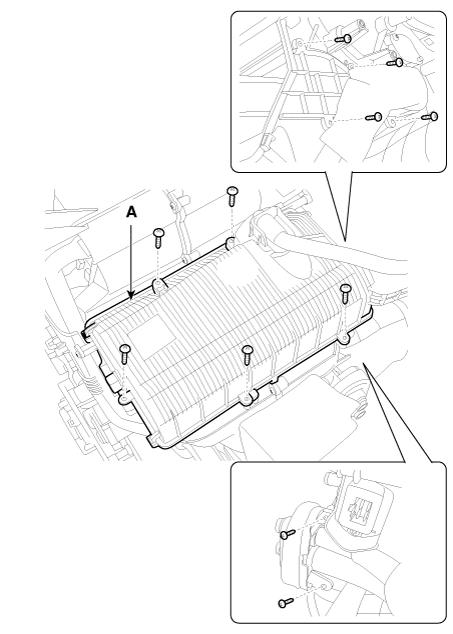
Pull out the evaporator core (A) from the heater unit.
Installation is the reverse of removal.
If installing a new evaporator, add refrigerant oil (PAG oil).
Replace the O-rings with new ones at each fitting and apply a thin coat of compressor oil before installation. Be sure to use O-rings suitable for R-134a to prevent leakage.
Close the oil container cap immediately after use and seal it to prevent moisture absorption.
Do not spill refrigerant oil on the vehicle; it may damage the paint. If refrigerant oil gets on the paint, wipe it off immediately.
Apply sealant to the bushings.
Check that there is no air leakage.
Charge the system and check that it operates properly.
Do not interchange the heater inlet and outlet hoses, and make sure the hose is securely connected.
Fill the cooling system with engine coolant.
Test yourself
A quick Kia Rio YB quiz: every answer comes with an explanation and a link to the manual page.