Oil Pan and Oil Strainer
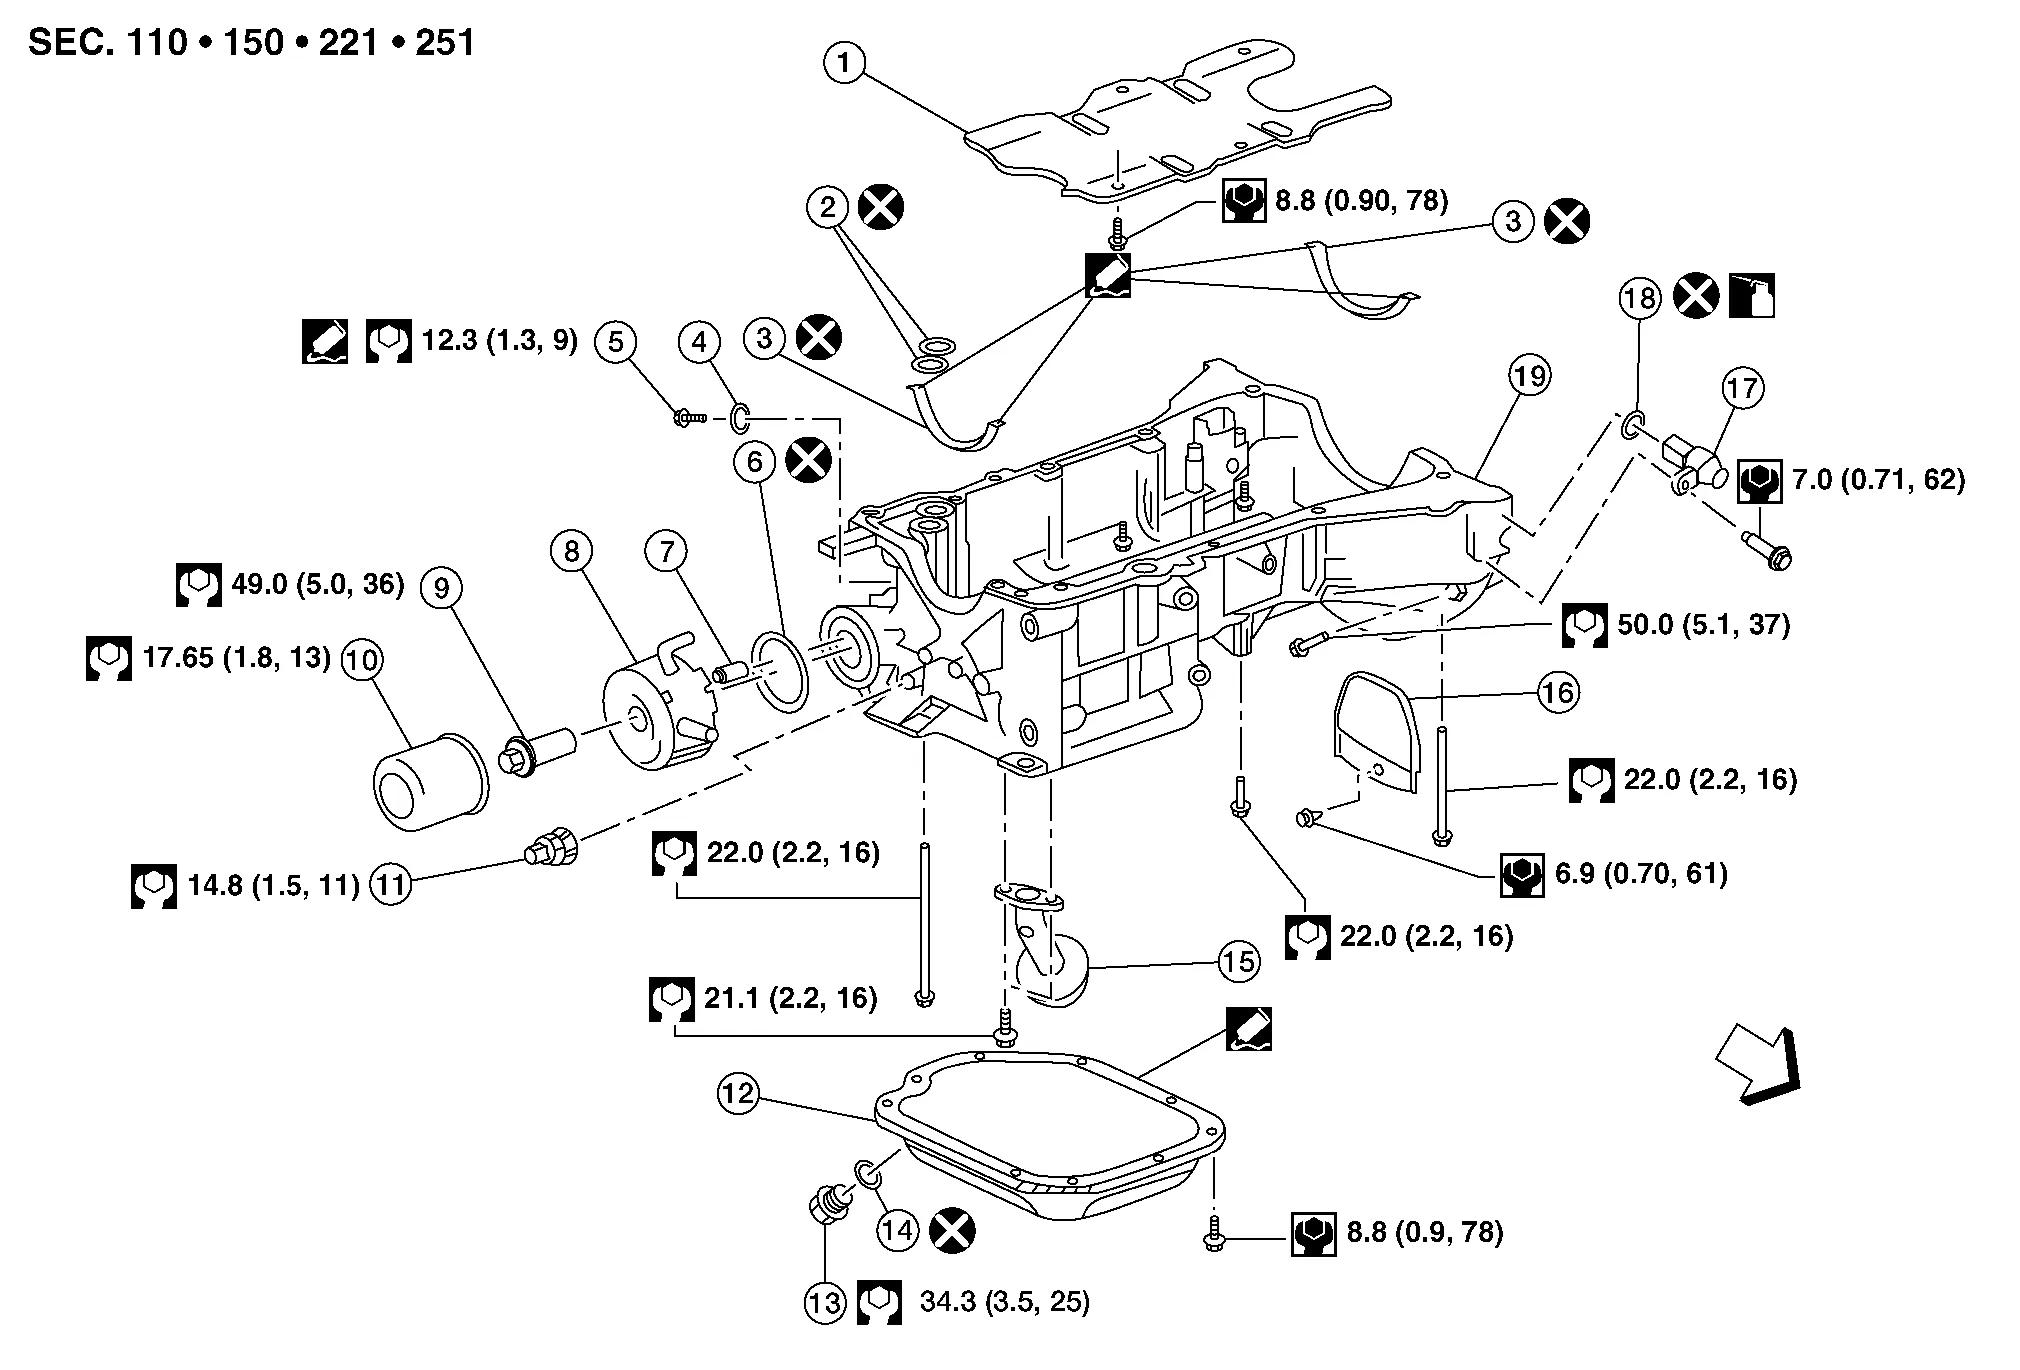
| 1. | Oil pan baffle | 2. | O-ring | 3. | Upper oil pan gasket |
| 4. | Blind plug O-ring | 5. | Blind plug | 6. | Oil cooler O-ring |
| 7. | Relief valve | 8. | Oil cooler | 9. | Oil cooler connector |
| 10. | Oil filter | 11. | Oil pressure sensor | 12. | Lower oil pan |
| 13. | Drain plug | 14. | Drain plug washer | 15. | Oil strainer |
| 16. | Rear cover plate | 17. | Crankshaft position sensor (POS) | 18. | O-ring |
| 19. | Upper oil pan |  |
Front |
REMOVAL
Drain the engine oil. Refer to Changing Engine Oil.
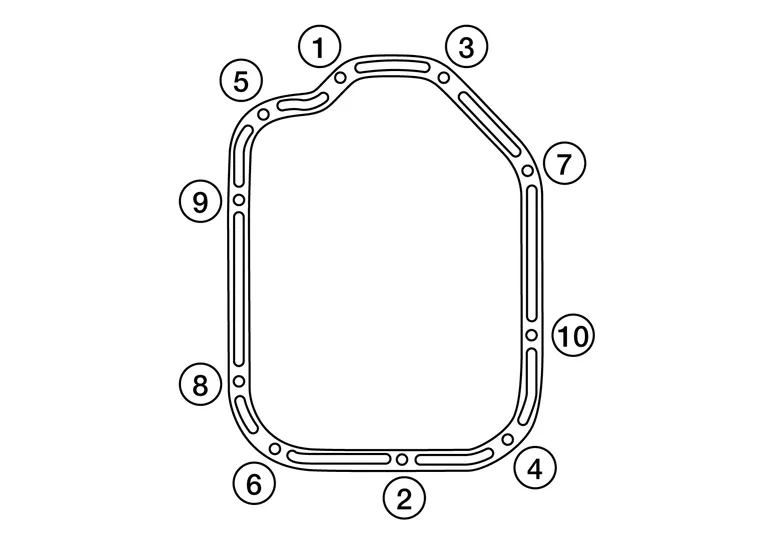
Loosen the lower oil pan bolts in reverse order as shown.
Remove the lower oil pan.
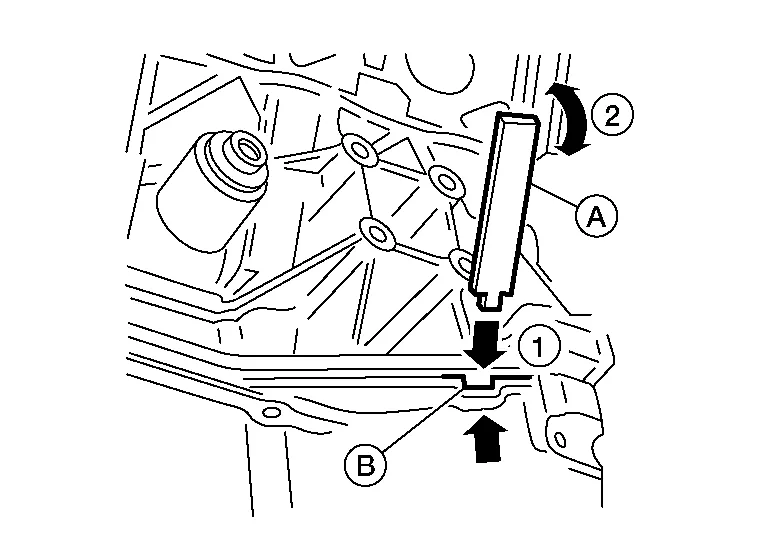
After removing the bolts, separate the mating surface and remove the old liquid gasket using Tool (A).

Tool number (A) : KV10111100 (J-37228) In areas where the Tool is difficult to use, use a plastic hammer to lightly tap (1) the Tool where the liquid gasket is applied. Use a plastic hammer to slide (2) the Tool by tapping on the side.
Remove the old sealant from the bolt holes and threads.
INSPECTION AFTER REMOVAL
Clean debris from the oil strainer.
INSTALLATION
Apply a continuous bead of sealant to the lower oil pan.
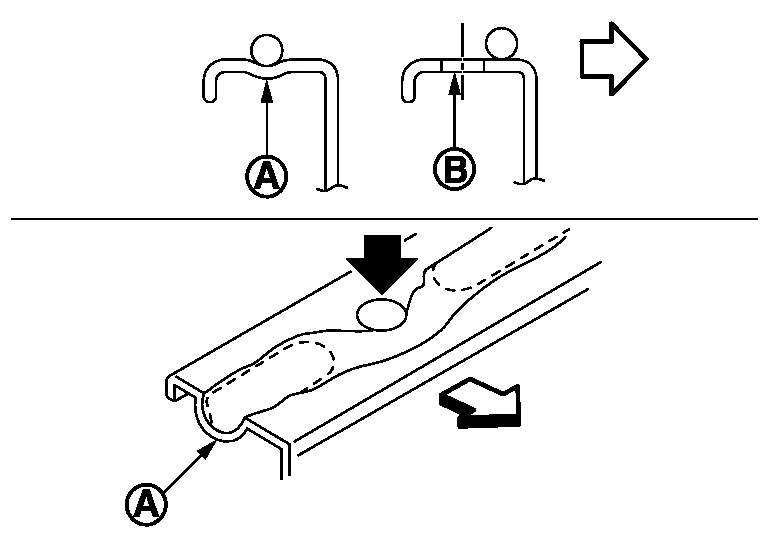
Use Genuine Silicone RTV Sealant, or equivalent. Refer to Recommended Chemical Products and Sealants.
Be sure the sealant is 4.5 - 5.5 mm (0.177 - 0.217 in) wide.
| (A) | : Groove |
| (B) | : Bolt hole |
|
: Inside |
Install the lower oil pan. Tighten the lower oil pan bolts in order as shown.
Refill the engine with oil. Refer to Changing Engine Oil.
INSPECTION AFTER INSTALLATION
Inspect the engine oil level. Refer to Inspection.
Start the engine and check for leaks. Refer to Inspection. Repair as necessary.
REMOVAL
Be careful not to damage sensor edges or signal plate teeth.
Remove the engine from the vehicle. Refer to Removal and Installation (FWD) or Removal and Installation (AWD).
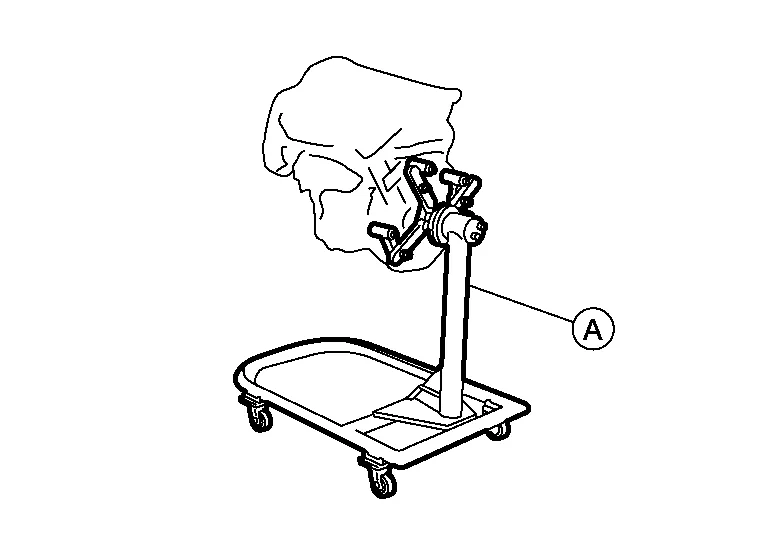
Install the engine on engine stand (A). Any commercially available engine stand (A) can be used.
Remove the oil dipstick.
Remove the drive belt. Refer to Removal and Installation.
Disconnect the harness connector from A/C compressor.
Remove the A/C compressor bolts and remove the A/C compressor. Refer to Removal and Installation.
Remove water pipe bolts.
Disconnect the water hoses from the engine oil cooler.
Remove the oil filter and engine oil cooler from the upper oil pan. Refer to Removal and Installation (Upper Oil Pan).
Remove the oil pressure switch, and the crankshaft position sensor (POS) from the upper oil pan.
Remove the lower oil pan. Refer to Removal and Installation (Lower Oil Pan).
Remove the oil strainer.
Remove the upper oil pan.

Remove rear engine mount buffer bracket.
Remove the O-rings (2) from the bottom of the cylinder block (1) and oil pump housing. Use new O-rings for installation.
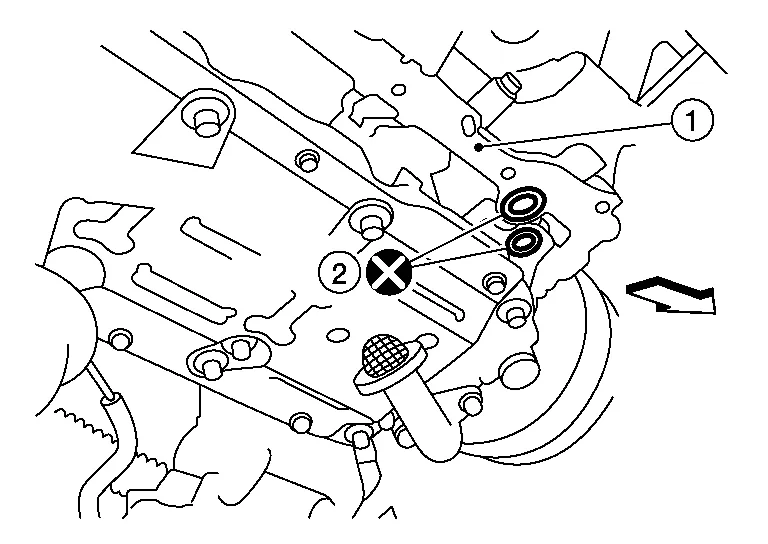
|
: Engine front |
Remove front cover gasket (A) and rear oil seal retainer gasket (B).
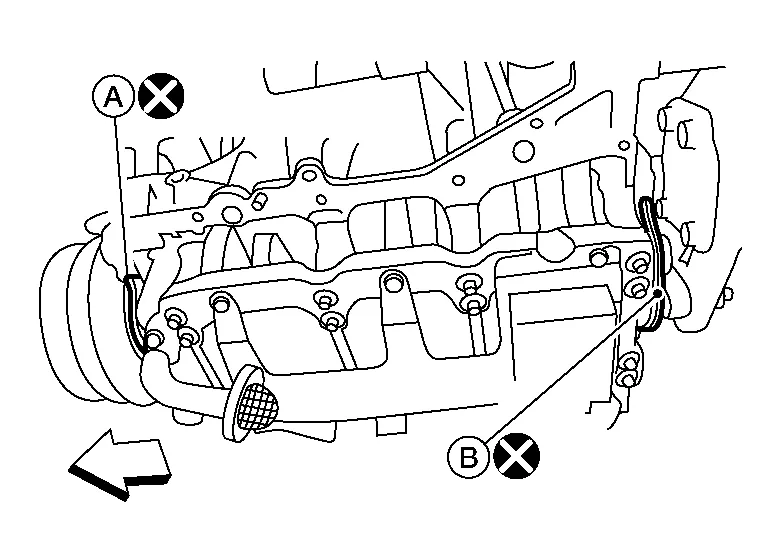
|
: Engine front |
If reinstalling the original oil pan, remove the old sealant from the mating surfaces using a suitable tool (A).
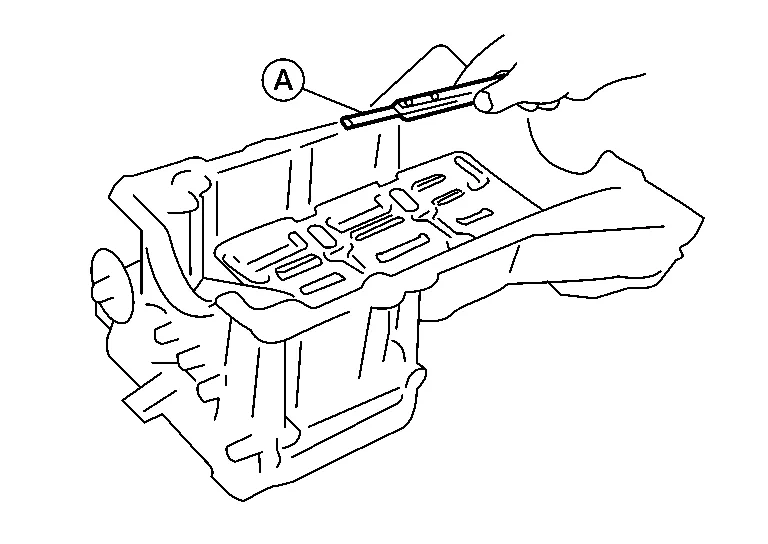
Also remove the old sealant from mating surface of the cylinder block.
Remove the old sealant from the bolt holes and threads.
INSPECTION AFTER REMOVAL
Clean debris from oil strainer.
INSTALLATION
Install oil strainer and tighten bolt to specified torque.
| Oil strainer bolts | : 21 N·m |
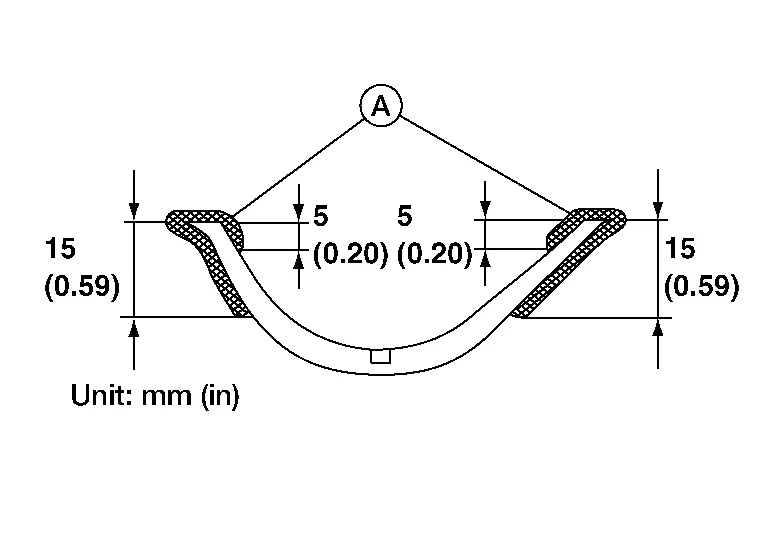
Apply Genuine Silicone RTV Sealant or equivalent (A) to the front cover gasket and the rear oil seal retainer gasket as shown. Refer to Recommended Chemical Products and Sealants.
Install the front cover gasket (A) and rear oil seal retainer gasket (B) as shown.
|
: Engine front |
Apply a bead of sealant to the cylinder block mating surface of the upper oil pan as shown.
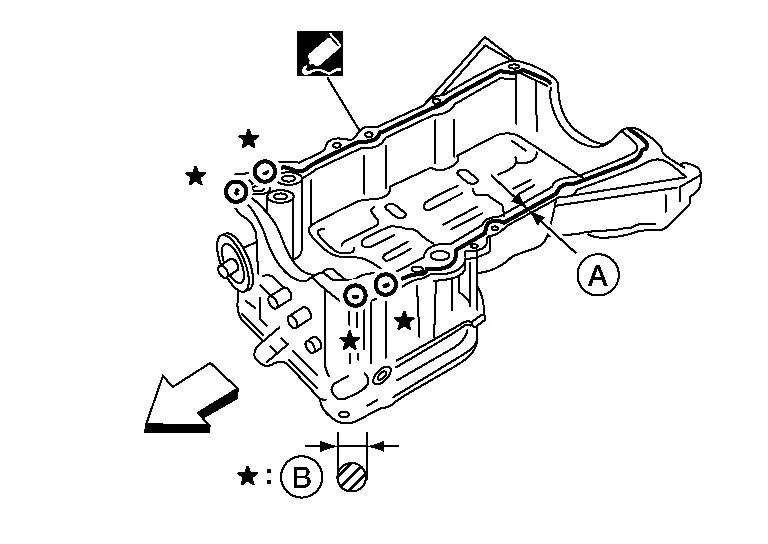
|
: Engine front |
| (A) | : Groove |
| (B) | : Bolt hole |
|
: Inside |
Install new O-rings (2) on the cylinder block (1) and oil pump body.
|
: Engine front |
Install the upper oil pan.
Tighten bolts (1) and (2) to specification within 5 minutes of applying the liquid gasket.
Tighten the remaining upper oil pan bolts to specification in the order shown.
Install the lower oil pan. Refer to Removal and Installation (Lower Oil Pan).
Installation of the remaining components is in the reverse order of removal.
Do not allow foreign material to contact tip of crankshaft position sensor (POS).
Do not allow foreign material to contact crankshaft position sensor (POS) O-ring.
Do not use a crankshaft position sensor (POS) that has been dropped.
Do not use an oil pressure sensor that has been dropped.
INSPECTION AFTER INSTALLATION
Before starting engine, check oil/fluid levels including engine coolant and engine oil. If there is less than required quantity, fill to the specified level. Refer to Fluids and Lubricants.
Use procedure below to check for fuel leakage.
Turn ignition switch ON (with engine stopped). With fuel pressure applied to fuel piping, check for fuel leakage at connection points.
Start engine. With engine speed increased, check again for fuel leakage at connection points.
Run engine to check for unusual noise and vibration.
Warm up engine thoroughly to make sure there is no leakage of fuel, exhaust gas, or any oils/fluids including engine oil and engine coolant.
Bleed air from passages in lines and hoses, such as in cooling system.
After cooling down engine, again check oil/fluid levels including engine oil and engine coolant. Refill to specified level, if necessary.
Summary of the inspection items:
Item Before starting engine Engine running After engine stopped Engine coolant Level Leakage Level Engine oil Level Leakage Level Transmission/transaxle fluid A/T and CVT Models Leakage Level/Leakage Leakage M/T Models Level/Leakage Leakage Level/Leakage Other oils and fluids* Level Leakage Level Fuel Leakage Leakage Leakage Exhaust gas — Leakage — *Power steering fluid, brake fluid, etc.