Rear Timing Chain Case
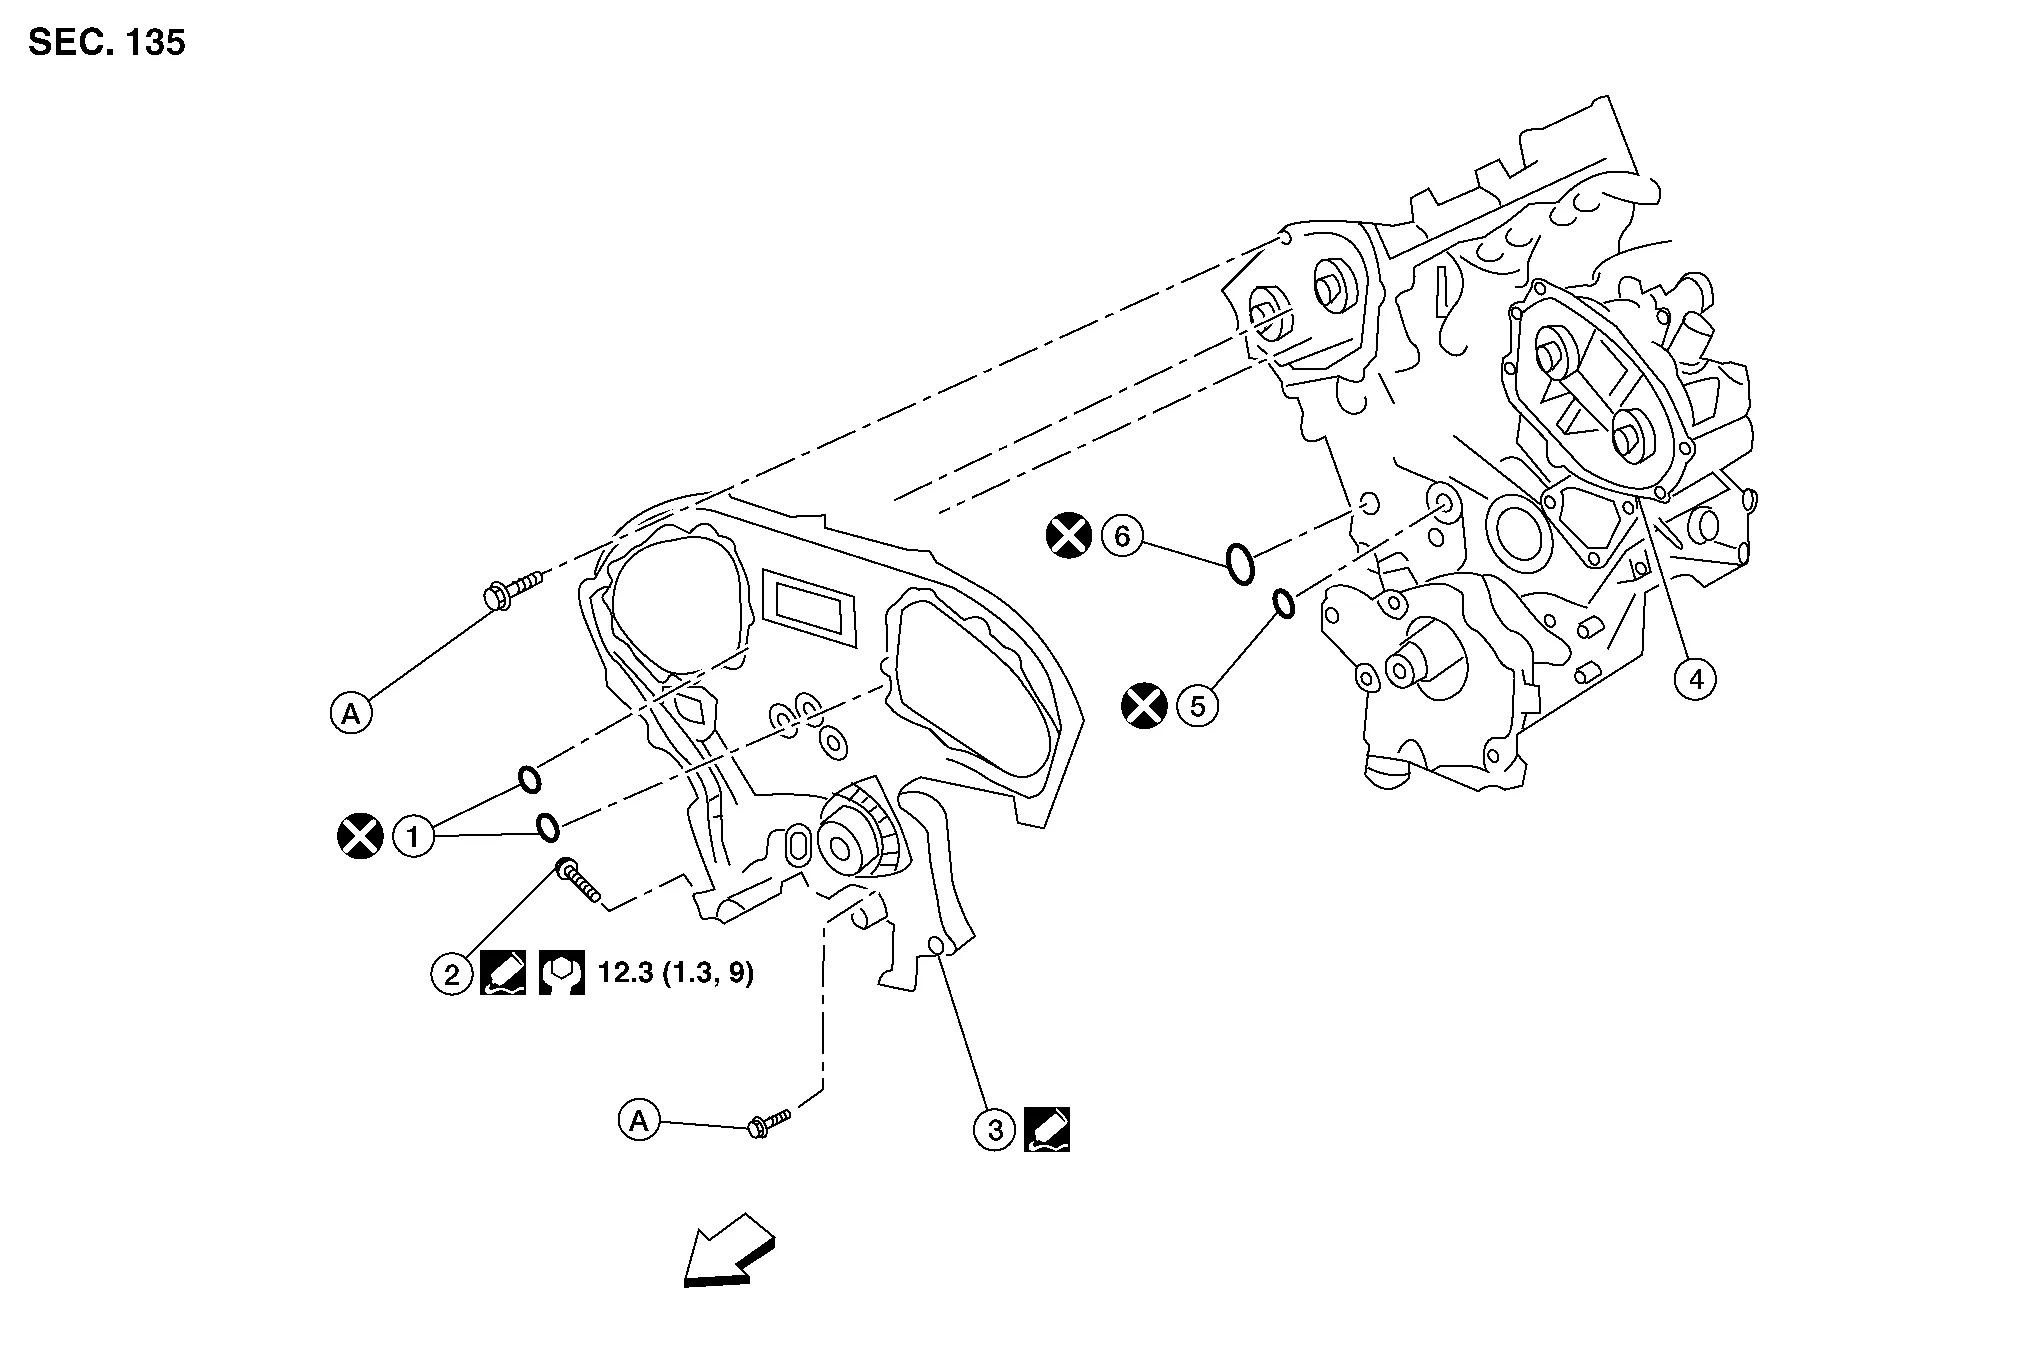
| 1. | O-ring | 2. | Blind plug (if equipped) | 3. | Rear timing chain case |
| 4. | Cylinder block | 5. | O-ring | 6. | O-ring |
| A. | Refer to Removal and Installation. |  |
Engine front |
REMOVAL
Remove the engine assembly. Refer to Removal and Installation (FWD) or Removal and Installation (AWD).
Remove upper oil pan. Refer to Removal and Installation (Upper Oil Pan).
Remove the front timing chain case. Refer to Removal and Installation.
Remove the timing chains (primary) and (secondary). Refer to Removal and Installation.
Remove the rear timing chain case.
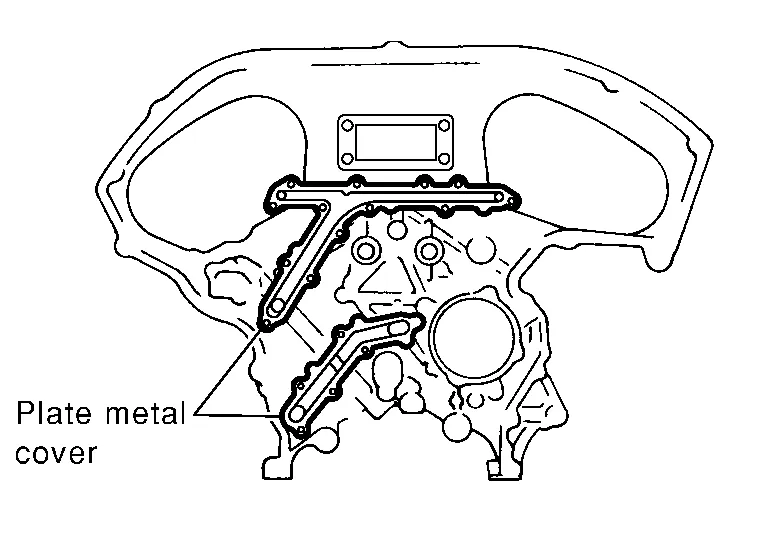
After removing the bolts, separate the mating surface and remove the old liquid gasket using Tool (A).

Tool number (A) : KV10111100 (J-37228) Tap the seal cutter to insert it (1).
In areas where the Tool is difficult to use, lightly tap to slide it (2).
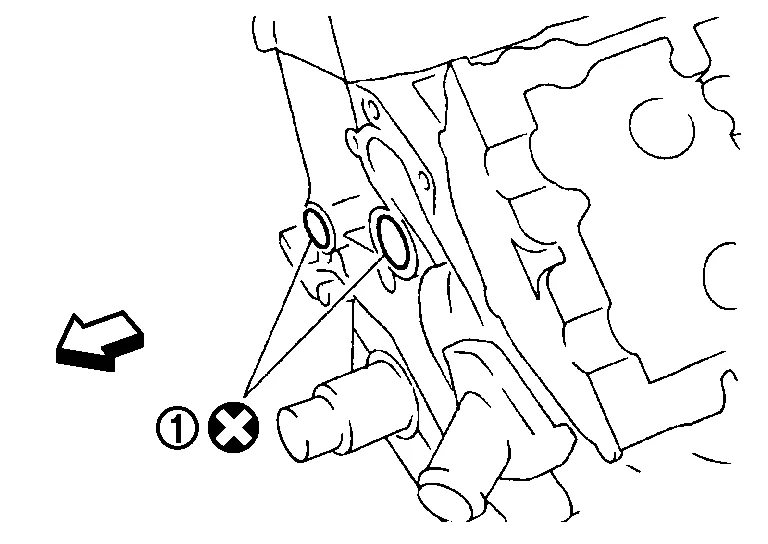
Remove O-rings (1) from cylinder block.
|
: Engine front |
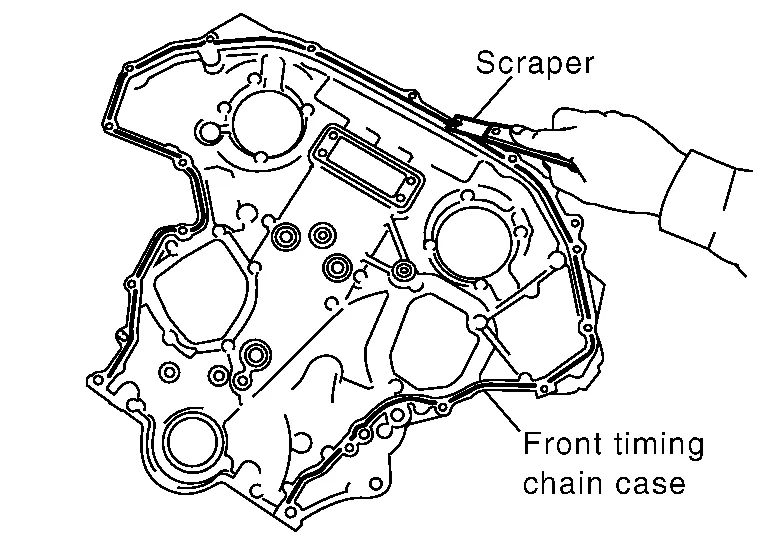
Use a scraper to remove all of the old Silicone RTV Sealant from the front and rear timing chain case and opposite mating surfaces.
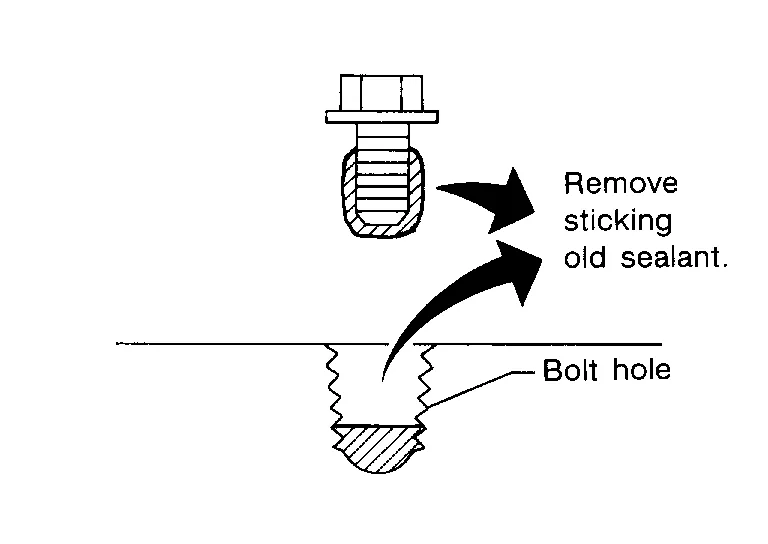
Remove all old Silicone RTV Sealant from all the bolt holes and bolts.
INSTALLATION
Install O-rings (1) on cylinder block.
|
: Engine front |
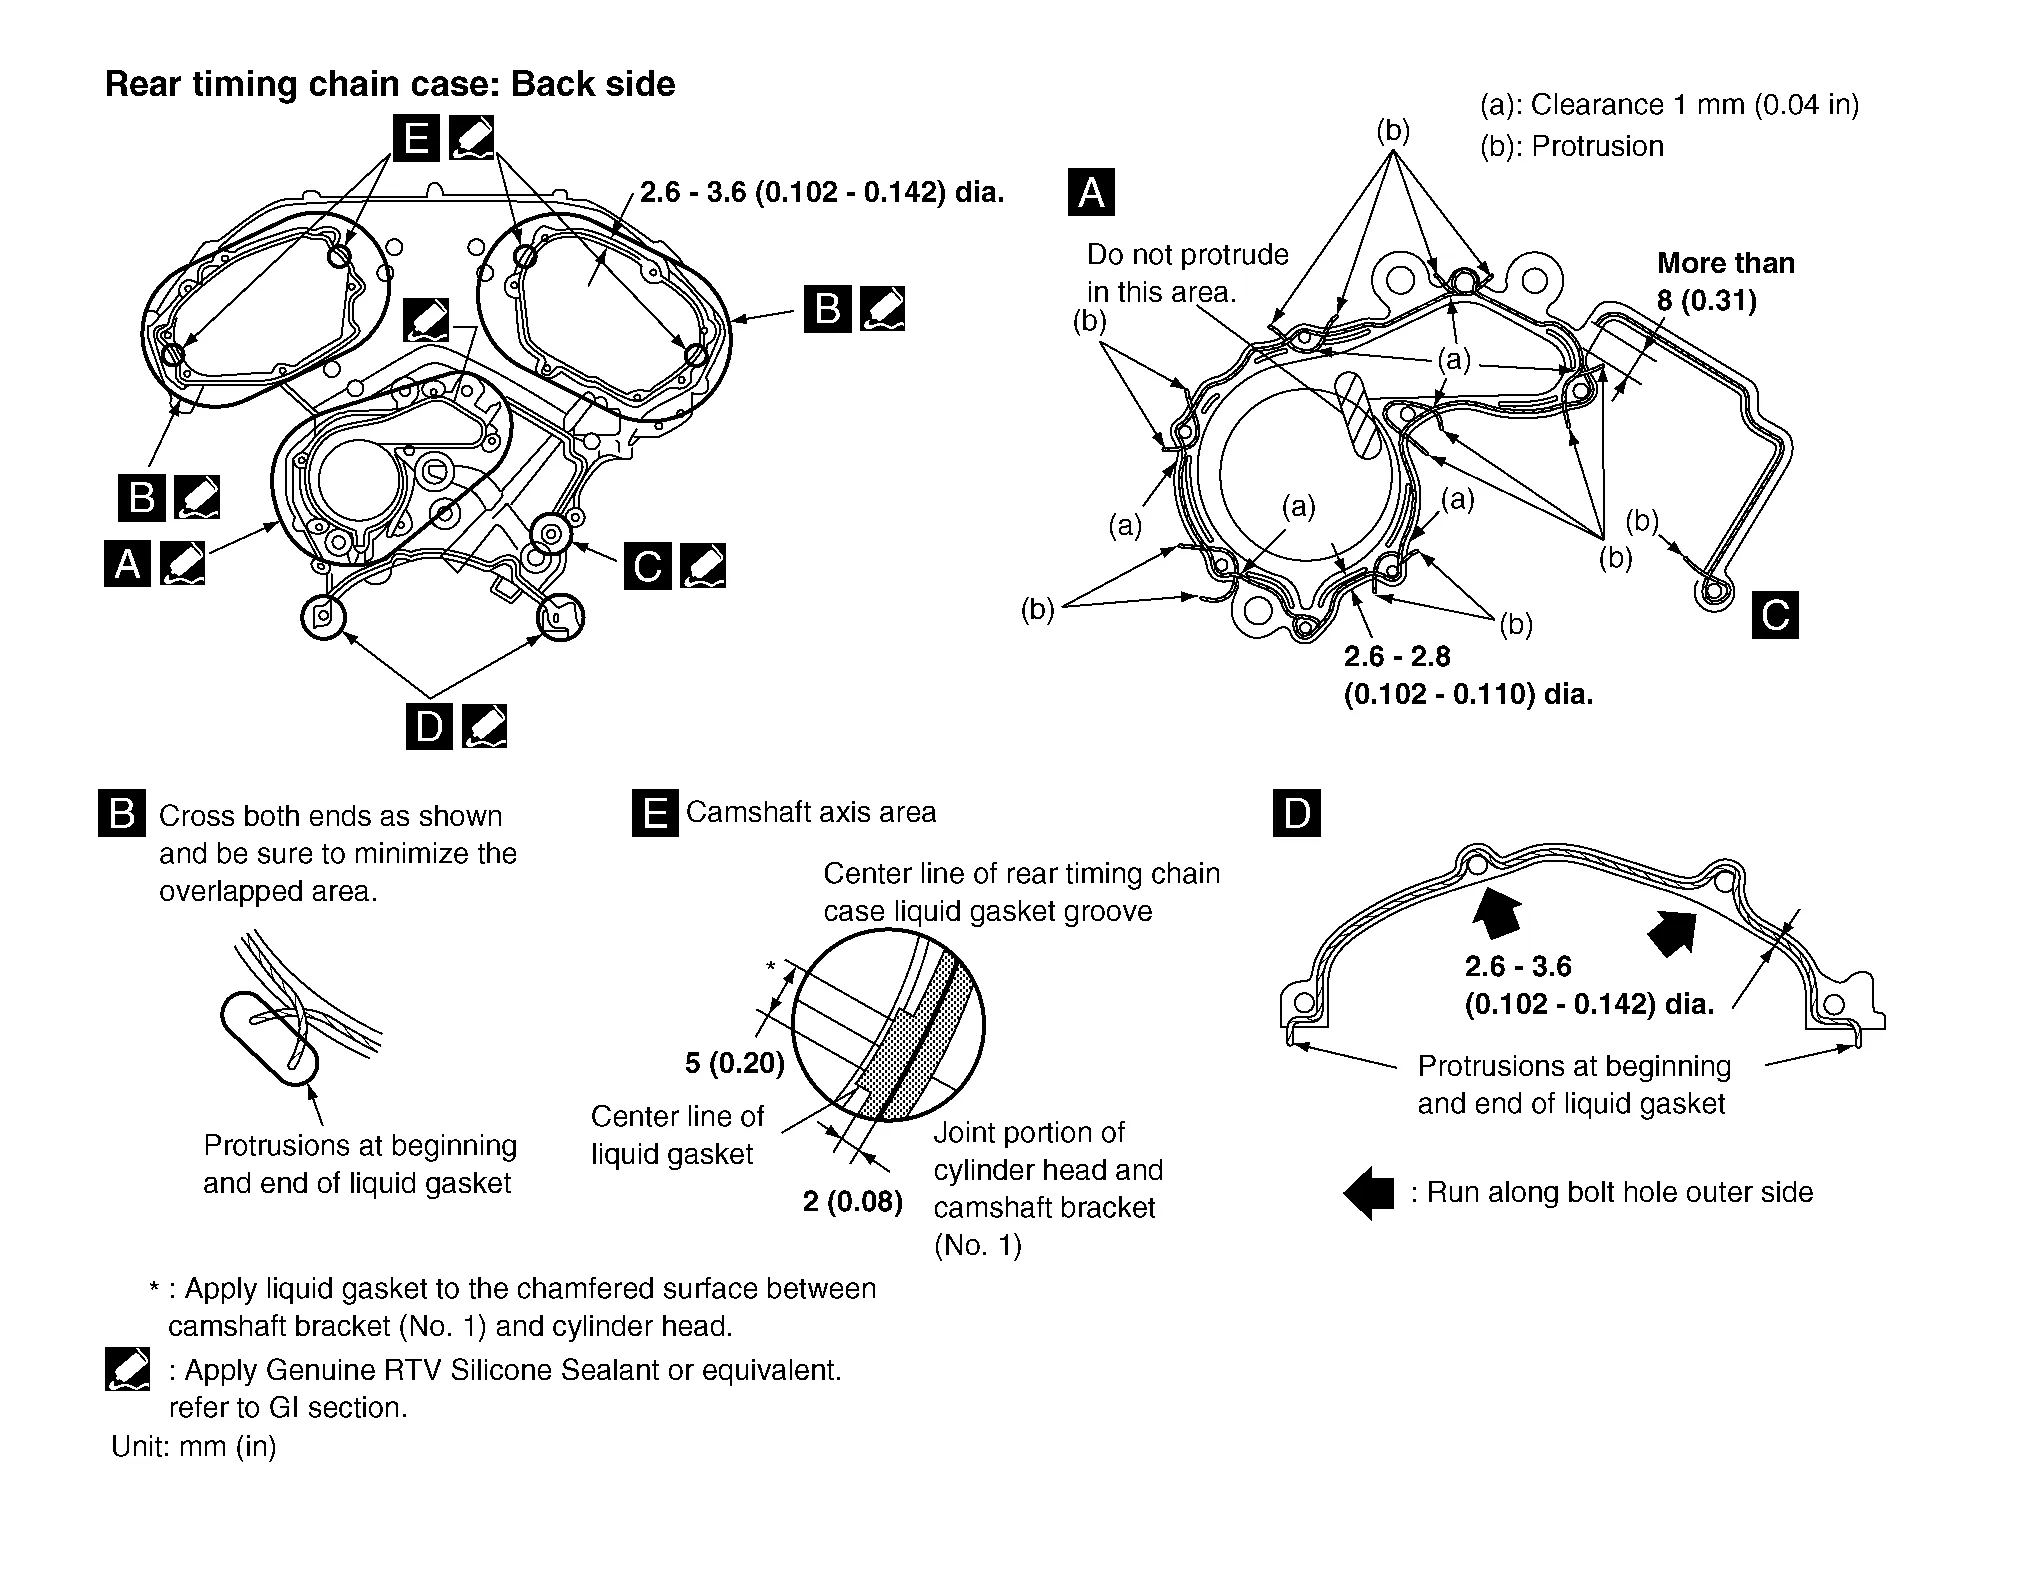
Apply Genuine Silicone RTV Sealant or equivalent, to the rear timing chain case using suitable tool as shown. Refer to Recommended Chemical Products and Sealants.
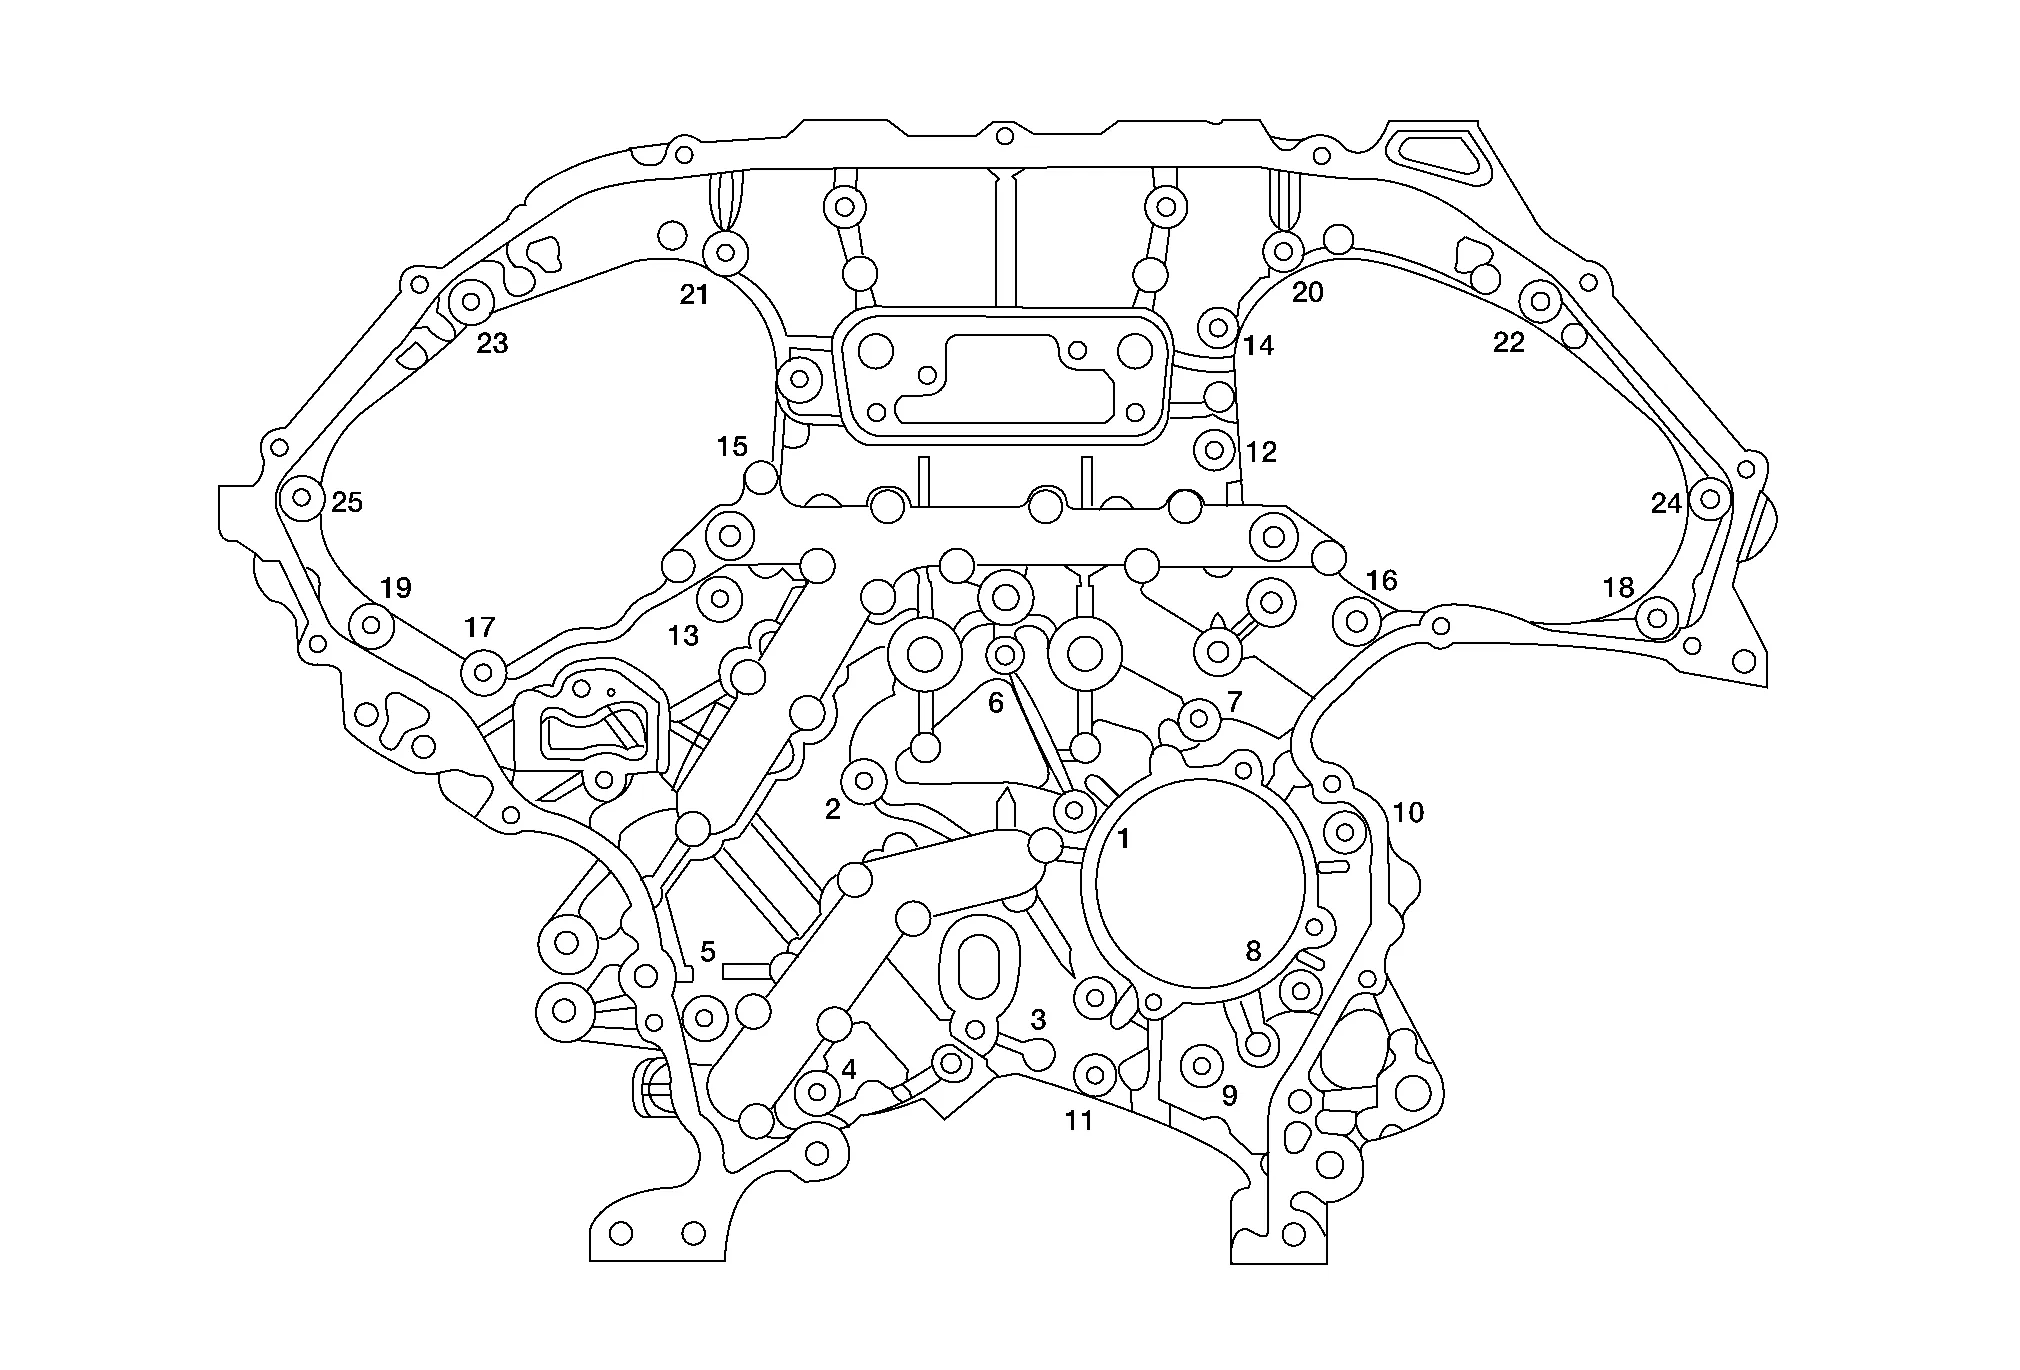
Align the rear timing chain case and water pump assembly with the dowel pins (RH and LH) on the cylinder block and install the case. Make sure the O-rings stay in place during installation.Tighten the bolts in the numerical order as shown. There are two bolt lengths used. Follow the chart below for proper bolt length specifications.
| Bolt length | Bolt position | Torque specification |
| 20 mm (0.79 in) | 1, 2, 3, 6, 7, 8, 9, 10 | 12,7 N·m |
| 16 mm (0.63 in) | All except the above | 12,7 N·m |
Install the timing chains (primary and secondary). Refer to Removal and Installation.
Install the front timing chain case. Refer to Removal and Installation.
Install the upper oil pan. Refer to Removal and Installation (Upper Oil Pan).
Install the engine assembly. Refer to Removal and Installation (FWD) or Removal and Installation (AWD).