Rear wing panel
Replacing this part is a basic operation for a rear side collision.
In the method described below, you will only find the descriptions and joins specific to the part concerned.
Information on related parts is covered in their respective sections (see contents).
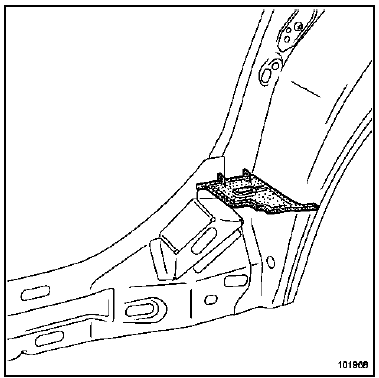
To carry out this operation, the following must also be ordered:
- the central expanding insert,
- the lower expanding insert.
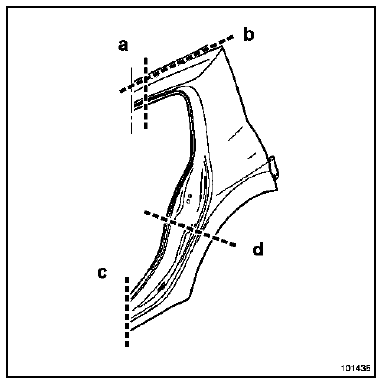
Several cutting locations are possible (see method below):
5-door version
- cuts (a) and (b) avoid removing the roof panel,
- cut (a) requires removing the roof panel,
- cut (d) avoids having to redo the stone chip protection on the sill.
3-door version
- cut (c) avoids having to redo the stone chip protection on the sill,
- cuts (b) and (d) avoid removing the roof panel,
- cut (b) avoids removing the tailgate,
- cut (a) requires removing the roof panel.
Select the combination of cuts according to the deformation.
Note: For 3-door version, make cut (b) in the lower part of the quarter window pillar to reduce the cut length and limit the risk of distortion during welding.Order the expanding inserts according to the chosen cuts.
Note: If the spot welds cannot be made with the spot welder, they may be replaced with plug welds.For bonded parts, use structural adhesive type MCT 514 (part number: 77 11 172 674).
REPLACEMENT PART CONTENTS
Part assembled with:
Door striker reinforcement
5-door version
3-door version
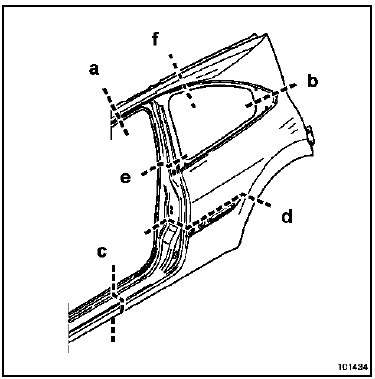
PARTS CONCERNED (thickness in mm):
- Rear wing panel 0.7
- Outer rear wheel arch 1.2
Details of expanding insert positions
Note: It is essential to replace the swelling inserts (see method described in chapter 40A-L).5-door version
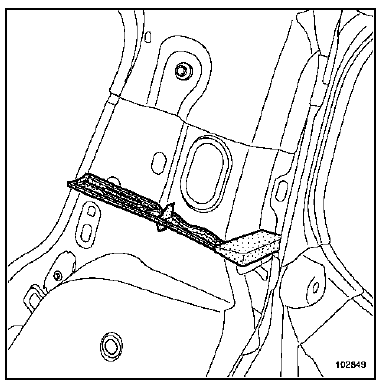
3-door version
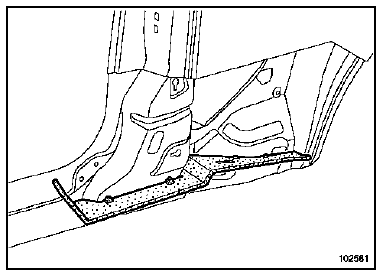
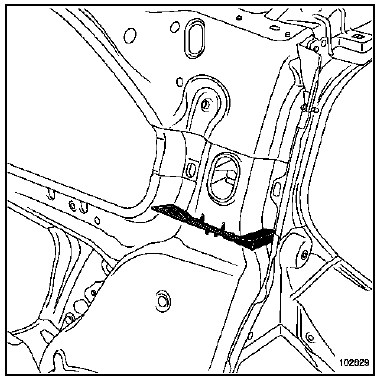
Order the inserts according to the chosen cuts.
Note: Only the particularities of partial cuts are given below; the remainder is identical to the method described previously.5-door version
Cut detail (b)
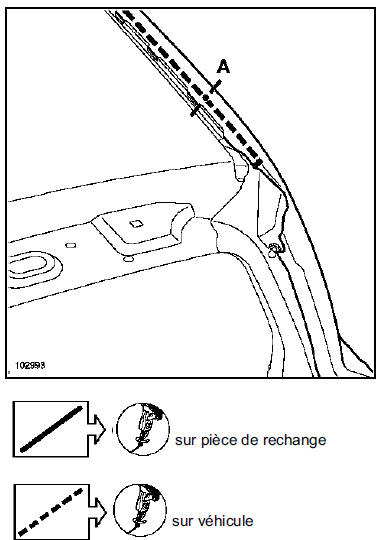
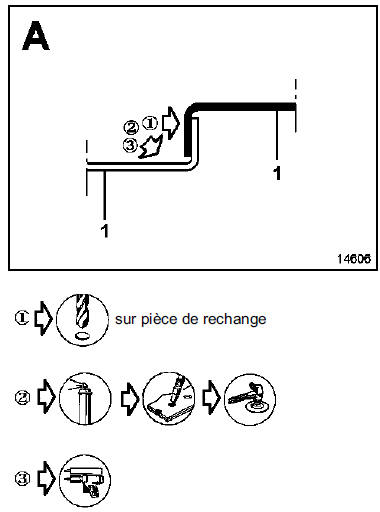
- Spacing between points 60 mm
- Apply a bead of sealer in the corner to ensure sealing and appearance.
Use M.J. Pro sealer (part number: 77 11 172 676).
Cut detail (c)
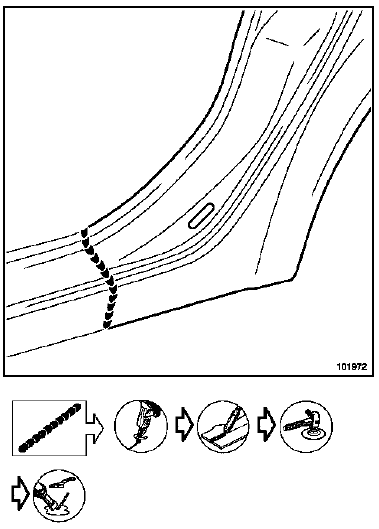
Detail of cut (d)
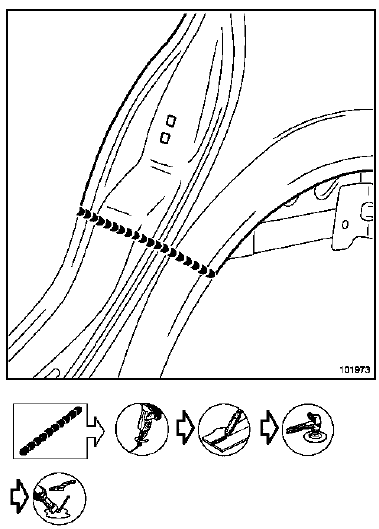
3-door version
Cut detail (a)
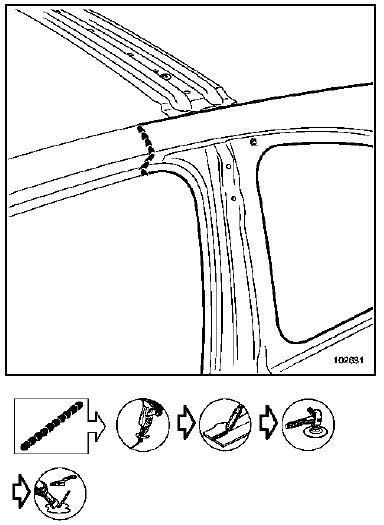
Cut detail (b)
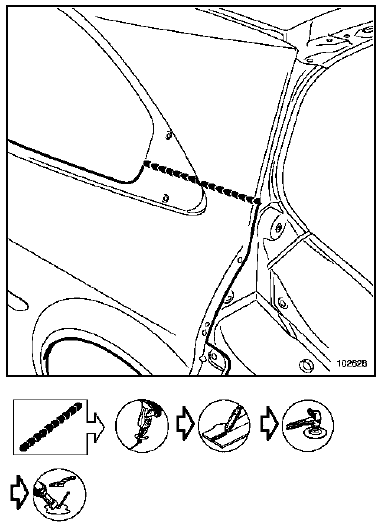
Specifics of cut (d)
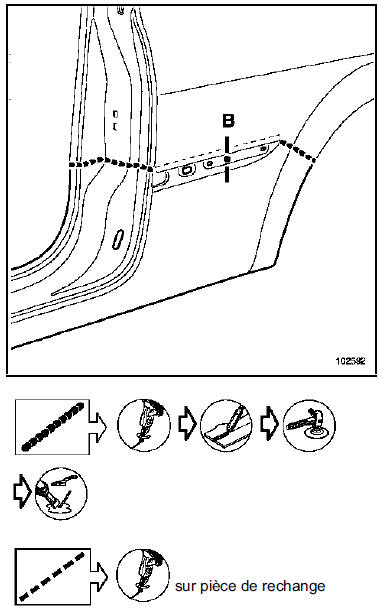
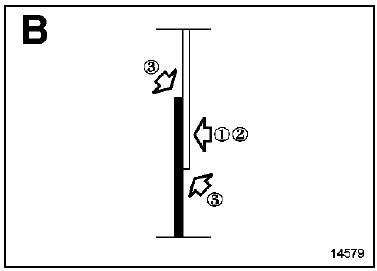
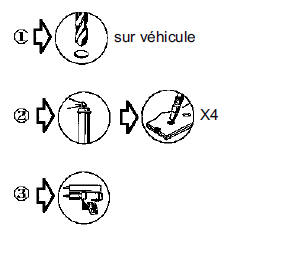
Detail of cut (e)
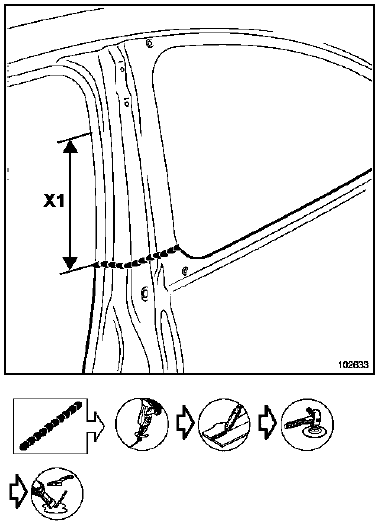
Note: The cut can be made in zone X1.
Specifics of rear wing panel replacement
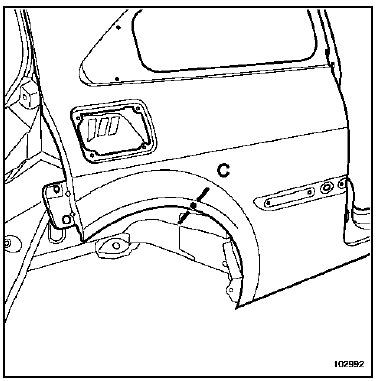
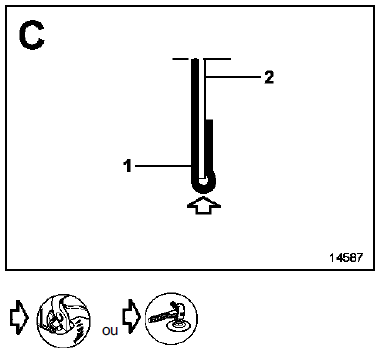
The rear wing panel replacement method is identical to that for replacing a door panel.
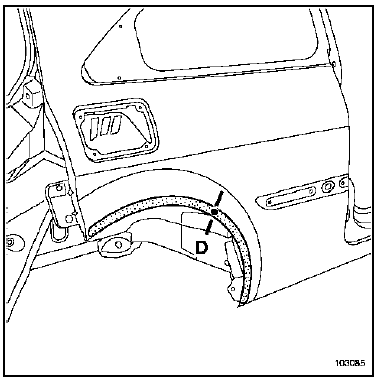
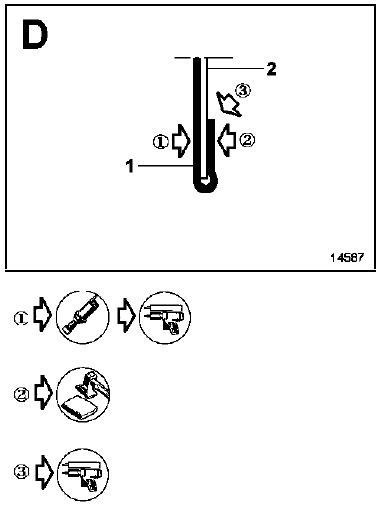
Use M.J. Pro adhesive (part number: 77 11 172 376) to ensure appearance and sealing after crimping the rear wing panel.
STONE CHIP PROTECTION
Part description
The adhesive film is protected by a release sheet on the adhesive side.
INSTALLATION
Clean the entire bonding area with heptane using a lint-free cloth.
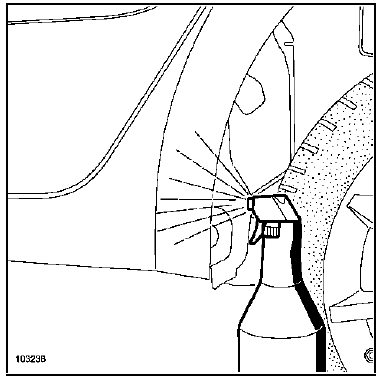
Spray water onto the bonding area.
Test yourself
A quick Renault Megane quiz: every answer comes with an explanation and a link to the manual page.