DCT (Dual Clutch Transmission) System
Shift Lever Repair Procedures
In this manual: DCT (Dual Clutch Transmission) System
11steps
~66min
3/5difficulty
Done 0 of 11
Removal
- Disconnect the dust boot from the upper console cover.
- Pull the knob (A) in the direction "F" and remove the knob.
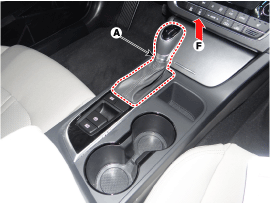
- Remove the floor console assembly. (Refer to Body - "Floor Console".)
- Disconnect the connector (A) from the shift lever.
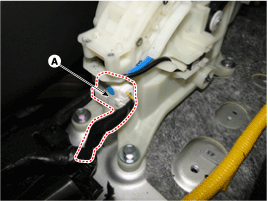
- Disconnect the control cable (A).
- Disconnect the shift cable eyelet (A) from the shift lever.
- Disconnect the shift cable bracket from the shift lever after pressing the lock.

- Remove the bolts, then remove the shift lever assembly (A).
Tightening torque: 8.8 ~ 13.7 N·m

- Remove the P position switch mounting bracket (A).

- Disconnect the P position switch (A) and the shift lock solenoid (B).
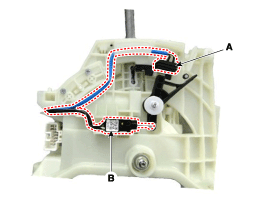
- Disconnect the main connector (A) from the shift lever.
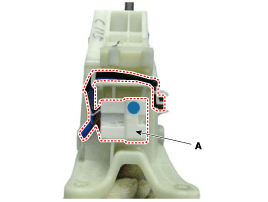
- Remove the terminal mounting bracket (A) from the main connector.
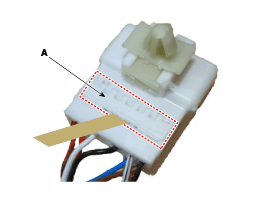
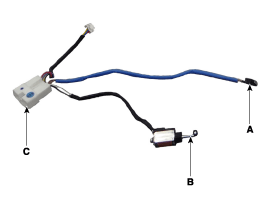
- Remove each terminal of the P position switch (A) and the shift lock solenoid (B) from the main connector (C).
Before disconnecting the terminals, record the wire color locations.
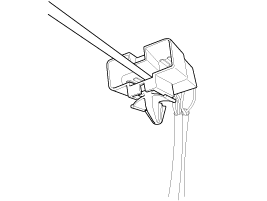
? Connector Information
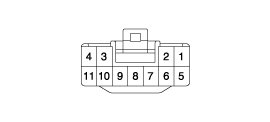
Installation
- Install in the reverse order of removal.
Adjust the cable after installing the shift lever and manual control lever in the N position.
Test yourself
A quick Hyundai Sonata LF quiz: every answer comes with an explanation and a link to the manual page.
Was this page helpful?