Speaker Output Short (B15C3)
This DTC is stored when a malfunction occurs in the speakers.
DTC No. | DTC Detection Condition | Trouble Area |
|---|---|---|
B15C3 |
A short is detected in the speaker output circuit. |
|
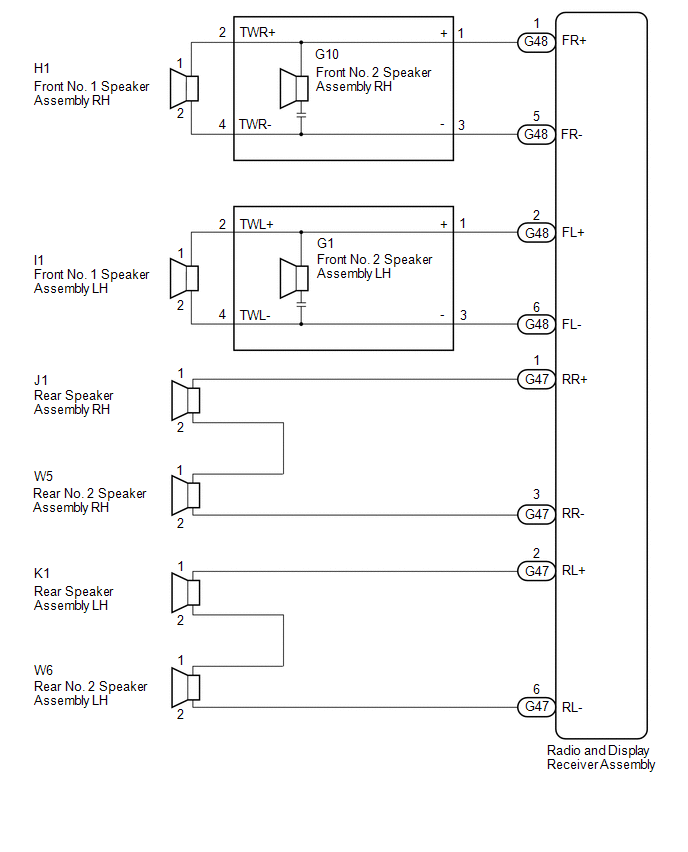
PROCEDURE
CHECK HARNESS AND CONNECTOR
(a) Disconnect the G47 and G48 radio and display receiver assembly connectors.
(b) Disconnect the H1 and I1 front No. 1 speaker assembly connectors.
(c) Disconnect the G1 and G10 front No. 2 speaker assembly connectors.
(d) Disconnect the J1 and K1 rear speaker assembly connectors.
(e) Disconnect the W5 and W6 rear No. 2 speaker assembly connectors.
(f) Measure the resistance between the radio and display receiver assembly and body ground to check for a short circuit in the wire harness.
Standard Resistance:
Tester Connection | Condition | Specified Condition |
|---|---|---|
G47-1 (RR+) - Body ground |
Always |
10 kΩ or higher |
G47-2 (RL+) - Body ground |
Always |
10 kΩ or higher |
G47-3 (RR-) - Body ground |
Always |
10 kΩ or higher |
G47-6 (RL-) - Body ground |
Always |
10 kΩ or higher |
G48-1 (FR+) - Body ground |
Always |
10 kΩ or higher |
G48-2 (FL+) - Body ground |
Always |
10 kΩ or higher |
G48-5 (FR-) - Body ground |
Always |
10 kΩ or higher |
G48-6 (FL-) - Body ground |
Always |
10 kΩ or higher |
(g) Measure the resistance between each of the front No. 2 speaker assemblies and body ground to check for a short circuit in the wire harness.
Standard Resistance:
Tester Connection | Condition | Specified Condition |
|---|---|---|
G1-2 (TWL+) - Body ground |
Always |
10 kΩ or higher |
G1-4 (TWL-) - Body ground |
Always |
10 kΩ or higher |
G10-2 (TWR+) - Body ground |
Always |
10 kΩ or higher |
G10-4 (TWR-) - Body ground |
Always |
10 kΩ or higher |
(h) Measure the resistance between each of the rear speaker assemblies and rear No. 2 speaker assemblies to check for a short circuit in the wire harness.
Standard Resistance:
Tester Connection | Condition | Specified Condition |
|---|---|---|
J1-2 - Body ground |
Always |
10 kΩ or higher |
K1-2 - Body ground |
Always |
10 kΩ or higher |
| NG |  | REPAIR OR REPLACE HARNESS OR CONNECTOR |
|

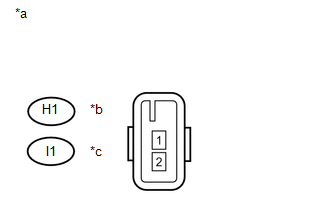
INSPECT FRONT NO. 1 SPEAKER ASSEMBLY
(a) Measure the resistance according to the value(s) in the table below. Standard Resistance:
|
 |
| NG | | REPLACE FRONT NO. 1 SPEAKER ASSEMBLY |
|
REPLACE FRONT NO. 2 SPEAKER ASSEMBLY
(a) Replace the front No. 2 speaker assembly with a known good one (See page  ).
(b) Clear the DTCs (See page ).
(c) Recheck for DTCs and check that no DTCs are output (See page ).
OK:
No DTCs are output.
HINT:
- Connect all the connectors to the front No. 2 speaker assemblies that were disconnected.
- When there is a possibility that either the right or left front speaker is defective, inspect by interchanging the right one with the left one.
- Perform the above inspection on both LH and RH sides.
| OK | | END (FRONT NO. 2 SPEAKER ASSEMBLY WAS DEFECTIVE) |
|
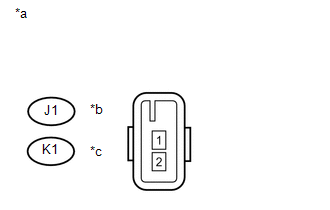
INSPECT REAR SPEAKER ASSEMBLY
(a) Measure the resistance according to the value(s) in the table below. Standard Resistance:
|
 |
| NG | | REPLACE REAR SPEAKER ASSEMBLY |
|
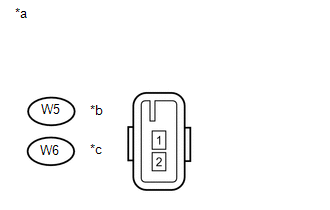
INSPECT REAR NO. 2 SPEAKER ASSEMBLY
(a) Measure the resistance according to the value(s) in the table below. Standard Resistance:
|
 |
| OK | | REPLACE RADIO AND DISPLAY RECEIVER ASSEMBLY |
| NG | | REPLACE REAR NO. 2 SPEAKER ASSEMBLY |
Test yourself
A quick Toyota 4Runner quiz: every answer comes with an explanation and a link to the manual page.