Bulbs
You can replace the following bulbs yourself. The difficulty of the replacement depends on the bulb. Because there is a risk of damaging components, it is recommended that the replacement be performed by any Toyota authorized dealer or repairer, or another suitably qualified and equipped professional.
Preparing to replace a bulb
Check the wattage of the bulb to be replaced
Bulb locations
■ Front
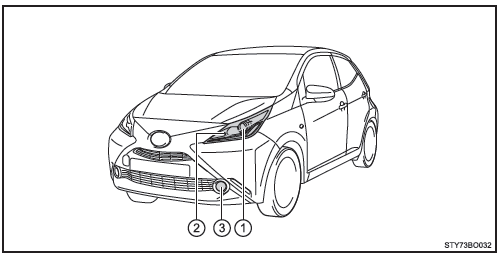
- Headlights
- Front turn signal lights
- Fog lights (if equipped)
■ Rear
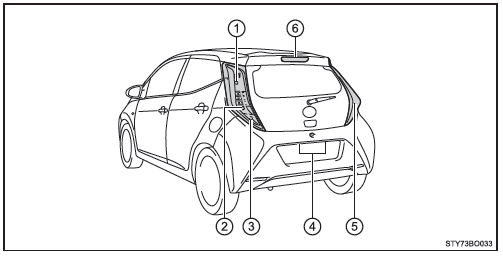
- Stop/tail lights
- Rear fog light*1 or back-up light*2
- Rear turn signal lights
- License plate lights
- Back-up light*1 or rear fog light*2
- High-mounted stop light
*1: Left-hand drive vehicles
*2: Right-hand drive vehicles
Replacing bulbs
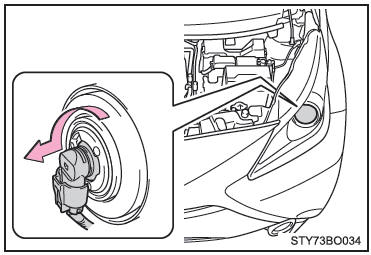
■ Headlights
1. Turn the bulb holder counterclockwise.
2. Disconnect the connector by pressing the release lever.
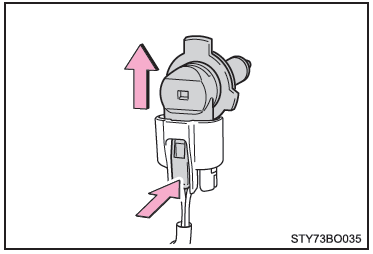
3. Replace the bulb and install the bulb holder.
Align the 3 tabs on the bulb with the mounting bracket, then insert it.
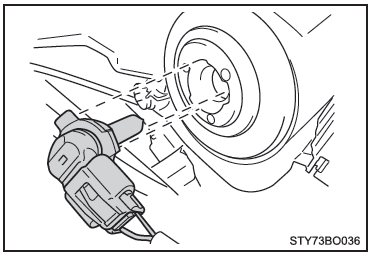
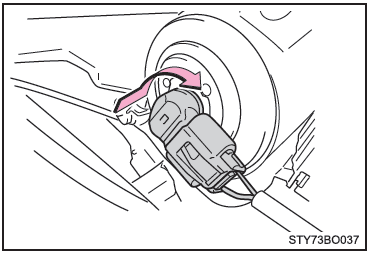
4. Turn and secure the bulb holder in place.
Gently shake the bulb holder to make sure it is not loose, turn the headlights on once, and visually check that no light leaks through the mounting bracket.
■ Front turn signal lights
1. Turn the bulb holder counterclockwise.
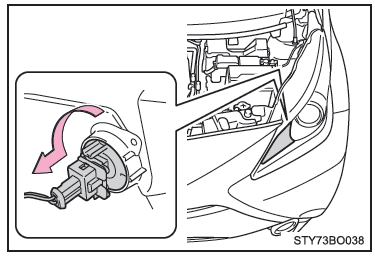
2. Remove the bulb.
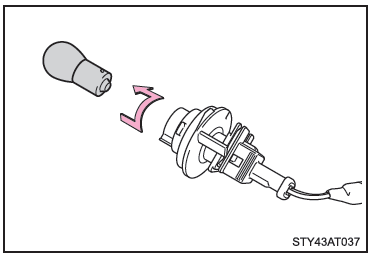
3. To install, reverse the order of the steps listed.
■ Fog lights (if equipped)
1. To create enough working space, turn the steering wheel toward the side opposite the bulb to be replaced.
Turn the steering wheel to the left to replace the right-side bulb, and turn the steering wheel to the right to replace the left-side bulb.
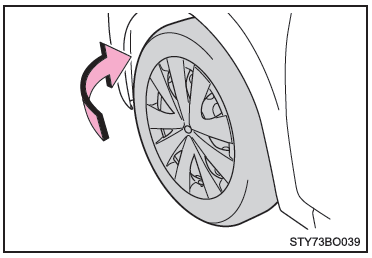
2. Remove the 2 screws.
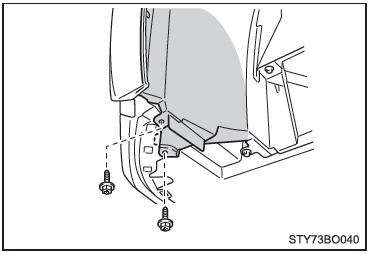
3. Remove the fender liner clip and open the fender liner.
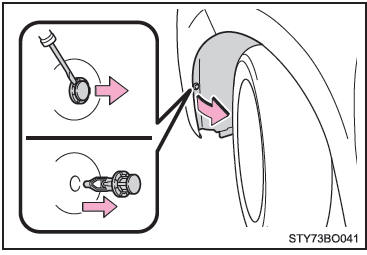
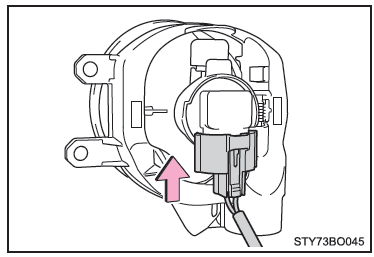
4. Disconnect the connector by pressing the release lever.
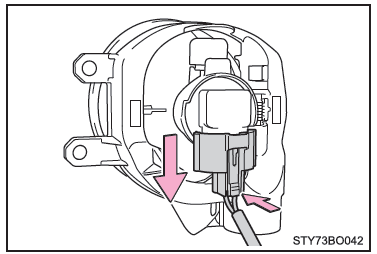
5. Turn the bulb holder counterclockwise.
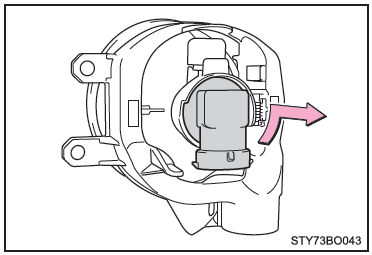
6. Position the new bulb.
Align the 3 tabs on the bulb with the mounting bracket, then insert it. Turn it clockwise to install.
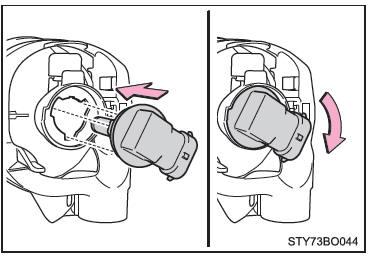
7. Attach the connector.
After installing the connector, gently shake the bulb holder to make sure it is not loose, turn the fog lights on once, and visually check that no light leaks through the mounting bracket.
8. Reinstall the fender liner and install the clip.
Insert the clip and turn it until it locks.
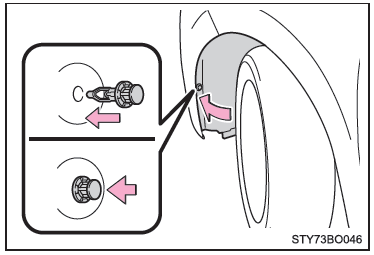
9. Reinstall the 2 screws.
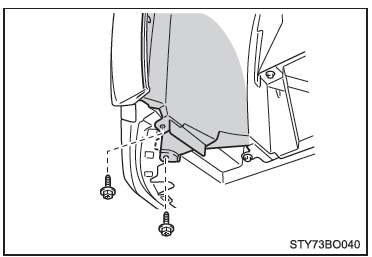
■ Stop/tail lights, back-up light, rear fog light and rear turn signal lights
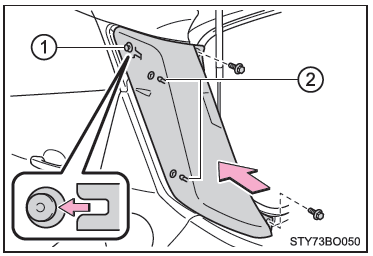
1. Open the tailgate and remove the 2 screws, then remove the bulb unit by pulling it straight back (working from the rear of the vehicle).
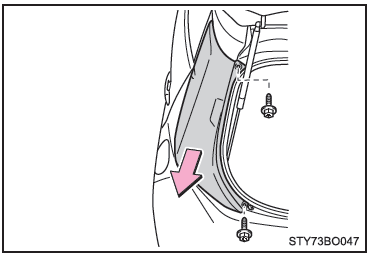
2. Turn the bulb holder counterclockwise.
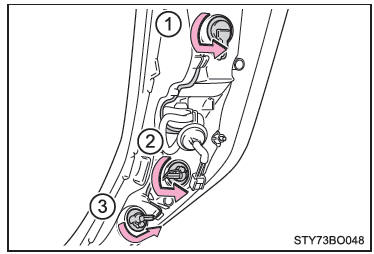
- Stop/tail light
- Back-up light or rear fog light
- Rear turn signal light
3. Remove the bulb.
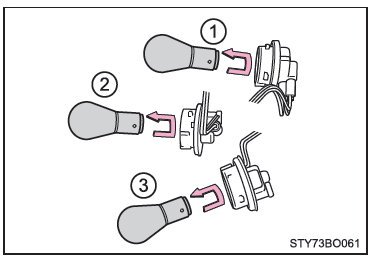
- Stop/tail light
- Back-up light or rear fog light
- Rear turn signal light
4. To install the bulb, perform steps 3 to 2 in reverse order.
5. Install the bulb unit, then reinstall the 2 screws.
When installing, align the guide ( 1 ) and the pins ( 2 ) of the bulb unit with the bracket.
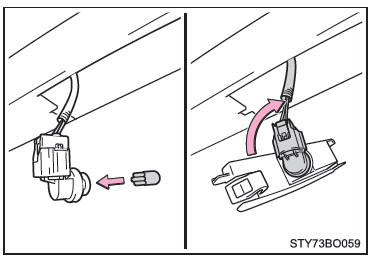
■ License plate lights
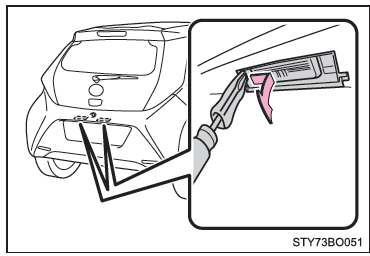
1. Disengage the retaining teeth and remove the license plate lights.
To avoid damage, wrap the tip of a flat-head screwdriver in a cloth.
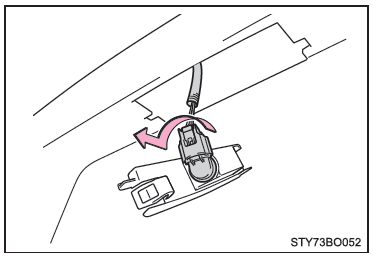
2. Turn the bulb holder counterclockwise.
3. Remove the bulb.
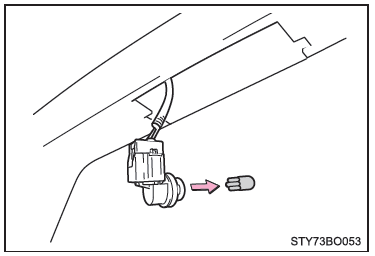
4. Position the new bulb and turn the bulb holder clockwise.
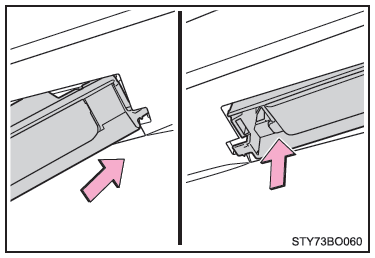
5. Reinstall the license plate lights as shown in the illustration.
When reinstalling, align the notches and retaining teeth on the license plate lights with the bracket.
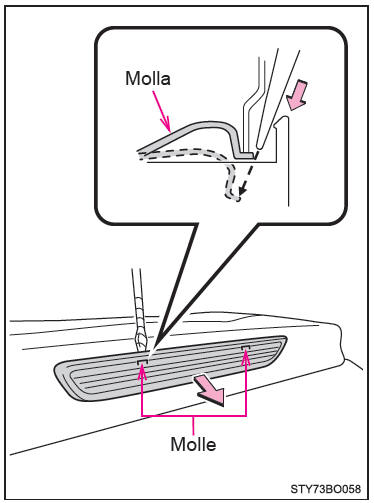
■ High-mounted stop light
1. Push the upper clips using a flat-head screwdriver and remove the upper stop light assembly.
To avoid damage, wrap the tip of the flat-head screwdriver with a piece of tape.
2. Remove the bulb holder.
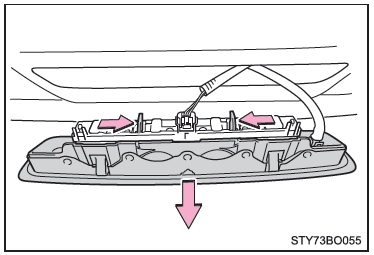
3. Remove the bulb.
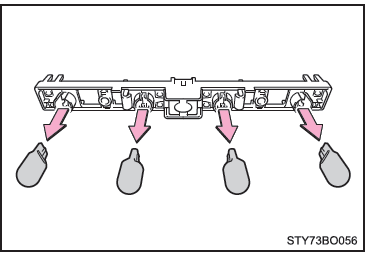
4. To install, reverse the order of the steps listed.
■ Replacing the following bulbs
If any of the bulbs listed below has burned out, have it replaced by any Toyota authorized dealer or repairer, or another suitably qualified and equipped professional.
- Front position lights
- Daytime running lights (if equipped)
- Side turn signal lights
■ LED lights The front position lights and daytime running lights (if equipped) consist of a series of LEDs. If one of the LEDs burns out, take the vehicle to any Toyota authorized dealer or repairer, or another suitably qualified and equipped professional, to have the light replaced.
■ Condensation inside the lens Temporary condensation inside the headlight lens does not indicate a malfunction. For more information, in the following situations contact any Toyota authorized dealer or repairer, or another suitably qualified and equipped professional:
- Large water droplets have formed inside the lens.
- Water has collected inside the headlight.
WARNING
■ Replacing bulbs
- Turn off the headlights. Do not attempt to replace a bulb immediately after turning off the headlights.
Bulbs reach very high temperatures and may cause burns.
■ To prevent damage or fire
- Make sure the bulbs are fully inserted and locked in place.
- Check the wattage of the bulb before installing it, to prevent heat damage.
Test yourself
A quick Toyota Aygo quiz: every answer comes with an explanation and a link to the manual page.