Axle Shaft Boot Replacement and CV Joint Inspection
* If it is necessary to overhaul the joint (usually due to a torn boot), check the price and availability of replacement parts before starting work. It may be more practical to simply replace the axle shaft.
Disassembly
PROCEDURE
1. Remove the axle shaft (refer to Subsection 8.3).
2. Secure the axle shaft in a vise, placing protective pads between the vise jaws to avoid damaging it. Check the joint for excessive radial play, which would indicate wear of the joint components.
If the joint boot is torn, disassemble the joint, clean all components, and inspect them for damage caused by operation without lubrication or by the entry of foreign objects or dirt.

3. Using a small screwdriver, bend up the tabs on the boot clamps and remove the clamps.
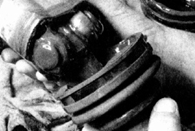
4. Using a screwdriver, carefully pry up the edge of the outer boot and remove it from the joint. If the boot is old or worn, it may be cut off. Remove the inner boot from the joint housing, then remove the housing from the tripod. Mark the relative position of the tripod and housing so they can be reinstalled in their original positions.
5. Mark the installed position of the tripod relative to the axle shaft so the tripod can be correctly installed after removal.

6. Remove the split retaining ring using special snap ring pliers.
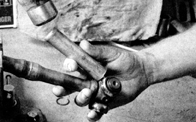
7. Using a hammer and copper drift, remove the tripod from the axle shaft.
8. If not already cut off, remove both boots. When working on the right axle shaft, it is necessary to cut the dynamic damper clamp and slide the damper aside, marking its installed position beforehand.
Inspection
PROCEDURE
Thoroughly clean all components, including the outer CV joint, with solvent so that all old grease is removed from the joint parts. Inspect the tripod bearing surfaces of the inner joint and the inside surface of its housing for cracks, corrosion, scratches, or other signs of wear. It is very difficult to check the condition of the inner and outer raceways of the outer joint, but the condition of the balls can be checked. If the balls are in good condition, the raceways are obviously also in good condition. If the inner CV joint is worn, a new inner CV joint can be purchased and installed on the original axle shaft; if the outer CV joint is worn, both the outer joint and the axle shaft must be replaced (they are sold only as an assembly).
Assembly
PROCEDURE
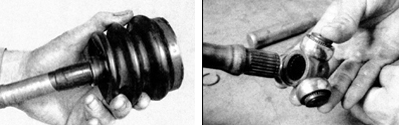
1. Wrap the splines on the end of the axle shaft with electrical tape to protect the boots (photo left). Slide the clamps and boots onto the axle shaft, then install the tripod on the shaft with the side on which the splines do not extend to the edge of the tripod facing outward (photo right).
* When working on the right axle shaft, do not forget to install the dynamic damper and a new clamp before installing the inner boot.
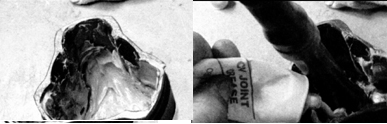
2. Apply grease to the tripod and the inside surface of the housing (photo left). Insert the tripod into the housing and fill the remaining space around the tripod with grease (photo right).
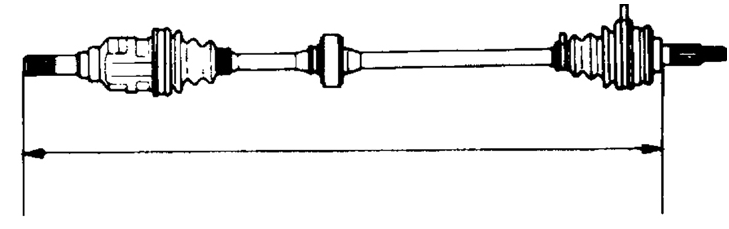
3. Position the boot, making sure both edges of the boot seat in their grooves. Adjust the axle shaft length to the value specified in Subsection 8.1.
4. Equalize the pressure inside the boot by inserting a small screwdriver between the boot and the outer raceway.
5. To install new clamps, bend the end of the clamp (photo left), then bend the tabs over the strap to secure it (photo right).
Test yourself
A quick Toyota Corolla quiz: every answer comes with an explanation and a link to the manual page.