Tire pressure monitoring system
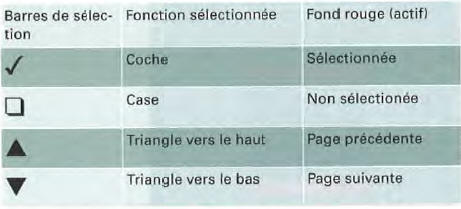
Applies to vehicles with driver information system
Adjustment procedure (part 1)
The driver information system settings are made through the menus.
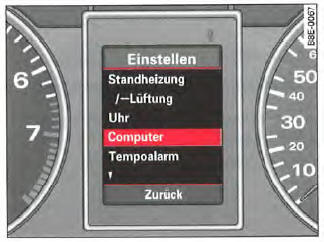
Fig. 30 Display: Settings menu selected, Computer
Make your settings as follows:
- Press the button
 . The start menu
appears, fig. 26. - Press the toggle control => , fig. 27 until the Settings function appears.
- Press the button
 . All menus
appear. - Press the toggle control until the desired line is activated (red background) => fig. 30.
- Press the button
 .
- If necessary, position the selection arrow on the "Next page" or "Previous page" symbol to scroll, and confirm your choice by pressing the push/turn button.
If you have selected the "Computer" menu and activated it by pressing thebutton, two
computer levels appear (Computer 1 and Computer 2). Now select the desired level with the toggle control and activate it with the.
button. Continued => , "Adjustment procedure (part 2)".
Adjustment procedure (part 2)
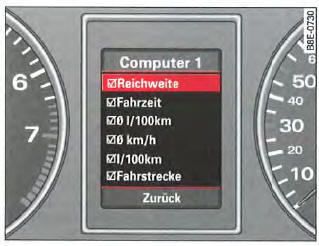
Fig. 31 Display: Computer 1 menu selected, Range
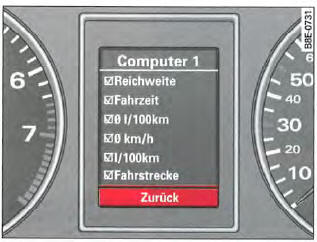
Fig. 32 Display: Computer 1 menu selected, Back
Make your adjustment as follows:
- Press the toggle control => , fig. 27 until the desired line is activated (red background) => fig. 31.
- Now activate or deactivate the selected function by pressing the
 button and ticking the box (for "yes") or leaving it unticked (for "no").
- Press the toggle control until the Back function is selected => fig. 32, then press the
 button
to return to the higher-level menu.
Some settings require numerical values to be entered, for example to set the date. The toggle control is also used for this.
Applies to vehicles with driver information system
Operating example (part 1)
Example of a complete adjustment procedure using the menus.
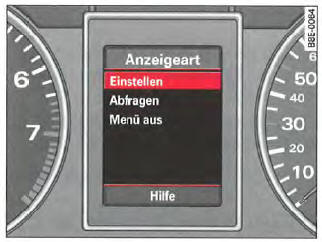
Fig. 33 Display: start menu, Settings selected
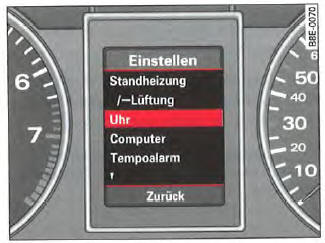
Fig. 34 Display: Settings menu selected, Clock
To set the date, for example, proceed as follows:
- Press the i
 button. The
start menu appears => fig. 26. - Press the toggle control => fig. 27 until the Settings function => fig. 33 is activated.
- Press the button
 . The submenus
available under the Settings menu appear. - Press the toggle control until the Clock/Date function => fig. 34 appears.
- Press the button
 . The Clock
adjustment menu appears.
Continued => , "Operating example (part 2)".
Applies to vehicles with driver information system
Operating example (part 2)
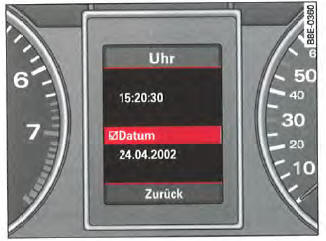
Fig. 35 Display: Clock menu selected, Date
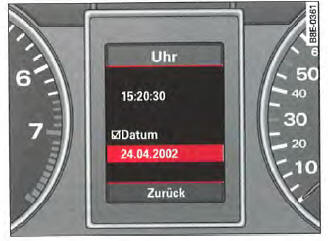
Fig. 36 Display: Clock menu adjustment, Date
Set the date as follows:
- Press the toggle control => , fig. 27 until the Date function => fig. 35 is activated.
- If an empty box precedes the Date entry, press the
 button. The box is now ticked.
- Press the toggle control until the date display is activated, then press the
 button: the
day flashes => , fig. 36. - Press the top or bottom of the toggle control until the number for the day is correct.
Press the button
 .
The month flashes. - Using the same method, change the month and year.
Continued on page 47, "Operating example (part 3)".
Applies to vehicles with driver information system
Operating example (part 3)
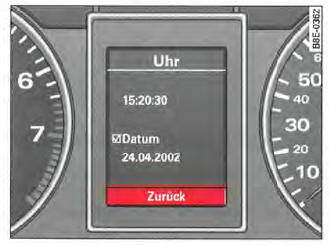
Fig. 37 Display: Clock/Date menu selected, Back
Finish setting the date as follows:
- Press the toggle control => fig. 27 until the Back function => fig. 37 is activated.
- Press the button
 . The Settings
menu appears again. - Press the
 button again.
The start menu appears again.
Tire pressure monitoring system
Applies to vehicles with a tire pressure monitoring system
Introduction
The tire pressure monitoring system monitors the pressure of all 4 tires while driving.
If pressure is lost, symbols and messages appear in the instrument cluster to alert the driver. On some vehicle models, the information display has a higher resolution and is in color. The symbol is replaced by the symbol
 . The system works using
sensors located at the wheels. The signals from these sensors are transmitted wirelessly to the tire pressure monitoring system.
Tire pressure also depends on tire temperature. The higher the temperature, the higher the tire pressure (by 0.1 bar for every 10 °C change). When you drive, the tire warms up and the pressure increases. Only correct the tire pressure when the tires are cold, when the tire temperature is the same as the ambient temperature.
For the tire pressure monitoring system to work properly, the tire inflation pressure must be checked at regular intervals, corrected if necessary, and then stored once it is correct (specified pressure).
The recommended tire pressure for your vehicle is shown on the sticker on the door pillar.
CAUTION!
- Never correct the tire pressure when the tire temperature is high. This could seriously damage the tire or even cause it to burst - risk of accident!
- At high cruising speeds, a tire with too low a pressure is subjected to greater flexing work. It therefore overheats. This can cause the tread to separate and even cause the tire to burst - risk of accident!
 Environment
When the tire pressure is too low, fuel consumption and tire wear increase.
Note
- The tire pressure monitoring system assists the driver in monitoring the tire pressures. However, the driver is responsible if the tire pressure is not correct.
- Only correct the tire pressure of tires whose temperature is equal to the ambient temperature.
- When replacing the tires, do not loosen or replace the sensors and valves. Only replace the valve mechanism and, if necessary, the valve and wheel electronics.
- After using the TMS (Tire-Mobility-Systems)*, a malfunction of the tire pressure monitoring system may occur. For this reason, replacement of the tire pressure monitoring system sensor must be carried out by a specialist workshop.
Applies to vehicles: with tire pressure monitoring system
Significant loss of tire pressure (1)
The red symbol is displayed in the event of a significant loss of tire pressure.
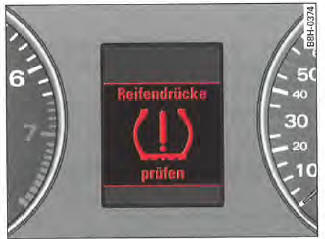
Fig. 38 Warning screen with warning message
If the symbol lights up, the pressure of
one tire is too low.
- Stop the vehicle.
- Switch off the engine.
- Check the tire(s).
- Change the affected wheel, if necessary.
If the tire pressure is more than 0.5 bar below the specified pressure, the tire symbol with the CO indicator is displayed with the message Check tire pressure!.
=> fig. 38.
Note
If the tire pressure loss is intentional, e.g. after a new adaptation, you must store the pressure again.
Applies to vehicles: with tire pressure monitoring system
Moderate loss of tire pressure
The yellow symbol is displayed in the event of a moderate loss of tire pressure.
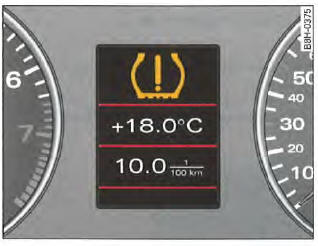
Fig. 39 Display: moderate tire pressure
If the tire pressure is more than 0.3 bar below the specified pressure, the tire symbol is displayed.
Note
Only correct the tire pressure of tires whose temperature is equal to the ambient temperature.
Applies to vehicles: with tire pressure monitoring system
Storing the tire pressure
Correctly storing the specified pressures is the prerequisite for reliable tire pressure monitoring.
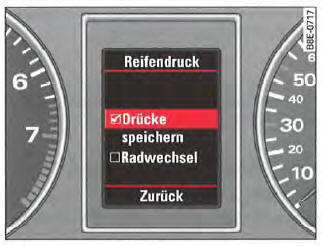
Fig. 40 Display: storing the inflation pressures
For the tire pressure monitoring system to function correctly, you must store the specified pressures each time you correct the pressure, e.g. when the vehicle's load condition changes. Proceed as follows:
Correcting the tire pressure
- Check the tire pressure.
- If necessary, correct the tire pressure according to the information on the sticker on the door pillar.
Storing the tire pressure
- Press the (Reset) button on the wiper lever.
- Select Tire pressure.
- Select Store pressure.
Store the tire pressure each time you change the specified pressure.
Once the tire pressure has been stored, the tire pressure monitoring system measures the current tire pressure and stores it as the new specified pressure.
Note
- The recommended tire pressure for your vehicle is shown on the sticker on the door pillar.
Applies to vehicles: with tire pressure monitoring system
Wheel change
When you change a wheel, it must be stored again.
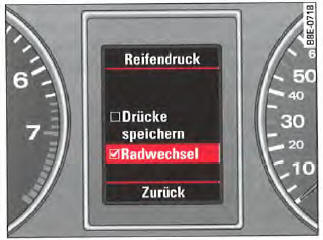
Fig. 41 Display: Wheel change
- Press the (Reset) button on the wiper lever.
- Select Tire pressure.
- Select Wheel change.
When a wheel has been replaced, the Wheel change function must be run. After you select this function, the new wheels are stored. This adaptation phase can last up to twenty minutes.
During the adaptation process, the tire pressure monitoring system is only partially available. It only alerts the driver when the tire pressure falls below the minimum permitted pressure. One or more wheels may be affected. If this is the case, the warning symbol and the message TIRE PRESSURE! are displayed.
Applies to vehicles: with tire pressure monitoring system
Malfunctions
Malfunctions can have various causes.
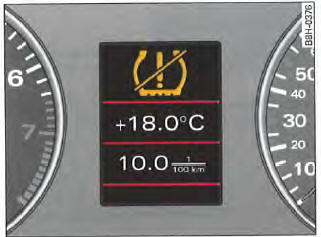
Fig. 42 Display: malfunction
If the tire pressure monitoring system is not available, a tire symbol and/or . This can have various
causes:
- If this message appears at the end of the adaptation process, the system may not recognize the wheels fitted to your vehicle. This may be because the wheel sensors are not fitted to one or more wheels.
- A wheel sensor or other components may be defective.
- The system has detected more than 4 wheels in the vehicle, for example if you are carrying winter tires.
- A wheel has been changed and the Wheel change function has not been activated.
- When using snow chains, the system may have operating restrictions due to the shielding effect of the chains.
- The tire pressure monitoring system is not available due to a malfunction.
- Transmitters on the same frequency, such as radio headsets or radio devices, may cause a temporary malfunction due to strong electromagnetic fields.
- If possible, eliminate the cause of the fault and select the Wheel Change function again. If you cannot resolve the malfunction, seek help from a specialist.
Test yourself
A quick Audi A4 quiz: every answer comes with an explanation and a link to the manual page.