Maintenance

Headlamp Aim

In this manual: Maintenance
Introduction — 1Symbol Glossary — 1Data Privacy — 7At a Glance — 1Child Safety — 11Seat Belts — 9Personal Safety System™ — 1Airbags — 8Pedestrian Warning System. 911 Assist — 1Keys and Remote Controls — 8MyKey™ — 5Doors & Locks — 5Keyless Entry — 6Easy Entry and Exit — 1Liftgate - Vehicles With: Manual Liftgate — 3Liftgate - Vehicles With: Power Liftgate — 6Safety — 4Steering Wheel — 1Wipers and Washers — 7Exterior Lighting — 8Interior Lighting — 4Windows — 3Interior Mirror — 1Exterior Mirrors — 1Sunroof (if equipped) — 4Instrument Cluster — 16Instrument Cluster Display — 14Trip Computer — 3Head-Up Display (If Equipped) — 1Remote Start — 5Climate Control — 7Cabin Air Quality — 1Front Seats — 5Rear Seats — 1Rear Seat Reminder — 1Memory Function — 1Garage Door Opener — 7USB Ports — 3Power Point - Vehicles With: 12V Outlet — 1Wireless Accessory Charger — 1Storage — 1Starting and Stopping the Engine — 9Hybrid Electric Vehicle Information — 6Auto Start-Stop — 1Fuel and Refueling — 10Catalytic Converter — 1High-Voltage Battery — 1Charging Your Vehicle – Plug-in Hybrid Electric Vehicle (PHEV) — 7Automatic Transmission — 8All-Wheel Drive — 1Brakes — 4Electric parking brake — 1Hill Start Assist — 1Auto Hold — 1Traction Control — 1Stability Control — 1Steering — 1Park Aid — 7Rearview Camera — 1Active Park Assist — 5Cruise Control — 1Adaptive Cruise Control — 10Drive Mode Control — 5Lane Keeping System — 6Blind Spot Information System — 5Cross-Traffic Alert — 5Pre-Collision Assist — 9Driver Alert — 4Traffic Sign Recognition — 4Loading — 6Cargo Area — 1Trailer Hitch Connection — 3Towing a Trailer — 4Trailer Sway Control — 1Driving Tips — 4Breakdown and Emergency Information — 7Towing Your Vehicle — 4Fuses — 4Maintenance — 14Vehicle Care — 5Body Styling Kits — 1Storing Your Vehicle — 1Wheels and Tires Information — 6Tire Care — 4Tire Sealant and Inflator Kit — 8Tire Pressure Monitoring System — 4Road Wheel Replacement — 1Capacities and Specifications — 16Vehicle Identification — 1Connected Vehicle — 4Vehicle Wi-Fi Hotspot — 3Audio System — 8SYNC™ (if equipped) — 9SYNC™ 3 (if equipped) — 41Accessories — 1Ford Protect — 1Scheduled Maintenance — 4Customer Information — 23Appendices — 3
6steps
~36min
2/5difficulty
Done 0 of 6

Vertical Aim Adjustment

The headlamps on your vehicle are properly aimed at the assembly plant. If your vehicle has been involved in an accident, the headlamp aim must be checked by your authorized dealer.
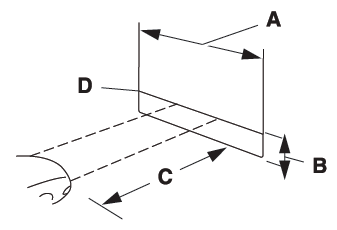
Ford Escape. Adjusting the Headlamps
  1. 8 ft (2.4 m)
  2. Height of lamp center above ground
  3. 25 ft (7.6 m)
  4. Horizontal reference line
  1. Park the vehicle straight in front of a wall or screen on a level surface, approximately 25 ft (7.6 m) away.
  2. Measure the height of the headlamp lamp center from the ground and mark a horizontal reference line 8 ft (2.4 m) long on the vertical wall or screen at that height.
  3. Turn on the low beam headlamps to illuminate the wall or screen and open the hood.
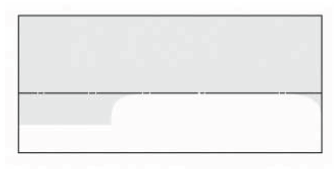
    Ford Escape. Adjusting the Headlamps
  4. On the wall or screen, you will observe a flat zone of high-intensity light located at the top of the right-hand part of the beam pattern. If the top edge of the high-intensity zone is not on the horizontal reference line, the headlamps must be adjusted.
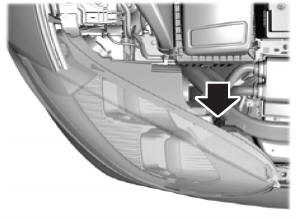
    Ford Escape. Adjusting the Headlamps
  5. Locate the vertical adjuster on each headlamp. Using a Phillips #2 screwdriver, turn the adjuster either clockwise or counterclockwise to aim the headlamp. The horizontal edge of the brighter light must touch the horizontal reference line.
  6. Close the hood and turn off the lamps.

Horizontal Aim Adjustment

Horizontal aim is not required on this vehicle and is not adjustable.

Test yourself

A quick Ford Escape quiz: every answer comes with an explanation and a link to the manual page.