Inner CV Joint - Inspection, Assembly
INSPECTION
PROCEDURE
1. Thoroughly remove grease residue from the outer joint housing and the tripod bearing cavities. Disassemble the tripod assembly one section at a time to avoid mixing up parts, and wash the needle roller bearings in solvent.
2. Inspect the rollers, bearings, tripod spider and outer joint housing for signs of excessive wear, scoring, cracks and other mechanical damage. Replace the CV joint if necessary.
ASSEMBLY
PROCEDURE

1. Wrap the splines of the drive shaft stub with tape to protect the new CV joint boot from cuts.

2. Install the boot onto the shaft, remove the tape, and install the inner snap ring.
3. Install the tripod assembly onto the shaft.

4. Secure the tripod assembly with the outer snap ring.

5. Apply special heavy grease to the inner sides of the needle roller bearings to temporarily hold them on the tripod assembly spider journals. Make sure each roller is installed strictly in its original position.
If the rollers have a rectangular flat, make sure they are installed with the flat facing the shaft.
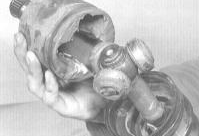
6. Fill the outer joint housing halfway with the grease supplied with the new boot. Pack the boot with the remaining grease. Install the outer housing onto the shaft. Make sure the alignment marks made during removal are matched between the housing and the tripod bearing.
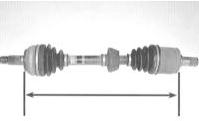
7. Seat the boot lips into the grooves on the outer joint housing and the shaft body, then adjust the shaft assembly length in accordance with the Specifications.
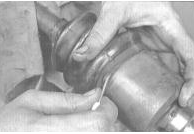
8. After setting the shaft length, release the air from under the boot by prying its outer (larger diameter) edge with a blunt screwdriver. Be careful not to damage the boot.
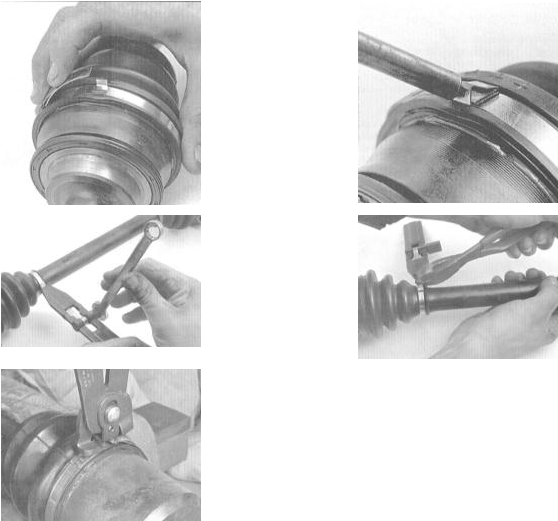
9. Secure the boot with new retaining straps/clamps.
10. Install the shaft assembly on the vehicle (refer to Drive Shaft Removal and Installation).
Test yourself
A quick Honda Accord quiz: every answer comes with an explanation and a link to the manual page.