Driveshaft Removal
PROCEDURE
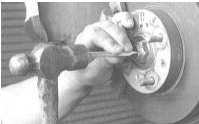
1. Remove the wheel cover. If the hub nut is staked, bend back the locking tab using a center punch or chisel.
On some models the wheel cover is secured by the wheel nuts. In this case, loosen the wheel nuts, raise the vehicle, remove the cover, reinstall the wheel nuts, lower the vehicle to the ground, and only then begin loosening the hub nut.
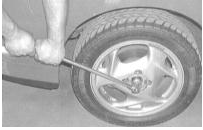
2. Loosen the hub nut using a socket with a long breaker bar.
3. Loosen the wheel nuts of the applicable front wheel, raise the vehicle and support it on stands. Remove the wheel. Drain the transmission fluid/ATF (see Maintenance and Lubrication section).
4. Disconnect the damper fork from the strut assembly and the lower control arm (see Suspension and Steering section).
5. Release the lower control arm from the steering knuckle (see Suspension and Steering section). Now fully remove the hub nut.

6. Pivot the hub assembly outward to release the driveshaft stub axle from it.
If the driveshaft is seized and cannot be removed from the hub, tap the end of the shaft with a soft-faced hammer. Tie the outer end of the driveshaft to a suspension component with wire to avoid stressing the inner CV joint assembly.
7. Carefully pry the inner end of the driveshaft out of the transaxle differential or intermediate shaft assembly. A pry bar works well; insert it into the gap between the inner CV joint housing and the transaxle case/intermediate shaft bearing support. Holding the CV joints, carefully remove the driveshaft assembly from under the vehicle. To avoid damaging the intermediate shaft/differential seal, keep the inner CV joint horizontal until the stub axle is fully released from its seat.

Test yourself
A quick Honda Accord quiz: every answer comes with an explanation and a link to the manual page.