In this manual: Heating,Ventilation And Air Conditioning
77steps
~462min
4/5difficulty
Tightening torque found on this page
Done 0 of 77
Contents:
Components and Components Location
Component
1. Auto Defogging Actuator 2. Temperature Control Actuator 3. Heater Unit 4. Mode Control Actuator 5. Heater Core
6. Heater Core Cover 7. Evaporator Temperature Sensor 8. Evaporator Core 9. Heater Unit Lower Cover 10. PTC Heater
On Vehicle Inspection
On Vehicle Inspection
Diagnosis with KDS
The heating,ventilation and air conditioning system can be more quickly diagnosed for problems with the KDS (Refer to "DTC guide").
Self diagnosis : Inspect the Diagnostic Trouble Code (DTC) with the KDS. (Refer to DTC guide when fault code is found.)
Refer to the KDS screen for operating conditions and details.
Heater Unit Removal and Installation
Removal
Recover the refrigerant by using recovery/recycling/charging equipment. (Refer to Air conditioning System - "Refrigerant Recovery/Recycling/Charging/Vacuum/Leak Test")
When the engine is cooled, drain the engine coolant from the radiator. (Refer to Engine Mechanical System - "Coolant")
Remove the front wiper motor. (Refer to Body Electrical System - "Wiper Motor")
Remove both front seat assembly. (Refer to Body - "Front Seat Assembly")
Remove the floor console assembly. (Refer to Body - "Floor Console Assembly")
Remove the both side front pillar trims. (Refer to Body - "Front Pillar Trim")
Remove both cowl side trims. (Refer to Body - "Cowl Side Trim")
Remove both crash pad side covers. (Refer to Body - "Crash Pad Side Cover")
Separate the MDPS column & housing. (Refer to Steering System - "MDPS Column & Housing")
Remove the expansion valve cover (A) after removing the nut.
Tightening torque : 8.8 - 13,7 N·m
Remove the expansion valve (A) from the evaporator core after removing the bolts.
Tightening torque : 8.8 - 13,7 N·m
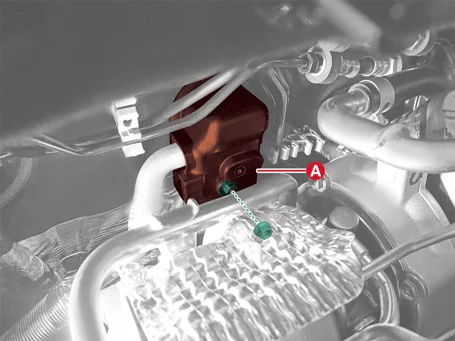
Remove the air cleaner assembly. (Refer to Engine Mechanical System - "Air Cleaner")
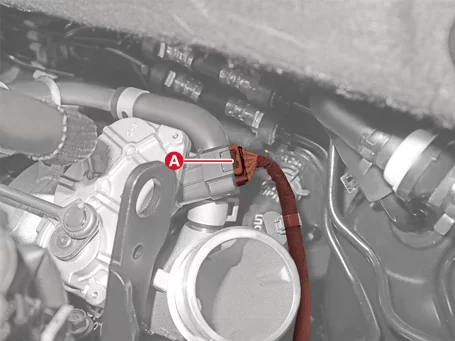
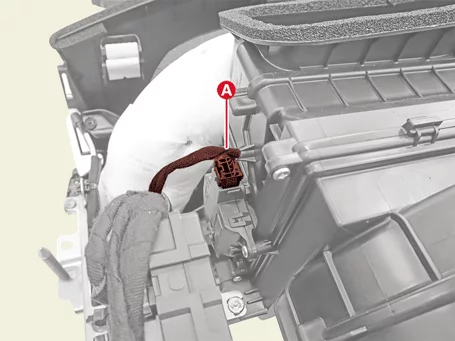
Disconnect the electric waste gate actuator connector (A).
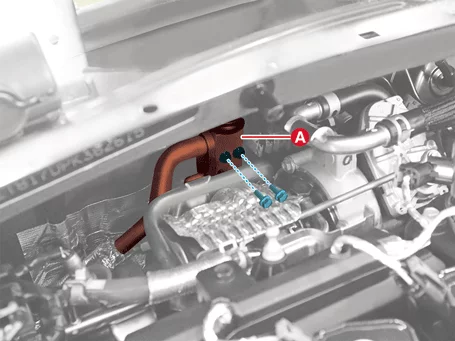
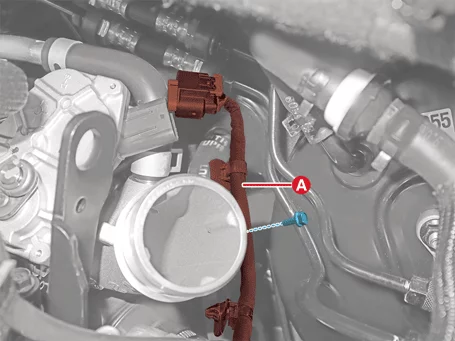
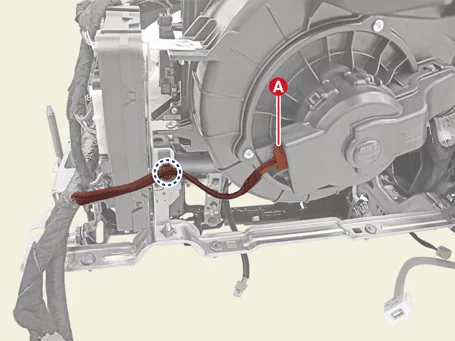
Remove the electric waste gate actuator wiring and bracket (A).
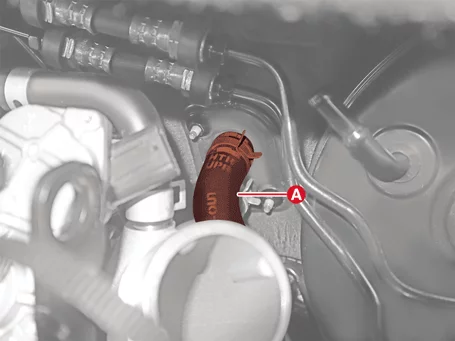
Remove the upper heater hose (A).
When separating the hose, the coolant flows. The coolant cause damage to the electrical parts or the painted surface, so wipe it off immediately.
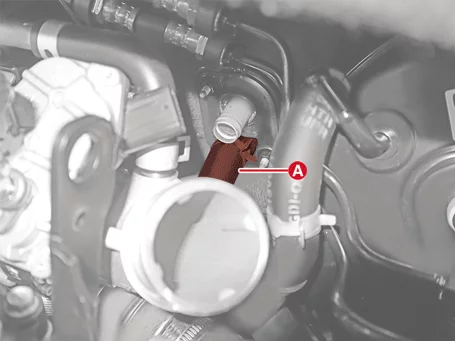
Remove the lower heater hose (A).
When disconnecting the hose, the coolant flows. The coolant cause damage to the electrical parts or the painted surface, so wipe it off immediately.
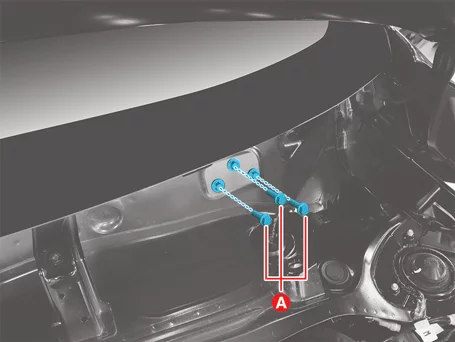
Remove the dash panel cowl cross bar bolts (A).
Tightening torque : 23.5 - 30 N·m
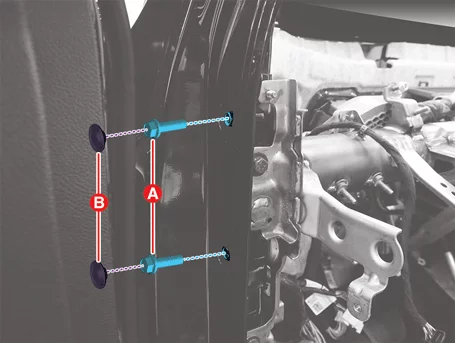
Remove the side panel cowl cross bar bolts (A) after removing hole plug (B).
Tightening torque : 16.7 - 24 N·m
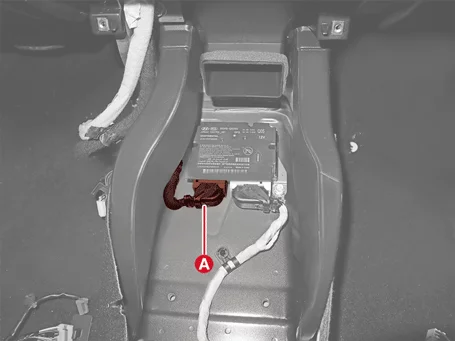
Disconnect the SRSCM connector (A) by releasing the locking pin.
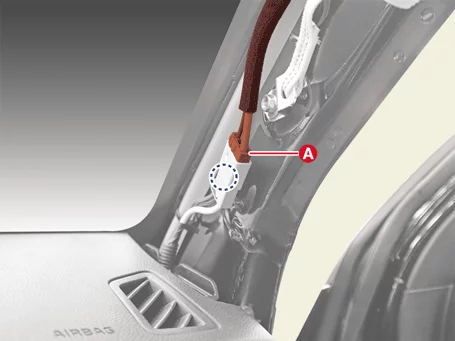
Disconnect the roof antenna connector (A).
Clip position :
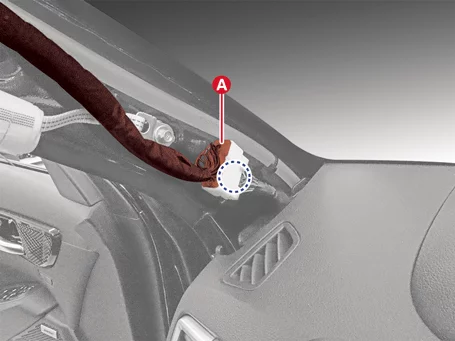
Disconnect the roof trim connector (A).
Clip position :
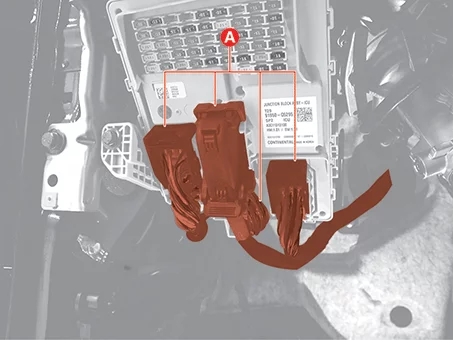
Disconnect the integrated central control unit (ICU) connectors (A).
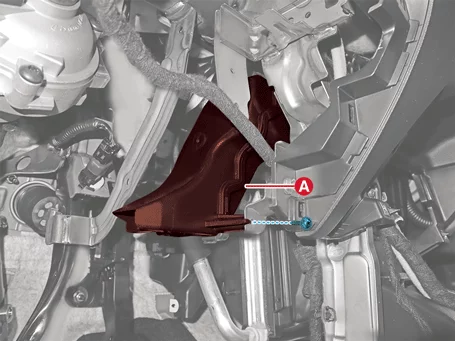
Remove the driver's side shower duct (A) after removing the screw.
Remove the passenger's side shower duct (A) after removing the screw.
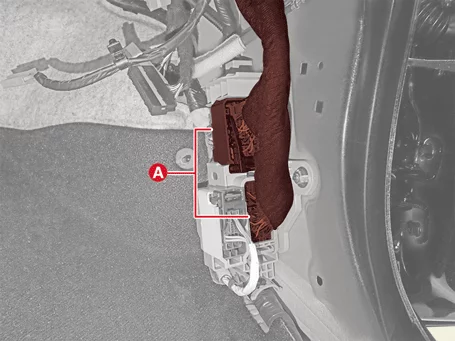
Disconnect the multi-box connectors (A). [Driver's side] [Passenger's side]
Remove the rear air vent (A).
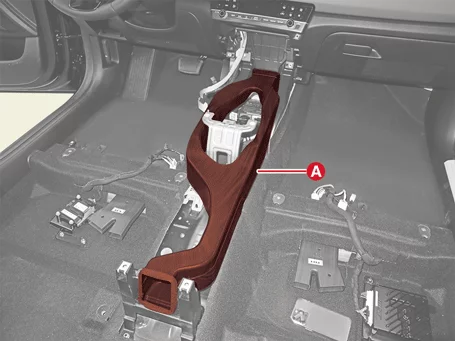
Remove the rear heating duct (A). [Driver's side] [Passenger's side]
Separate the floor carpet (A) backwards.
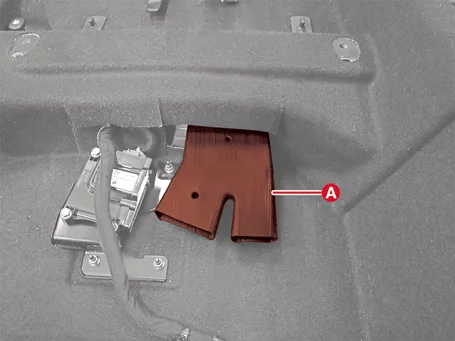
Remove the rear heating duct (A). [Driver's side] [Passenger's side]
Remove the integrated body control unit (IBU) bolt and nut (A).
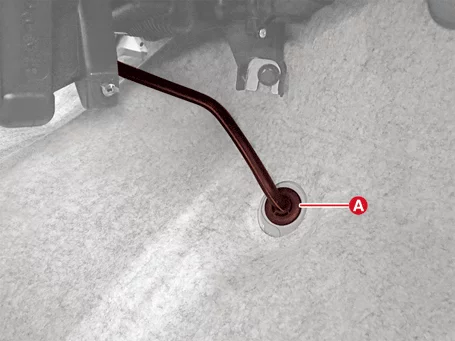
Separate the drain hose (A).
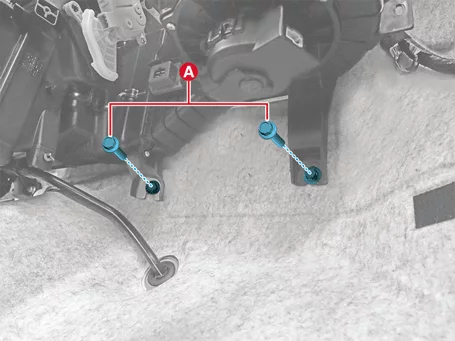
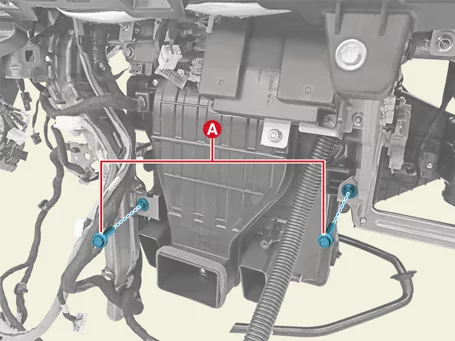
Remove the heater and blower unit lower bolts (A). Tightening torque : 3.9 - 5,9 N·m (0.4 - 0.6 kgf·m, 2.9 - 4.3 lb·ft, 34.7 - 52.1 lb·in)
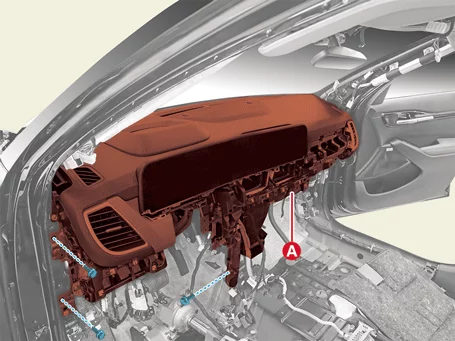
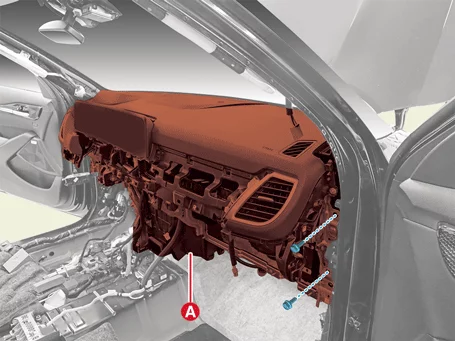
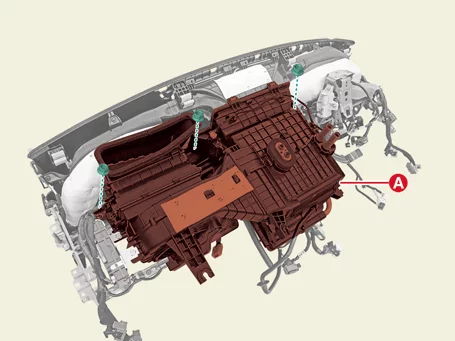
Remove the bolts and remove the crash pad, heater and blower unit (A) from the body at the same time.
Tightening torque : 16.7 - 24 N·m
[LH] [RH]
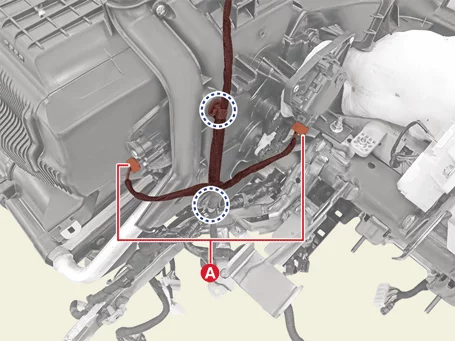
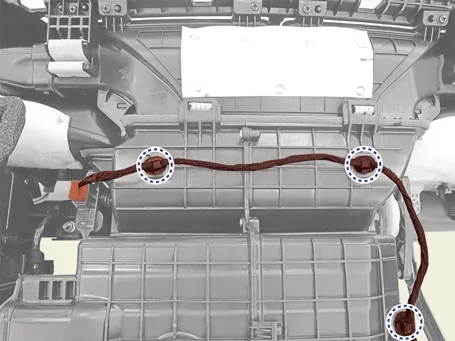
Disconnect the each connector of the heater and blower unit and remove the wiring clips. [Driver's Side]
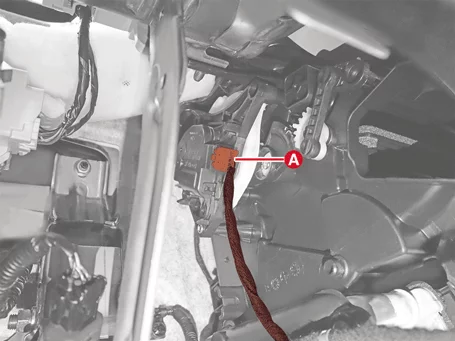
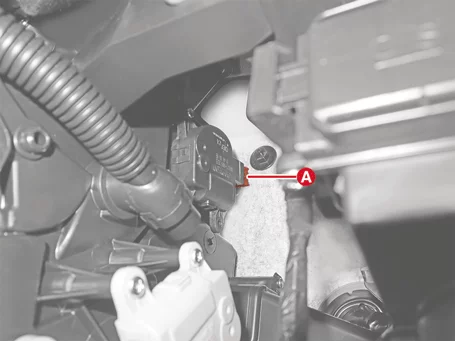
Disconnect the evaporator temperature sensor and mode control actuator connectors (A) and remove the wiring mounting clips.
Clip position :
Remove the heater unit wiring clips.
Clip position :
[Passenger's Side]
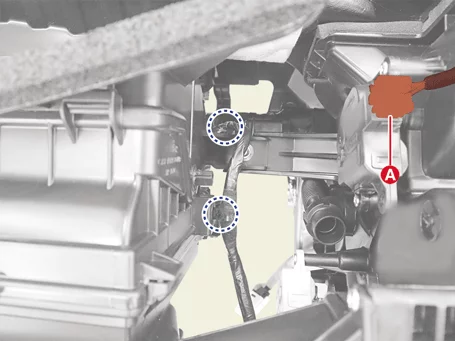
Disconnect the auto defogging actuator connector (A) and remove the mounting clips.
Clip position :
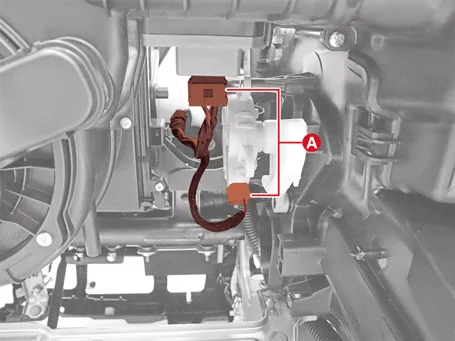
Disconnect the temperature control actuator and resistor connectors (A).
Disconnect the blower motor connector (A) and remove the wiring mounting clip.
Clip position :
Disconnect the intake actuator connector (A).
Remove the heater and blower unit.
Remove the heater and blower unit bolts. Tightening torque : 3.9 - 5,9 N·m (0.4 - 0.6 kgf·m, 2.9 - 4.3 lb·ft, 34.7 - 52.1 lb·in)
Remove the heater and blower unit (A) from the crash pad after removing the nuts. Tightening torque : 3.9 - 5,9 N·m (0.4 - 0.6 kgf·m, 2.9 - 4.3 lb·ft, 34.7 - 52.1 lb·in)
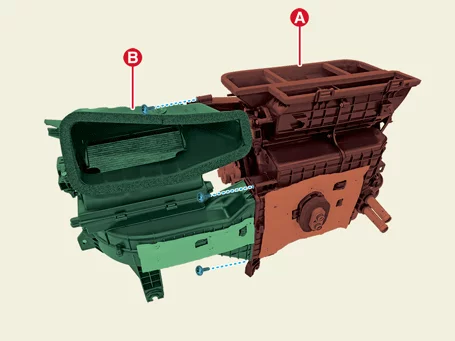
Separate the heater unit (A) and the blower unit (B) after removing the screws.
Installation
Install in reverse order of removal.
Perform refrigerant leak Test / vacuum / charging. (Refer to Air conditioning System - "Refrigerant Recovery/Recycling/Charging/Vacuum/Leak Test")
Perform the compressor oil inspection. (Refer to Air conditioning System - "Compressor Oil")
Heater Core Removal and Installation
Removal
Remove the blower unit from the heater unit. (Refer to Heater - "Heater Unit")
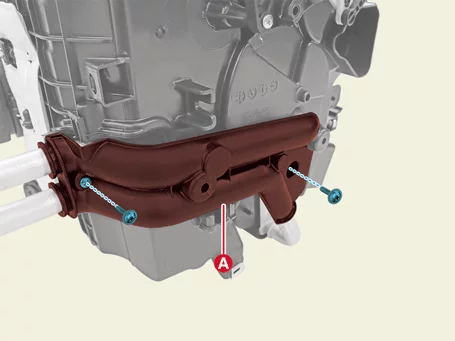
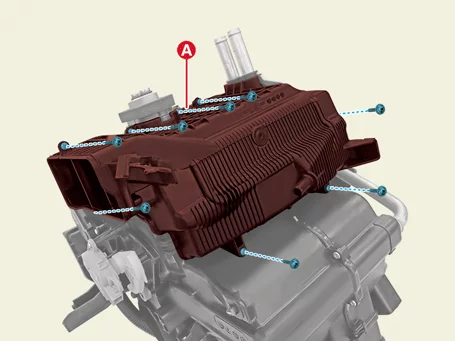
Remove the heater core cover (A) after removing the screws.
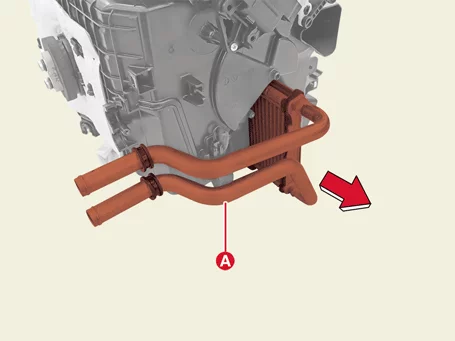
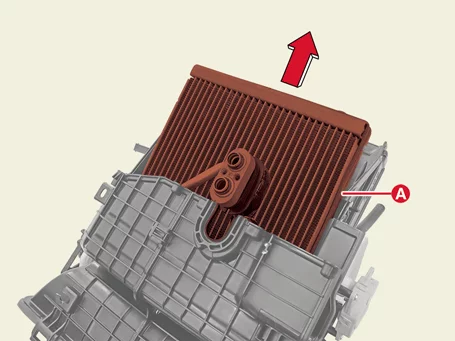
Remove the heater core (A) in the direction of the arrow.
Installation
Install in reverse order of removal.
Evaporator Core Removal and Installation
Removal
Remove the blower unit from the heater unit. (Refer to Heater - "Heater Unit")
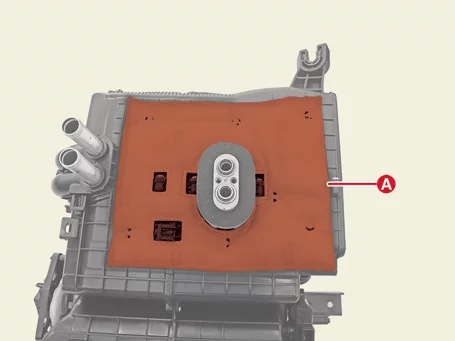
Remove the heater unit pad (A).
Separate the evaporator temperature sensor (A) in the direction of the arrow.
Remove the evaporator core cover (A) after removing the screws.
Remove the evaporator core (A) in the direction of the arrow.
Installation
Install in reverse order of removal.
Temperature Control Actuator Description and Operation
Description
The heater unit is equipped with a mode actuator and a temperature control actuator.
It is operated by a control switch and controls the position of the temperature control door to adjust the temperature of the discharge air.
Temperature Control Actuator Removal and Installation
Removal
Remove the crash pad center panel. (Refer to Body - "Crash Pad Lower Panel")
Remove the passenger's side shower duct (A) after removing the screw.
Disconnect the temperature control actuator connector (A).
Remove the temperature control actuator (A) after removing the screws.
Installation
Install in reverse order of removal.
Temperature Control Actuator Inspection
Inspection
Turn the IG OFF.
Disconnect the temperature control actuator connector.
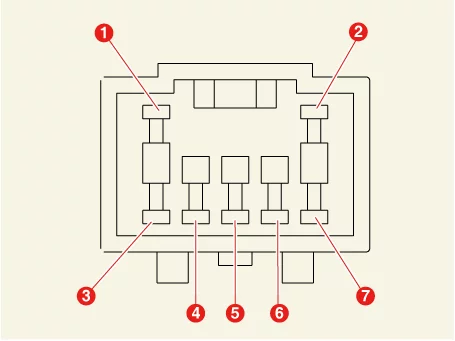
Connect the power ( + ) terminal to the 3 terminal of the actuator connector and the ( - ) terminal to the 4 terminal and check whether the actuator operates. When connecting in the opposite direction, check if it operates in reverse.
1. - 2. - 3. Cooling 4. Heating
5. Sensor Power (+5 V) 6. Feedback Signal 7. Sensor Ground
Connect the temperature control actuator connector.
Turn the IG ON.
Measure the terminal voltage between 6 - 7.
Door Position
Voltage (V)
Error Detection (V)
Maximum cooling
0.5 ± 0.15
Low voltage : 0.1 or below High voltage : above 4.9
Maximum heating
4.5 ± 0.15
* Feedback the current position of the actuator to the control.
If the measured voltage does not match with the specifications, replace it with a new temperature control actuator.
Mode Control Actuator Description and Operation
Description
The mode control actuator installed on the heater unit adjusts the wind direction mode of the air conditioner according to the input signal to the control panel by the driver.
It consists of an actuator motor that moves the mode door and a potentiometer that detects the position of the mode door. According to the operation of the control panel, the mode control actuator changes the wind direction mode in the order of Vent → Bi-Level → Floor → Mix.
Mode Control Actuator Removal and Installation
Removal
Remove the DC/DC Converter. (Refer to Engine Control / Fuel System - "DC/DC Converter")
Remove the driver's side shower duct (A) after removing the screw.
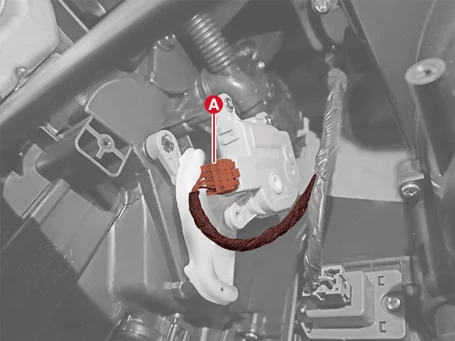
Disconnect the mode control actuator connector (A).
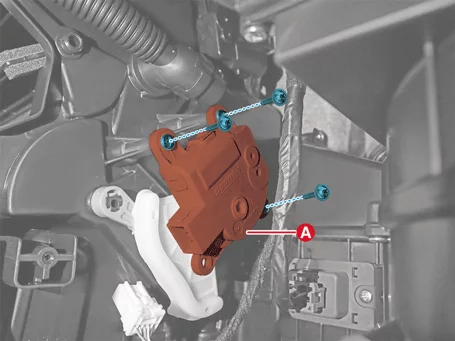
Remove the mode control actuator (A) after removing the screws.
Installation
Install in reverse order of removal.
Mode Control Actuator Inspection
Inspection
Turn the IG OFF.
Disconnect the mode control actuator connector.
Connect the power ( + ) terminal to the terminal 3 of the mode actuator connector and the ( - ) terminal to the terminal 4 and check whether the motor operates. When connecting in the opposite direction, check if it operates in reverse.
1. - 2. - 3. Defrost Mode 4. Vent Mode
5. Sensor Ground 6. Feedback Signal 7. Sensor Power (+5 V)
Connect the mode control actuator connector.
Turn the IG ON.
Measure the terminal voltage between 5 - 6.
Door Position
Voltage (V)
Error Detection (V)
Vent
0.5 ± 0.15
Low voltage : 0.1 or below High voltage : above 4.9
Defrost
4.5 ± 0.15
* Feedback the current position of the actuator to the control.
If the measured voltage does not match with the specifications, replace it with a new mode control actuator.
Auto defogging Actuator Description and Operation
Description
Auto defogging system is a system that detects and removes fogging in advance. It is equipped with an auto defogging actuator that detects fogging by a sensor and automatically operates the external air intake or air conditioning system to prevent fogging.
Auto defogging Actuator Removal and Installation
Removal
Remove the crash pad center panel. (Refer to Body - "Crash Pad Lower Panel")
Remove the passenger's side shower duct (A) after removing the screw.
Disconnect the auto defogging actuator connector (A).
Remove the auto defogging actuator (A) after removing the screws.
Installation
Install in reverse order of removal.
Auto defogging Actuator Inspection
Inspection
Turn the IG OFF.
Disconnect the auto defogging actuator connector.
Connect the power ( + ) terminal to the 3 terminal of the auto defogging actuator connector and the ( - ) terminal to the 4 terminal and check whether the motor is running. When connected in the opposite direction, check if it operates in reverse.
1. - 2. - 3. DEF (closed) 4. DEF (open)
5. Sensor Ground 6. Feedback Signal 7. Sensor Power (+5 V)
Connect the auto defogging actuator connector.
Turn the IG ON.
Measure the terminal voltage between 5 - 6.
Door Position
Voltage (V)
Error Detection (V)
DEF closed
0.5 ± 0.15
Low voltage : 0.1 or below
DEF open
4.5 ± 0.15
High voltage : above 4.9
* Feedback the current position of the actuator to the control.
If the measured voltage does not match the specifications, replace it with a new auto defogging actuator.