Gauges and meters
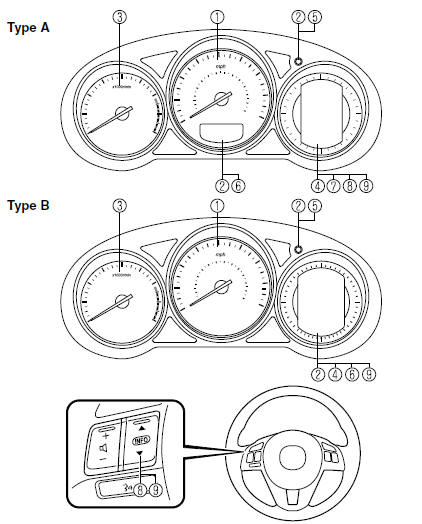
- Speedometer
- Odometer, trip meter and trip meter select button
- Tachometer
- Fuel gauge
- Instrument panel illumination
- Outside temperature display
- Cruise control set speed display (Instrument panel type A)
- Maintenance reminder (Instrument panel type A)
- Trip computer and INFO switch
Speedometer
The speedometer shows the vehicle speed.
Odometer, trip meter and trip meter select button
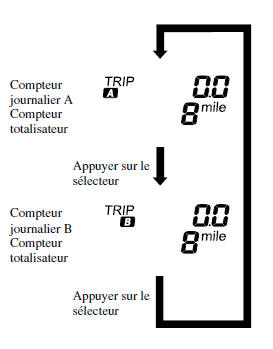
The display mode can be switched between trip meter A and trip meter B by pressing the select button while either one is displayed. The selected mode will be displayed.
Type A
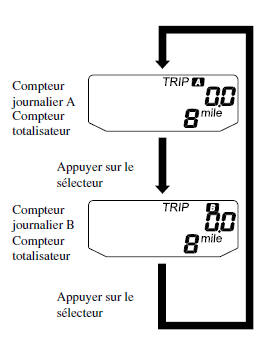
Type B
NOTE
When the ignition switch is in ACC or OFF, the odometer and trip meters cannot be displayed; however, if the select button is pressed by mistake, the trip meters may be switched or reset within approximately ten minutes in the following cases:
- Once the ignition switch is turned from ON to OFF
- After the driver's door is opened.
Odometer
The odometer records the total distance traveled by the vehicle.
Trip meter
The trip meter can record the distance traveled for two trips. One is recorded in trip meter A, and the other in trip meter B.
For example, trip meter A can record the distance from a starting point, and trip meter B the distance from the last time the fuel tank was filled.
When trip meter A is selected, pressing the select button again within one second will change the display to trip meter B.
When trip meter A is selected, TRIP A will be displayed. When trip meter B is selected, TRIP B will be displayed.
The trip meter records the distance traveled by the vehicle until the meter is reset. To reset the meter to "0.0", press and hold the select button for one second or longer. This meter can be used to calculate the distance traveled during a trip or the fuel consumption.
NOTE
- Only the trip meters record tenths of a kilometer (mile).
- The trip meter records will be reset when:
- Power is interrupted (the fuse blows or the battery is disconnected).
- The vehicle reaches 9999.9 kilometers (miles).
Tachometer
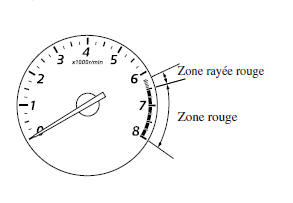
The tachometer shows the engine speed in thousands of revolutions per minute (r/min = rpm).
WARNING
Do not run the engine speed into the RED ZONE on the tachometer.
This may damage the engine.
NOTE
When the tachometer needle enters the HATCHED ZONE, it indicates to the driver that a gear change is needed before reaching the RED ZONE.
Fuel gauge
The fuel gauge shows the approximate amount of fuel remaining in the tank when the ignition switch is in ON. It is recommended to keep the tank more than 1/4 full.
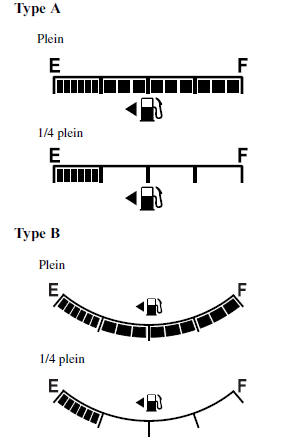
When the low fuel warning light comes on or the fuel level is very low, refuel as soon as possible.
Refer to Indicator and Warning Lights on page 4-24.
NOTE
- After refueling, it may take some time for the gauge to settle. Also, the gauge may fluctuate when driving on a slope or through a curve, due to fuel movement inside the tank.
- The direction of the arrow (

) indicates that the fuel filler door is on the left side of the vehicle.
Instrument panel illumination
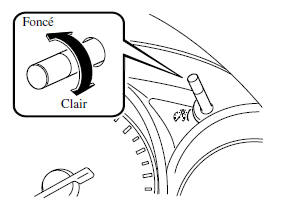
Turn the control to adjust the brightness of the instrument cluster and other instrument panel lights.
NOTE
- The brightness of the instrument panel lights can be adjusted when the headlights and parking lights are on.
- When the brightness of the instrument panel lights can no longer be adjusted further, a beep will sound.
Dimmer cancellation
When the headlight switch is in the position or
 , the illumination
of the instrument cluster decreases.
When driving on snowy roads or in fog, or in any other situation where the visibility of the instrument cluster is reduced due to reflection of ambient light, cancel the dimmer and increase the illumination brightness.
To cancel the dimmer function, turn the thumbwheel fully clockwise.
A beep sounds and the instrument panel dimmer function is canceled.
- NOTE
- This symbol (
 ) indicates
the control for adjusting the brightness of the instrument panel illumination. - If the instrument panel illumination button is held in the dimmer cancel position, the brightness of the instrument cluster will not decrease when the headlight switch is returned to the
 or
 position. Turn the
instrument panel illumination control counterclockwise to activate the dimmer function.
Outside temperature display
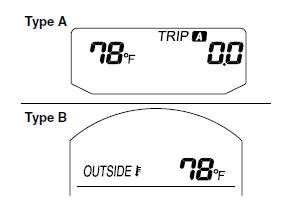
When the ignition switch is in ON, the outside air temperature is displayed.
NOTE
Under the following conditions, the displayed outside air temperature may differ from the actual outside air temperature depending on the vehicle's surroundings and vehicle conditions:
- Extremely cold or hot temperatures.
- Sudden changes in outside air temperature.
- The vehicle is stopped.
- The vehicle is being driven at low speed.
(Type B instrument panel) The outside air temperature unit can be switched between Celsius and Fahrenheit using the following procedure.
- With the ignition switch off, press and hold the INFO button for 5 seconds or more while turning the ignition switch to ON.

or lower
 side of the INFO switch
to change the outside air temperature unit.
Vehicle Speed Set by Cruise Control Display (Type A Instrument Panel)
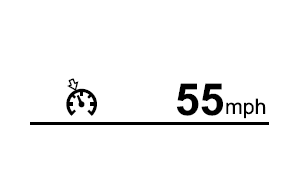
The preset vehicle speed set using the cruise control is displayed.
Maintenance reminder (Instrument panel type A)
The following maintenance reminders can be displayed by activating the maintenance reminder.
- Maintenance schedule
- Tire Rotation
- Tire pressure
The maintenance reminder displays information when the engine is switched to ON.
NOTE
This function does not operate while the vehicle is moving.
Initial Setting Method
- Press the upper

or lower Press the upper or lower side of the INFO switch
to select Settings, then press the INFO button. - Press the upper

or lower Press the upper or lower side of the INFO switch
to select Maintenance, then press the INFO button. - Press the upper

or lower Press the upper or lower side of the INFO switch
to select the item you want to activate, then press the INFO button.
- Schedule
- Tire Rotation
- Tire Pressure
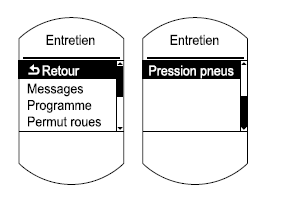
NOTE
For the Maintenance Schedule item, both the distance and days intervals can be set. For items other than Maintenance Schedule, either the distance interval or the days interval can be set.
- Press the upper
 or lower
 Press the upper or lower side of the INFO switch
to select Set Time or Set Km, then press the INFO button. The screen for setting the distance or days interval until the next maintenance is displayed.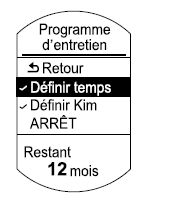
- Press the upper

or lower Press the upper or lower side of the INFO switch
to change the distance interval or days interval setting, then press the INFO button. If no change is needed, press the INFO button.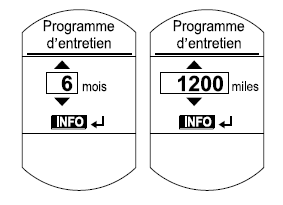
NOTE
- The initial setting values are displayed according to the maintenance schedule (except for some countries). For details on each regional maintenance schedule, refer to Scheduled Maintenance on page 6-4.
 is displayed on the
items that have been set.
Message Display
When the remaining distance or days approach 0, a message is displayed each time the ignition switch is turned to ON.
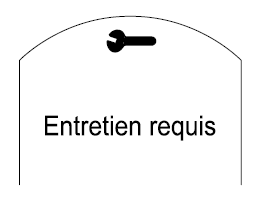
NOTE
- If the INFO switches (upper
 , lower
 ) or the INFO button are pressed while a message is displayed, that message will not appear the next time the ignition switch is turned to ON.
- Once maintenance work on the vehicle has been completed and the remaining days/distance have been reset, the message for the next maintenance will appear when the remaining distance or days until the next maintenance approaches 0 (displayed when the engine is started).
- If there are multiple messages, they are displayed in order.
- Messages are not displayed if OFF has been set for Messages.
Message Display
Item |
Message Display Condition |
Message Displayed |
| Maintenance schedule | When the remaining distance is less than 500 km (250 miles), or the remaining days are less than 15 (whichever occurs first) | Maintenance Required |
| Tire Rotation | When the remaining distance is less than 500 km (250 miles) | Tire Rotation Required |
| Tire pressure | When the remaining days are less than 15 | Tire Inflation Required |
Reset Method
If the reset is performed after maintenance has been completed, a reminder for the next maintenance will be displayed when it approaches.
- Press the upper

or lower Press the upper or lower side of the INFO switch
to select Settings, then press the INFO button. - Press the upper

or lower Press the upper or lower side of the INFO switch
to select Maintenance, then press the INFO button. - Press the upper

or lower Press the upper or lower side of the INFO switch
to select the item you want to reset from the following, then press the INFO button.
- Schedule
- Tire Rotation
- Tire Pressure
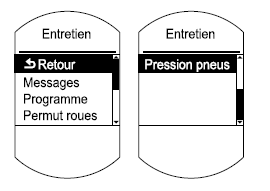
NOTE
- The current remaining distance and days are displayed.
- Even if the remaining distance or days have exceeded 0, no minus sign (-) appears and the value remains at 0.
- Press the upper

or lower Press the upper or lower side of the INFO switch
to select Set Time or Set Km, then press the INFO button. The remaining distance and days values return to the previously set values. If no change is needed, press the INFO button.
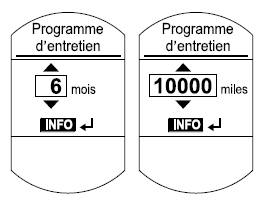
NOTE
- If the settings are changed from the initial values, the values you set will be displayed, not the initial values.
- Even if the battery is disconnected, the distance and days remaining information is not erased.
How to turn the system off
The maintenance reminder can be turned off, even after it has been turned on. If it is turned off, the calculation of the distance and days remaining until the next maintenance interval will stop, and no message will appear to indicate that a maintenance interval is approaching.
- Press the upper

or lower Press the upper or lower side of the INFO switch
to select Settings, then press the INFO button. - Press the upper

or lower Press the upper or lower side of the INFO switch
to select Maintenance, then press the INFO button. - Press the upper

or lower of the
INFO switch to select the item you want to turn off from the following, then press the INFO button.
- Schedule
- Tire Rotation
- Tire Pressure
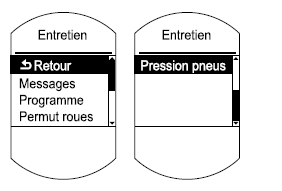
- Select OFF, then press the INFO button.

Trip computer and INFO switch
The following information can be selected by pressing the upper part or lower part
 of the
INFO switch with the ignition switched to ON.
- The approximate distance that can be driven with the remaining fuel.
- The average fuel consumption.
- The current fuel consumption.
- The average vehicle speed.
- Lane Departure Warning System (LDWS) display (Type A instrument panel)
- Mazda Radar Cruise Control (MRCC) display (Type A instrument panel)
- Settings (Type A instrument panel)
- Warning (Type A instrument panel)
If there is a problem with the trip computer, contact an authorized Mazda dealer.
Distance to empty mode
This function displays the approximate distance that can be driven with the remaining fuel, based on fuel consumption.
The distance to empty is calculated and displayed every second.
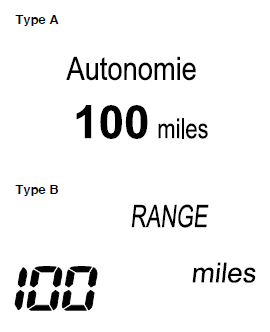
NOTE
- Even if the distance to empty display indicates a sufficient driving distance before refueling is required, refuel as soon as possible if the fuel level is very low or the low fuel warning light comes on.
- The display will only change if approximately 10 liters (2.6 US gal, 2.2 Imp gal) or more of fuel is added.
- The distance to empty is the approximate remaining distance the vehicle can be driven until all of the fuel level gauge segments indicating remaining fuel disappear.
Average fuel consumption mode
This mode displays the average fuel consumption by calculating the total amount of fuel consumed and the total distance driven since the vehicle was purchased, the battery was reconnected after being disconnected, or the data was reset.
The average fuel consumption is calculated and displayed every minute.
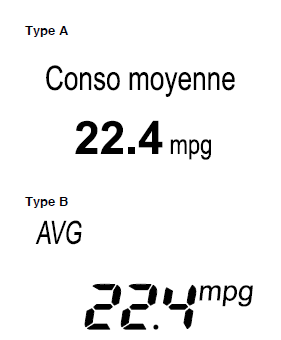
To clear the displayed data, press and hold the INFO button for more than 1.5 seconds.
After pressing the INFO button, - - - L/100 km (- - - mpg) is displayed for approximately 1 minute before the fuel economy is recalculated and displayed.
Current fuel consumption mode
This mode displays the current fuel consumption by calculating the amount of fuel consumed and the distance driven.
The current fuel consumption is calculated and displayed every 2 seconds.
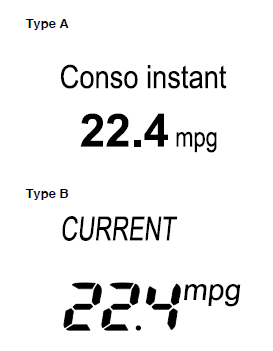
When the vehicle has slowed to approximately 5 km/h, - - - L/100 km (- - - mpg) is displayed.
Average vehicle speed mode
This mode displays the average vehicle speed by calculating the distance and time driven since the battery was reconnected or the data was reset.
The average vehicle speed is calculated and displayed every 10 seconds.
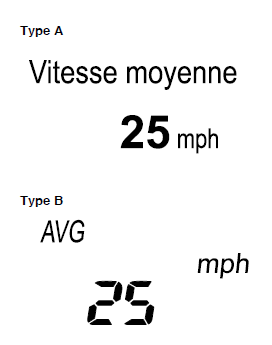
To clear the displayed data, press and hold the INFO button for more than 1.5 seconds. After pressing the INFO button, - - - km/h (- - - mph) will be displayed for 1 minute before the vehicle speed is recalculated and displayed.
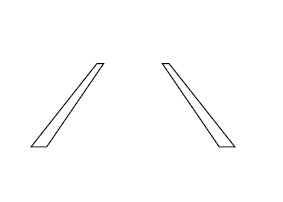
Lane Departure Warning System (LDWS) display (Type A instrument panel)*
Lane Departure Warning System (LDWS) information is displayed.
Refer to Lane Departure Warning System (LDWS) on page 4-134.
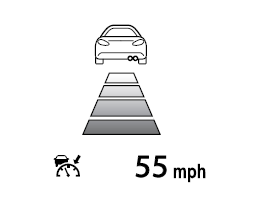
Mazda Radar Cruise Control (MRCC) display (Type A instrument panel)*
Mazda Radar Cruise Control (MRCC) information is displayed.
Refer to Mazda Radar Cruise Control (MRCC) on page 4-104.
Settings (Type A instrument panel)
The following settings can be changed (settings cannot be changed while driving, as the settings are not displayed):
- Resetting
- Smart City Brake Support (SCBS)
- Lane Departure Warning System (LDWS)
- Blind Spot Monitoring (BSM) system
- Maintenance
- Optional display
- Volumes
- Units
- Language
- Restore defaults
To change settings
- Press the upper

or lower of the INFO switch and
select Settings, then press the INFO button. - Press the upper

or lower of the INFO switch
to select the item you want to change, then press the INFO button. - Press the upper

or lower of the INFO switch and
select the desired setting, then press the INFO button.
Caution (display indication) (Type A instrument panel)
A message is displayed to alert the driver of the system's operating status and of malfunctions or abnormalities.
Check the message displayed.
Test yourself
A quick Mazda 6 quiz: every answer comes with an explanation and a link to the manual page.