Control Valve & Tcm
Exploded View
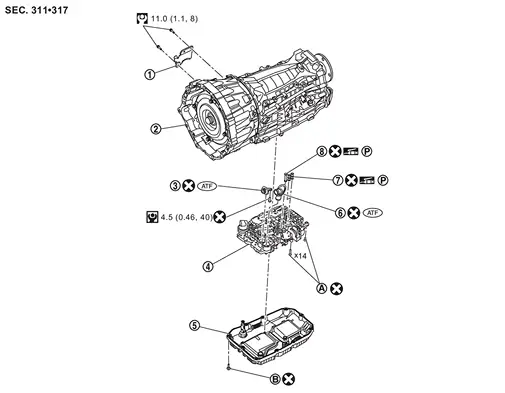
 |
Heat shield |  |
A/T assembly |  |
Joint tube |
 |
Control valve & TCM |  |
Oil pan |  |
Joint tube |
 |
Joint tube |  |
Tube | ||
 |
Refer to Removal and Installation. |  |
Refer to Removal and Installation. | ||
 |
: N·m (kg-m, ft-lb) | ||||
 |
: N·m (kg-m, in-lb) | ||||
 |
: Always replace after every disassembly. | ||||
 |
: Apply ATF | ||||
 |
: Apply petroleum jelly. | ||||
Removal and Installation
REMOVAL
Remove oil pan. Refer to Removal and Installation.
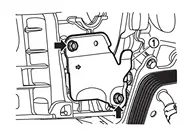
Remove heat shield mounting bolts ( ) and heat shield .
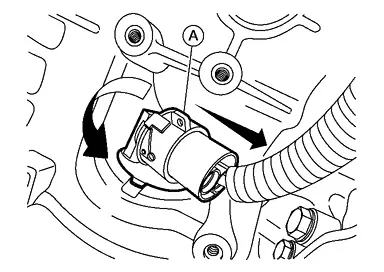
Disconnect harness connector from control valve & TCM.
Remove control valve & TCM mounting bolts and from the control valve & TCM.
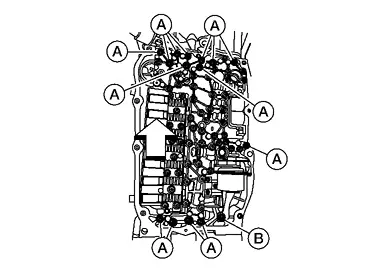
| : vehicle front |
| Bolt symbol | Length mm (in) | Number of bolts |
|---|---|---|
| A | 32 (1.26) | 14 |
| B | 18 (0.71) | 1 |
Insert RQ transmission guide pins (SST: NI–52983) (B) to A/T assembly using holes .
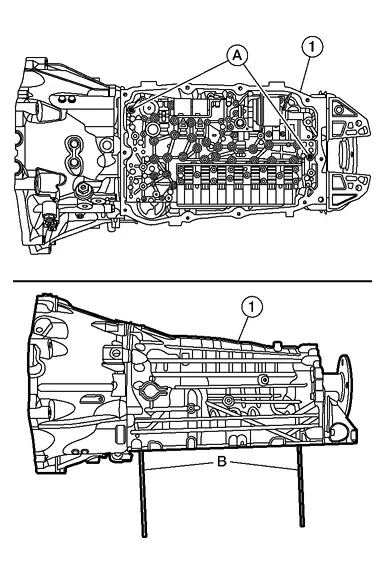
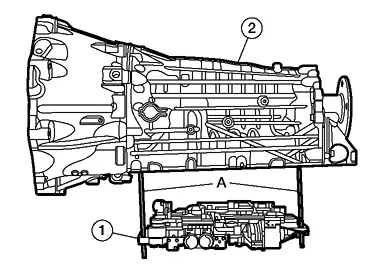
Remove the control valve & TCM from the A/T assembly using RQ transmission guide pins (SST: NI–52983) (A).
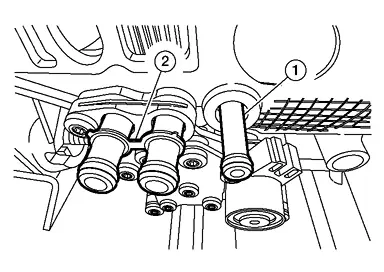
Remove joint tubes and .
INSTALLATION
Note the following, and install in the reverse order of removal.
Refer to the following when installing the control valve & TCM to transmission case.
Install joint tubes and .
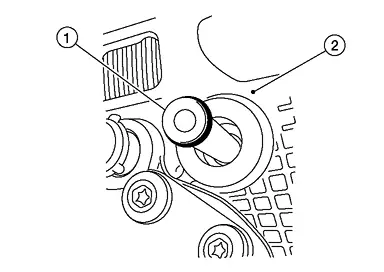
Install RQ transmission guide pins (SST: NI–52983) (A) to the A/T assembly as shown.

Install the control valve TCM to the A/T assembly using RQ transmission guide pins (SST: NI–52983) (A).
Hand tighten control valve & TCM bolts before removing guide pins (commercial service tool).
| : vehicle front |
| Bolt symbol | Length mm (in) | Number of bolts |
|---|---|---|
| A | 32 (1.26) | 14 |
| B | 18 (0.71) | 1 |
Replace RQ transmission guide pins (SST: NI–52983) (A) with control valve & TCM bolts.
Install the control valve & TCM bolts and , then tighten to the specification shown.
| Step 1 | : Tighten 4 N·m |
| Step 2 | : Tighten 95° |
Inspection and Adjustment
INSPECTION AFTER REMOVAL
Check foreign materials in oil pan to help determine causes of malfunction. If the A/T fluid is very dark, smells burned, or contains foreign particles, the frictional material (clutches) may need replacement. A tacky film that will not wipe clean indicates varnish build up. Varnish can cause valves and clutches to stick and can inhibit pump pressure.
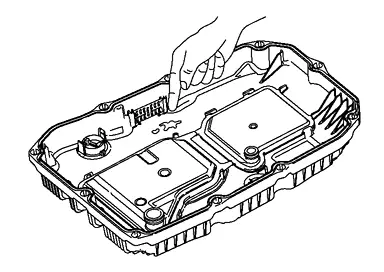
If frictional material is detected, perform A/T fluid cooler cleaning. Refer to Cleaning.
INSPECTION AFTER INSTALLATION
Start the engine and check visually that there is no leakage of A/T fluid.
ADJUSTMENT AFTER INSTALLATION
When replaced the control valve & TCM, perform “ADDITIONAL SERVICE WHEN REPLACING CONTROL VALVE & TCM”. Refer to Description.