Removal
REMOVAL
PRECAUTION / NOTICE / HINT
The procedures required (adjustment, calibration, initialization or registration) that must be performed after the parts have been removed and installed or replaced during removal/installation of the headlight assembly are listed below.
Procedure Required After Replacing / Removing / Installing PartsReplacement part or procedure | Necessary Procedures | Effects / Inoperative Function When Necessary Procedure Not Performed | Link |
|---|---|---|---|
Left Headlight ECU Subassembly |
|
Automatic Headlight Leveling System |
 |
NOTICE:
If the right headlight assembly is replaced with a new part, registration and initialization of vehicle information is not required.
HINT:
- Repeat the same procedure for the right side and the left side.
- The following procedure applies to the left side.
PROCEDURE
1. REMOVE FRONT BUMPER ASSEMBLY
Click here
2. REMOVE HEADLAMP ASSEMBLY
(a) Apply protective tape around the headlamp assembly as shown in the illustration.
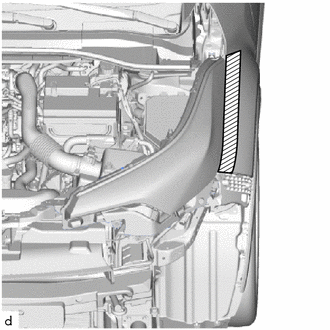
 |
Protective tape |
(b) Release the claw, then pull the connector lock lever down as shown in the illustration to disconnect the connector.
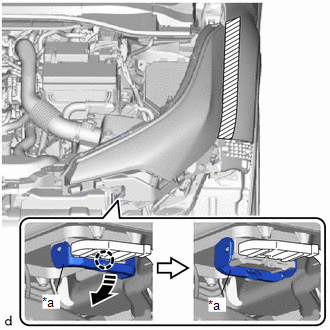
*a |
Connector Lock Lever |
 |
Remove in this direction |
(c) Remove the bolt and 3 screws. |
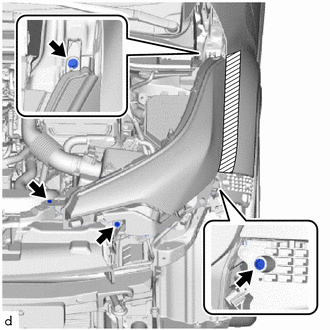 |
(d) Remove the headlamp assembly as shown in the illustration.
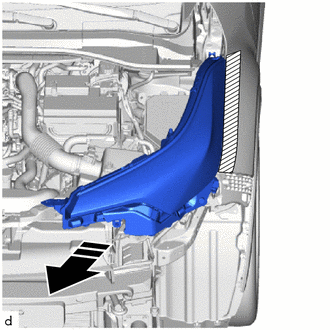
|
Remove in this direction |