Installation
INSTALLATION
PROCEDURE
1. INSTALL STOP LIGHT SWITCH ASSEMBLY
(a) Insert the stop light switch assembly until the threaded sleeve contacts the pedal. NOTICE: When inserting the stop light switch assembly, support the pedal from behind to prevent depressing the pedal. |
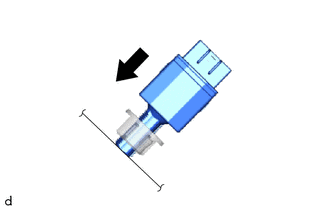 |
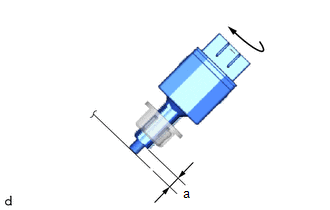
(b) Turn the stop light switch assembly 1/4 turn clockwise to install it. Torque: 1.5 N*m (15 kgf*cm, 13 lbf*in) maximum NOTICE: When inserting the stop light switch assembly, support the pedal from behind to prevent depressing the pedal. |
 |
(c) Connect the connector.
(d) Check the protrusion of the plunger.
Plunger piston protrusionArea | Measurement |
|---|---|
a |
0.6 to 2.6 mm (0.0236 to 0.102 in.) |
(e) If the protrusion is not as specified, reinstall the stop light switch assembly and adjust the brake pedal if necessary.
Click here
NOTICE:
Do not depress the brake pedal.
2. INSTALL NO. 1 AIR DUCT
Click here
3. INSTALL NO. 1 INSTRUMENT PANEL LOWER COVER SUB-ASSEMBLY
Click here
4. INSTALL LEFT COWL SIDE TRIM BOARD
Click here
5. INSTALL LEFT FRONT DOOR SILL PLATE
Click here