High beam headlamps (vehicles with diesel engines)
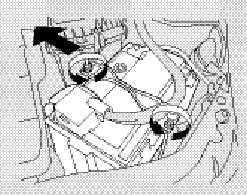
1. Open the hood.
To replace the left bulb, remove the nut from the battery post, then move the battery forward toward the windshield to make room for work.
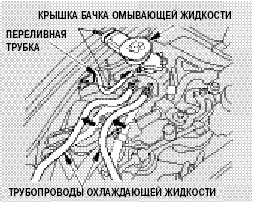
To replace the right bulb, remove the upper part of the washer fluid reservoir.
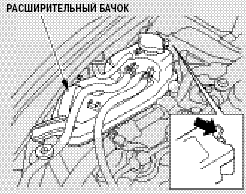
Disconnect the coolant hoses from the two clips, disconnect the overflow hose from the expansion tank, then remove the expansion tank by pressing the tab and pulling the tank upward.
Make sure the engine and radiator have cooled down.
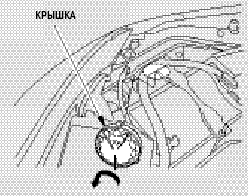
2. Remove the headlamp unit rear cover by turning it counterclockwise.
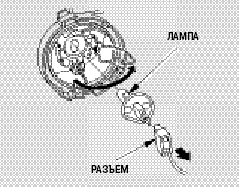
3. Disconnect the electrical connector from the bulb.
To do this, grasp the connector housing and pull it toward the rear of the vehicle.
4. Release the wire retaining clip.
Turn it until it stops and remove the bulb socket.
5. Insert the new bulb into the socket so that the tabs on the base engage the corresponding slots. Return the wire clip to its original position and snap its end into place.
6. Insert the plug connector into the electrical connector of the new bulb. Make sure it is securely locked.
7. Install the headlamp unit rear cover by turning it clockwise to lock it in place.
8. Turn on the headlamps to check the new bulb.
9. On the left side:
Return the battery to its original position, start the nut on the post, and tighten it securely.
On the right side:
Install the expansion tank in its holder and route the cooling system hoses into place. Securely attach the overflow hose to the expansion tank. Install the upper part of the expansion tank.
Test yourself
A quick Honda Civic quiz: every answer comes with an explanation and a link to the manual page.