Multifunction Switch
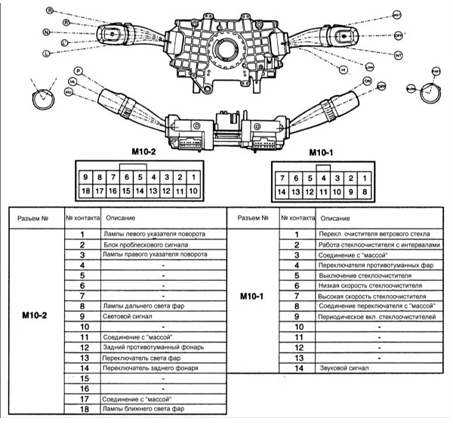
Multifunction Switch
Removal and installation
Vehicles Without Airbag
PROCEDURE
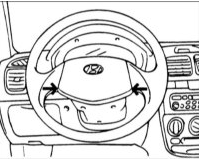
1. Remove the horn button and the steering wheel.
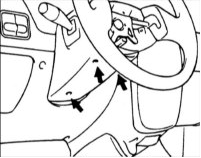
2. Remove the upper and lower steering column covers.
3. Remove the screws and the combination switch.
4. To install, reverse the removal procedure.
Vehicles with Airbag
When removing the combination switch on vehicles equipped with an airbag, be careful and observe the following precautions.
Do not disassemble any SRS airbag system component. Disassembling the components may render the airbag system inoperative.
Do not allow solvents or cleaning agents to contact the airbag.
Carry the airbag module separately, with the pad facing up.
If any SRS component has been dropped or has cracks, dents or other defects in the case, bracket or connector, replace it with a new one.
Do not hold the airbag module with your hands on the pad when carrying it.
Do not heat the airbag module to temperatures above 93 °C.
After the airbag has deployed, replace the clock spring with a new one.
Before installing the airbag clock spring, align the mark and the neutral position indicator of the clock spring with the front wheels set in the straight-ahead position. If the clock spring mark is not properly aligned, the steering wheel will not turn fully or the clock spring wire may be damaged, interfering with normal SRS operation.
PROCEDURE
1. Disconnect the negative battery cable.
Before servicing the airbag system, make sure that at least 30 seconds have passed after turning the ignition off and disconnecting the negative battery cable.
The airbag system is equipped with a backup power source that allows the airbags to deploy in a crash if the battery cables are disconnected.
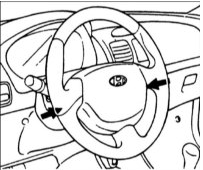
2. Remove the airbag module mounting bolts. Disconnect the horn and airbag connectors and remove the airbag module.
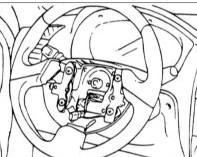
3. Remove the steering wheel.
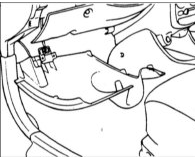
4. Remove the driver knee bolster.
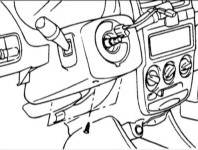
5. Remove the screws and the upper and lower steering column covers.
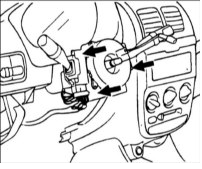
6. Remove the screws and the combination switch.
7. To install, reverse the removal procedure.
Inspection
With the combination switch in each position, check continuity between the corresponding connector terminals. If continuity does not match the specification, replace the combination switch.
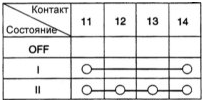
Light Switch (Connector M10–2)
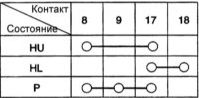
Headlight Switch (Connector M10–2)
HU: High beam headlights
HL: Low beam headlights
P: Parking lights
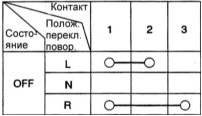
Turn Signal Switch (Connector M10–2)
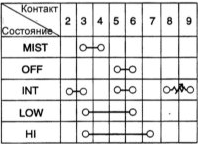
Wiper Switch (Connector M10–1)
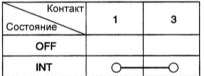
Washer Switch (Connector M10–1)
Test yourself
A quick Hyundai Accent quiz: every answer comes with an explanation and a link to the manual page.