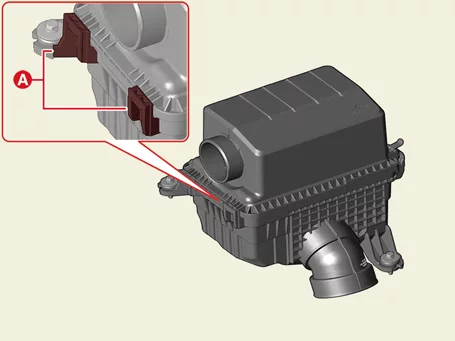
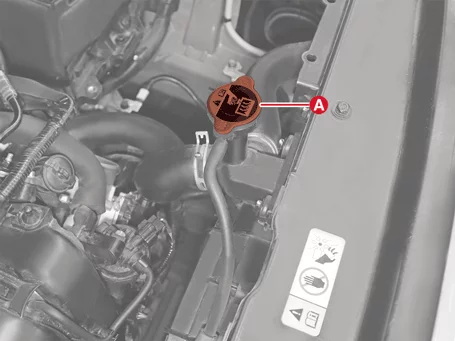
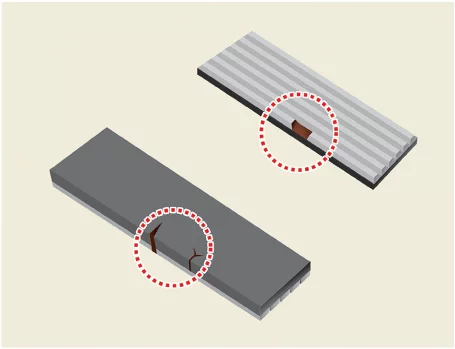
Check the coolant level in the coolant reservoir. Make sure it is between the "F" mark and "L" mark.
If the coolant level in the coolant reservoir is at or below the "L" mark, add coolant to bring it between the "L" and "F" marks, then inspect the cooling system for leaks.
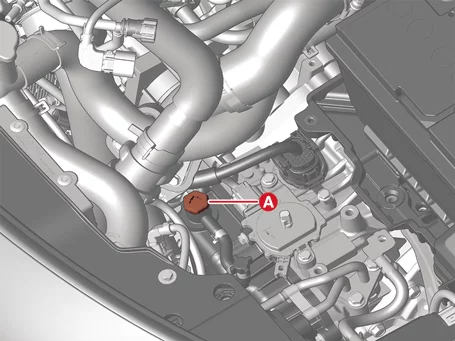
Remove the pressure cap.
Check if there are any excessive deposits of rust or scale around the radiator cap sub-assembly and radiator filler hole. Also, the coolant should be free of oil. If excessively dirty, clean the coolant passage and replace the coolant.
When replenishing coolant, be careful not to spill on the belt, electrical devices.
Make sure the engine and radiator are cool to the touch.
Remove the pressure cap (A).
Remove the engine room under cover. (Refer to Engine and Transaxle Assembly - "Engine Room Under Cover")
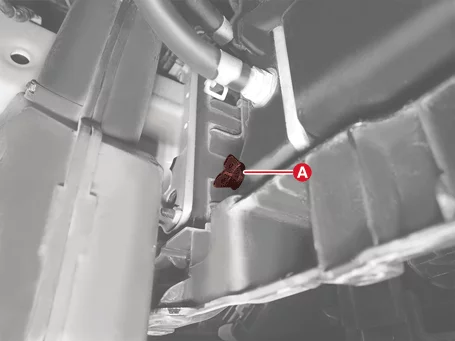
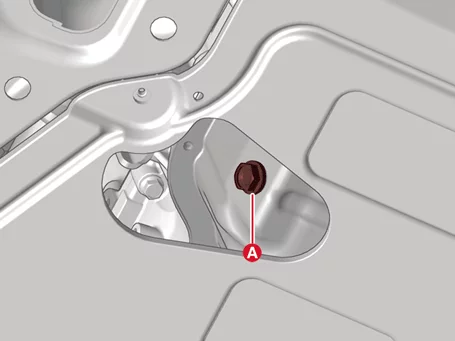
Remove the drain plug (A) and drain the coolant.
After draining the coolant, re-tighten the drain plug.
Drain coolant and inside the reservoir tank, and then clean it.
Install the coolant refill tank on the radiator and then add the mixture of anti-freeze and water (55 - 60%).
Fill coolant as far as possible with engine and all power supplies shut off.
Coolant capacity : Approx. 6.0 ℓ (1.58 US gal., 6.34 US qt., 5.27 lmp qt.)
Press the radiator upper/lower hoses to allow air to escape easily.
Use only genuine antifreeze.
Do not mix antifreeze/coolant from different brands.
Do not add any anti-rust.
Use only distilled water when mixing antifreeze with water.
For best corrosion protection, the coolant concentration must be maintained year-round at 55% minimum. Coolant concentrations less than 55% may not provide sufficient protection against corrosion or freezing.
Coolant concentrations greater than 60% will impair cooling efficiency and are not recommended.
Start the engine and run until coolant circulates. When the cooling fan operates and coolant circulates, refill coolant through the reservoir tank.
Repeat step 12 until the cooling fan operates 3 - 5 times and bleed air sufficiently out of the cooling system.
Fill the reservoir tank to the "MAX" (or "FULL") line with coolant and tighten the pressure cap.
Install the engine room under cover. (Refer to Engine and Transaxle Assembly - "Engine Room Under Cover")
Drive Belt Inspection
Inspection
Check belt for maintenance and abnormal wear of V-ribbed part. Replace if necessary.
Do not bend, twist or turn the drive belt inside out.
Do not allow the drive belt to come into contact with oil, water and steam.
Visually check the belt for excessive wear, frayed cords etc. If any defect has been found, replace the drive belt.
Cracks on the rib side of a belt are considered acceptable. If the belt has chunks missing from the ribs, it should be replaced.
Drive Belt Removal and Installation - G 1.6 T-GDI GAMMA ll
Removal and Installation
There are two ways to remove the drive belt.
[When removing the drive belt from the upper of the vehicle]
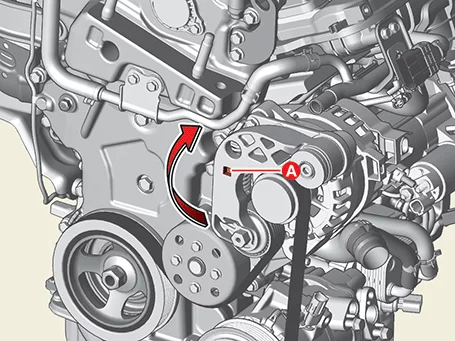
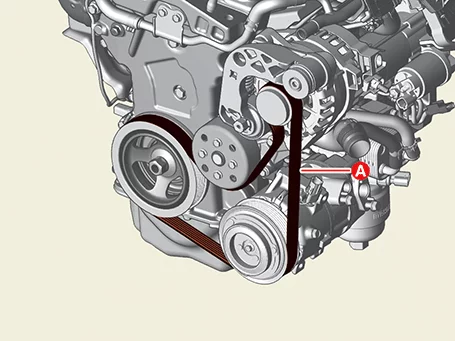
After installing the wrench in the drive belt tensioner maintenance hole (A), turn it clockwise.
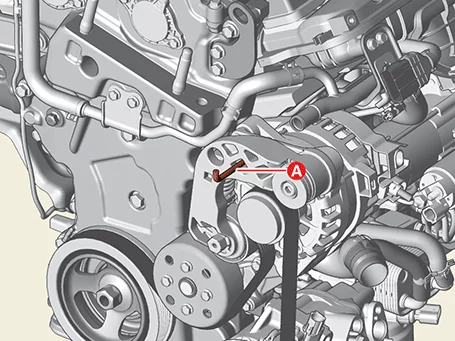
After turning the drive belt tensioner clockwise, install the retaining pin (A) to secure the drive belt tensioner.
For the fixing pin, use a 6mm hexagon wrench or a pin with the same outer diameter as a 6mm hexagon wrench.
Remove the drive belt (A).
When removing the drive belt, remove the drive belt from the water pump pulley.
Install in reverse order of removal.
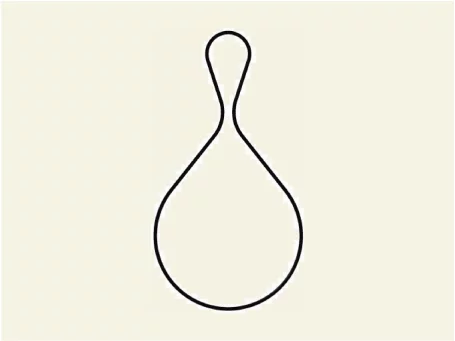
When installing the drive belt, make the drive belt into a larger circular ring shape than the alternator pulley as shown in the figure below, and then install the alternator → air conditioner compressor → crankshaft damper pulley → water pump → drive belt tensioner.
[When removing the drive belt from the Lower of the vehicle]
Remove the engine compartment under cover. (Refer to Engine and Transaxle Assembly - "Engine Room Under Cover")
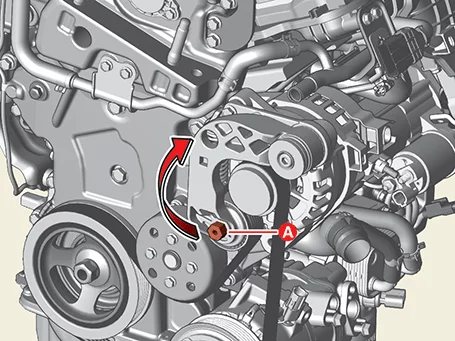
Install the spanner on the drive belt tensioner arm boss (A) and turn it clockwise.
After turning the drive belt tensioner clockwise, install the retaining pin (A) to secure the drive belt tensioner.
For the fixing pin, use a 6mm hexagon wrench or a pin with the same outer diameter as a 6mm hexagon wrench.
Remove the drive belt (A).
When removing the drive belt, remove the drive belt from the water pump pulley.
Install in reverse order of removal.
When installing the drive belt, make the drive belt into a larger circular ring shape than the alternator pulley as shown in the figure below, and then install the alternator → air conditioner compressor → crankshaft damper pulley → water pump → drive belt tensioner.
Drive Belt Removal and Installation - G 2.0 MPI NU
Removal
Turn the auto tensioner pulley (A) counterclockwise using a wrench and insert the stopper pin (B) into the hole.
Remove the drive belt (A).
Installation
Install in reverse order of removal.
Engine Oil and Filter Inspection
Inspection
Check the engine oil quality. Check the oil deterioration, entry of water, discoloring of thinning. If the quality is visibly poor, replace the oil.
Check the engine oil level. After engine warm up stop the engine wait 5 minutes then check the oil level. Oil level should be between the "L" and "F" marks on the dipstick. If low check for leakage and add oil up to the "F" mark.
Do not fill with engine oil above the "F" mark.
Check the oil level gauge when the engine oil is on normal tempeature (20 °C ~ 25 °C).
The tire pressure should be in the specification range.
Make sure the road surface is flat when measuring engine oil.
When draining engine oil, check the total amount of drained oil and refill.
Engine Oil and Filter Replacement - G 1.6 T-GDI GAMMA ll
Oil And Filter Replacement
Never use any additives to engine oil, as they can change the properties of engine oil which can cause serious engine failure.
Prolonged and repeated contact with mineral oil will result in the removal of natural fats from the skin, leading to dryness, irritation and dermatitis. In addition, used engine oil contains potentially harmful contaminants which may cause skin cancer.
Exercise caution in order to minimize the length and frequency of contact of your skin to used oil. Wear protective clothing and gloves. Wash your skin thoroughly with soap and water, or use water-less hand cleaner, to remove any used engine oil. Do not use gasoline, thinners, or solvents.
In order to preserve the environment, used oil and used oil filter must be disposed of only at designated disposal sites.
Drain the engine oil.
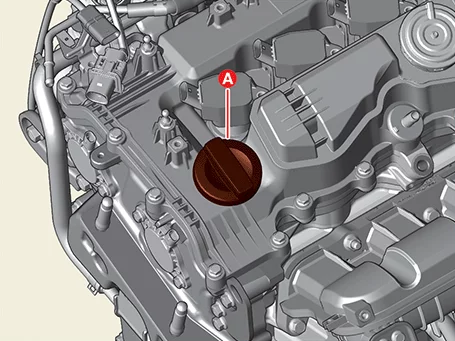
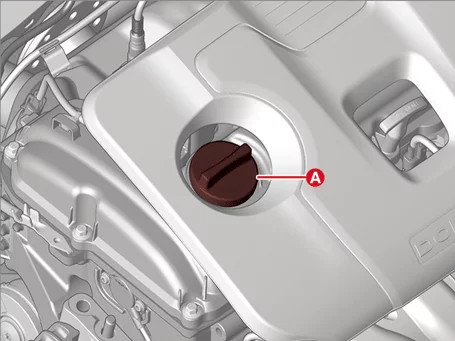
Open the oil filler cap (A).
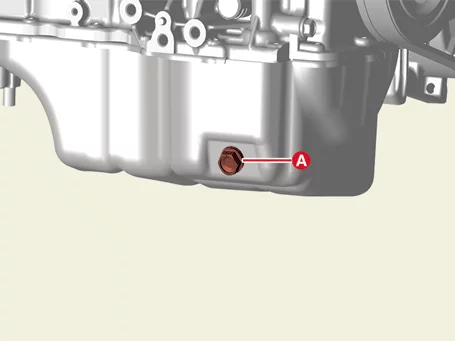
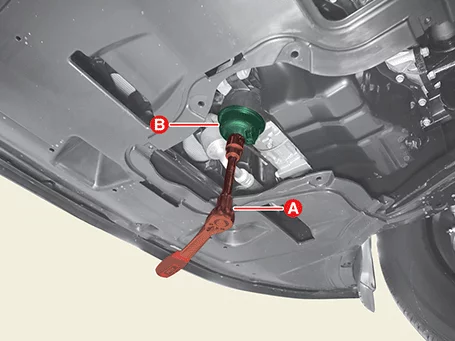
Remove the drain plug (A) and then drain the oil.
Replace the oil filter.
Remove the safety pin (A).
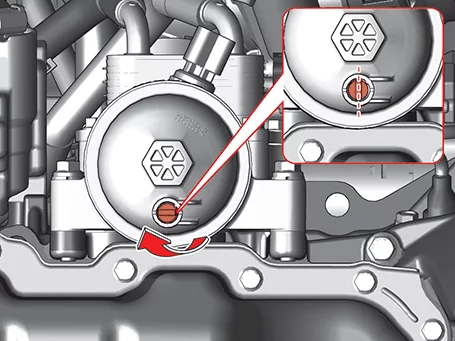
Remove the free drain plug (A) by rotating it 90° and drain the engine oil from the oil filter.
Remove the oil filler cap (B) using a socket wrench (A).
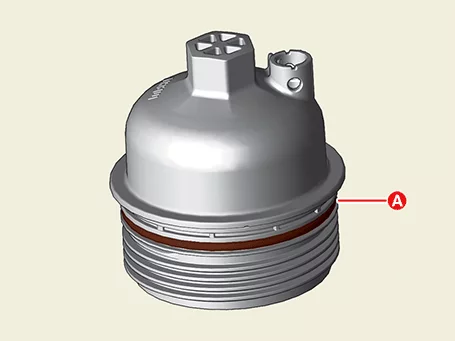
Install the new O-ring (A) on the oil filter cap.
Do not reuse the O-ring.
Install a new oil filter (A).
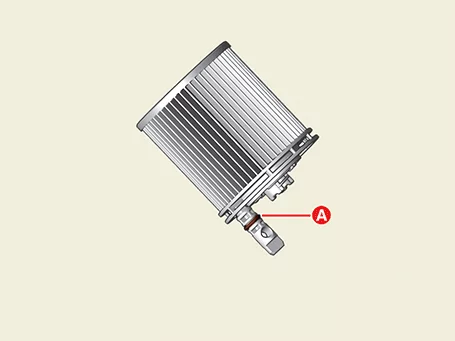
Must use the drain plug (A) which is installed on a new oil filter.
Apply engine oil on drain plug O-ring (A) when the installation of oil filter.
Rotate the free drain plug (A) 90° so that the drain pin is in the locked position.
Install the new safety pin (A).
Do not reuse the safety pin.
Install the oil filter cap (B) using the socket wrench (A).
Tightening torque : 34 N·m
When installing the oil filter cap, check that the new O-ring is seated in place of the cap.
When installing the oil filter cap, and then apply engine oil to new O-ring.
Fill the engine oil.
Install the oil drain plug (A) with the new gasket.
Tightening torque : 34.3 - 44 N·m
Fill new engine oil through the oil filler hole. Remove the oil level gauge before adding oil. Oil capacity Total : 5.0 ℓ (1.32 U.S.gal., 5.28 U.S.qt., 4.40 lmp.qt.) Oil pan : 4.4 ℓ (1.16 U.S.gal., 4.65 U.S.qt., 3.87 lmp.qt.) Drain and refill (include oil filter) : 4.8 ℓ (1.276 U.S.gal., 5.07 U.S.qt., 4.22 lmp.qt.)
Inject 1/2 of the total capacity first and then the remaining 1/2 after approximately 1 minute.
Install the oil filler cap (A).
Install the oil level gauge.
Start engine and check for leaks.
Recheck the engine oil level.
Before rechecking the engine oil level, sufficiently warm up the engine.
If engine is not sufficiently warmed up, engine oil level could be checked below the specified value.
Engine Oil and Filter Replacement - G 2.0 MPI NU
Special Service Tool
Tool Name / Number
Illustration
Description
Oil filter wrench 09263 - 2E000
Used for removing and installing oil filter
Engine Oil and Filter Replacement
Never use any additives to engine oil, as they can change the properties of engine oil which can cause serious engine failure.
Prolonged and repeated contact with mineral oil will result in the removal of natural fats from the skin, leading to dryness, irritation and dermatitis. In addition, used engine oil contains potentially harmful contaminants which may cause skin cancer.
Exercise caution in order to minimize the length and frequency of contact of your skin to used oil. Wear protective clothing and gloves. Wash your skin thoroughly with soap and water, or use water-less hand cleaner, to remove any used engine oil. Do not use gasoline, thinners, or solvents.
In order to preserve the environment, used oil and used oil filter must be disposed of only at designated disposal sites.
Drain engine oil.
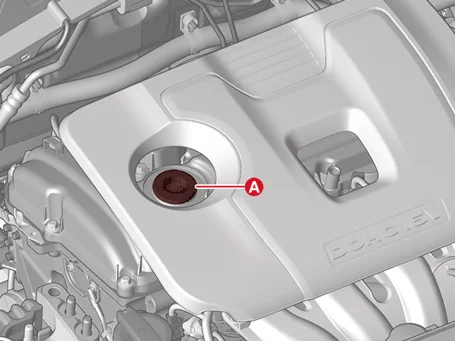
Open the oil filler cap (A).
Remove the oil drain plug (A), and drain the oil into a container.
Replace the oil filter.
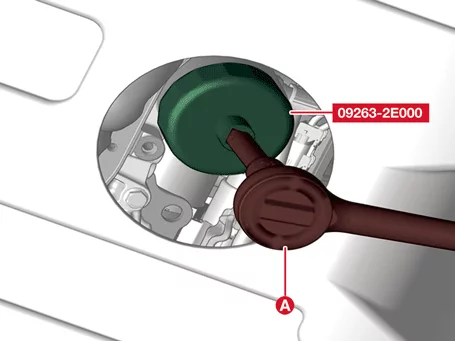
Remove the oil filter by using SST (09263 - 2E000) and wrench (A).
Check and clean the oil filter installation surface.
Check the part number of the new oil filter is as same as old one.
Apply clean engine oil to the gasket of a new oil filter.
Lightly screw the oil filter into place, and tighten it until the gasket contacts the seat.
Install the oil filter by using SST (09263 - 2E000) and wrench.
Tightening torque : 11.8 - 15,7 N·m
Fill the engine oil.
Install the oil drain plug (A) with the new gasket.
Tightening torque : 34.3 - 44 N·m
Fill new engine oil through the oil filler hole. Remove the oil level gauge before adding oil. Capacity Total : 4.5 ℓ (1.19 U.S.gal., 4.76 U.S.qt., 3.96 lmp.qt.) Oil Pan : 3.7 ℓ (0.98 U.S.gal., 3.91 U.S.qt., 3.26 lmp.qt.) Drain and refill including oil filter : 4.0 ℓ (1.06 U.S.gal., 4.23 U.S.qt., 3.52 lmp.qt.)
Install the oil filler cap (A).
Start engine and check for leaks.
Recheck the engine oil level.
When rechecking the engine oil level, warm up the engine sufficiently and check the engine oil level.
If sufficient warm-up is not performed, the engine oil level may be checked below the specified value.
Start the engine and check for leaks around the oil filter cap and drain plug.
Exhaust System Inspection
Inspection
Visually check the pipes, hangers and connections for severe corrosion, leaks or damage.
Check for unusual exhaust sounds or abnormal exhaust fumes.
Fuel Lines, Hoses and Connections Inspection
Inspection
Visually check the fuel lines for cracks, leakage, loose connections, deformation or tank band looseness.
Spark Plug Removal and Installation
Removal
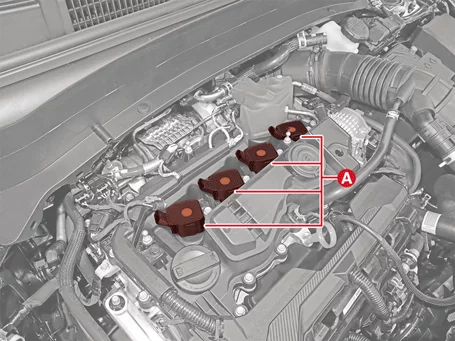
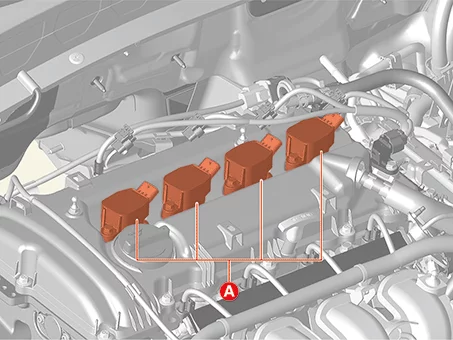
Remove the ignition coil. Smartstream G1.6 T-GDi (Refer to Ignition System - "Ignition Coil") G2.0 MPI NU ATKINSON (Refer to Ignition System - "Ignition Coil")
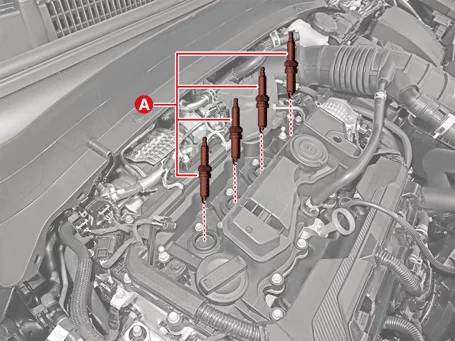
Remove the spark plugs (A) by using a spark plug socket.
Tightening torque : 14.7 - 24 N·m
Be careful not to get foreign matter into the spark plug hole.
Installation
Install in reverse order of removal.
Install the spark plug to the specified torque.
Be careful not to damage the electrode when installing the spark plug.
If the spark plug is dropped, it may cause internal damage. (Do not reuse)
When installing the parts, use cloth to clean the contaminated area (A). - Use a clean and soft cloth to avoid damage. (When replacing ignition coil and spark plug together, cleaning is not required.)
Spark Plug Inspection
Troubleshooting
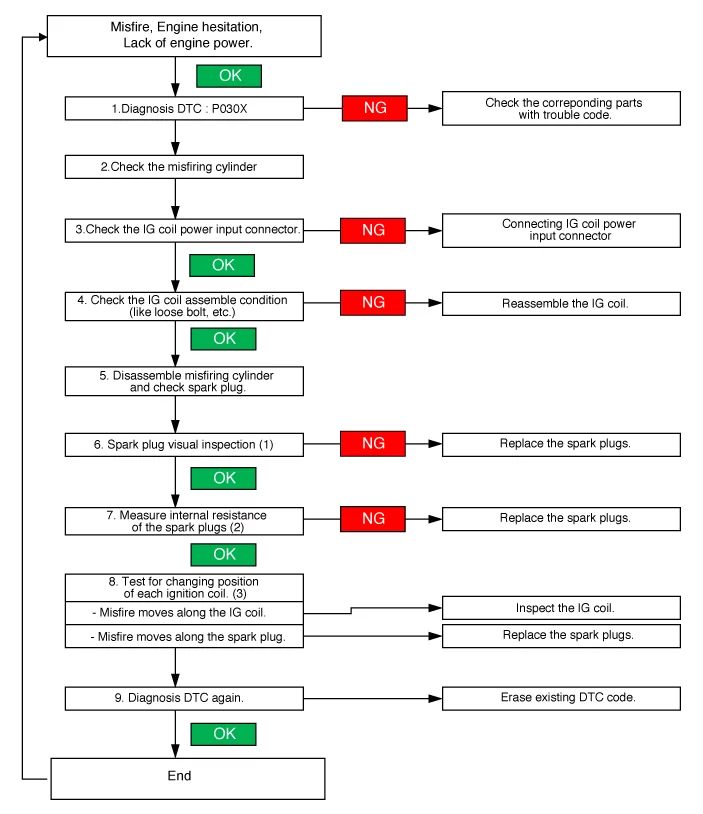
Check the DTC code by using the KDS (Refer to "DTC guide").
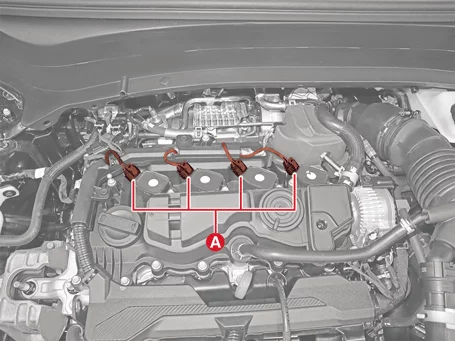
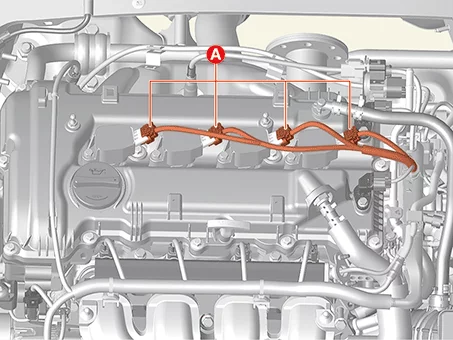
Check the ignition coil connectors (A). G1.6 T-GDI GAMMA II G2.0 MPI NU
Check the installation condition of the ignition coils (A).
Tightening torque : 9.8 - 11,8 N·m
G1.6 T-GDI GAMMA II G2.0 MPI NU
Remove the spark plug. G1.6 GAMMA II (Refer to Spark Plug - "Removal and Installation") G2.0 MPI NU (Refer to Spark Plug - "Removal and Installation")
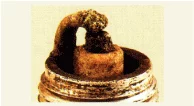
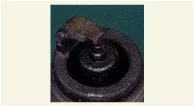
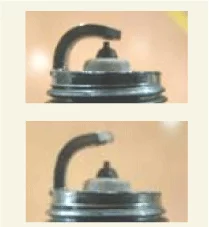
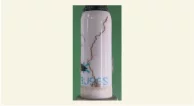
Visually inspect the external spark plugs. Spark plug gap [mm (in.)] G1.6 GAMMA II : 0.7 - 0.8 mm (0.0276 - 0.0315) G2.0 MPI NU : 0.8 - 0.9 (0.0314 - 0.0354)
Symptom
Suspected Cause
Correction
Melting Electrode
Abnormal Combustion, Overheat
Replace the Spark Plug
Carbon and Foreign Matter
Ring Crack
Abnormal Combustion, External Shock
Vertical Crack
External Shock
Overheat
Abnormal Combustion
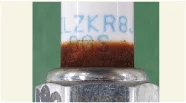
Symptom
Suspected Cause
Correction
Poor Gap
Physical Damage
Replace the Spark Plug
Flash Over
Excessive Electrode Wear
Replace the Spark Plug, Ignition Coil
Corrosion/Rust
Remaining Oil Mist
Reassemble the Spark Plug
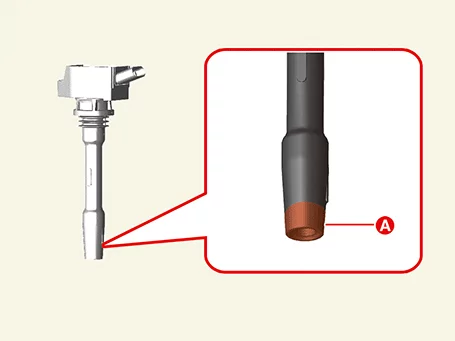
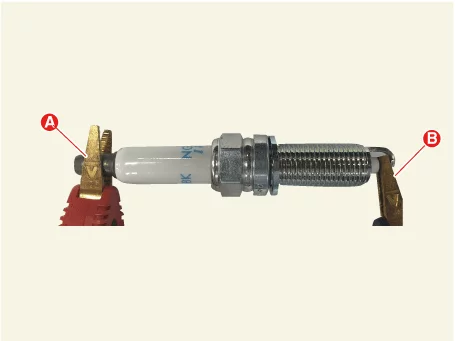
Check the resistance between the spark plugs terminal (A) and probe (B) by using a multi-tester or a resistance meter.
Specified value : 2 - 20 kΩ
Avoid the contact resistance between probe and spark plugs (when it occurs, the measured value is not stabilized).
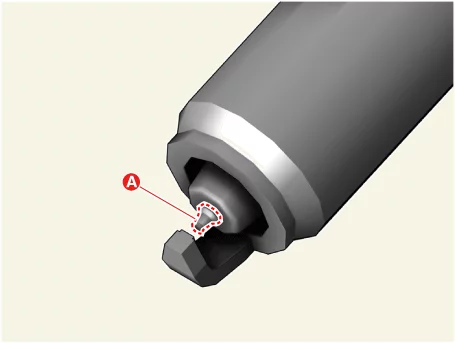
Be careful not to damage center electrode (A) while measuring resistance.
Test for changing position of each ignition coil and spark plug.
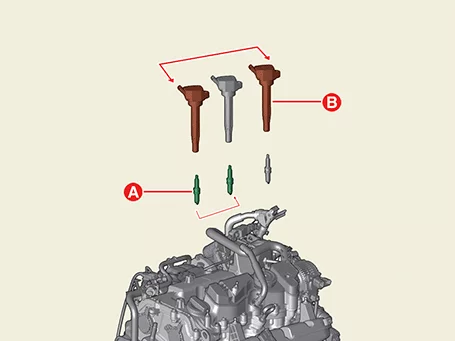
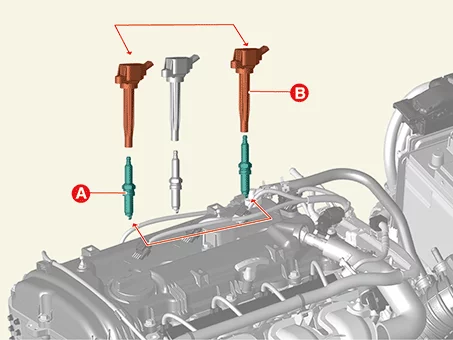
Remove the spark plug (A) and ignition coil (B) from the misfiring cylinder and exchange them with one of the other cylinders. G1.6 T-GDI GAMMA II (Refer to Spark Plug - "Removal and Installation") G2.0 MPI NU (Refer to Spark Plug - "Removal and Installation")
Replace the spark plugs, if misfire moves along the spark plugs.
Inspect the Intelligent Variable Transmission Fluid (IVTF) level
When checking the IVTF level, be careful not to allow foreign substance (like dust) to enter through the filler hole.
Remove the air cleaner assembly. (Refer to Engine Mechanical System - "Air Cleaner")
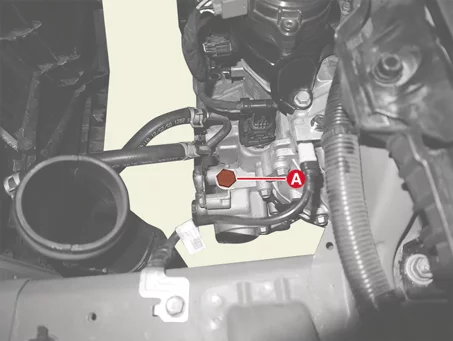
Remove the IVTF filler plug (A).
Start the engine to warm up the IVTF.
Do not step on the brake and accelerator simultaneously to warm up the IVTF.
Check by using KDS that the temperature of the IVTF is between 45 - 55 °C.
Move the shift lever slowly from "P" to "D", then back to "P". Repeat this sequence two times and then move the shift lever to "P" range.
Pause in each range for more than 2 seconds.
Remove the engine room under cover. (Refer to Engine Mechanical System - "Engine Room Under Cover")
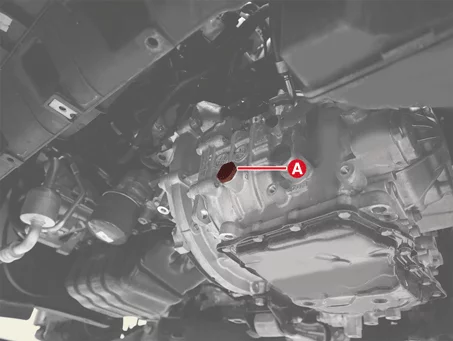
Lift the vehicle and remove the IVTF level plug (A).
When removing the IVTF level plug, keep the vehicle on a level ground.
Check the IVTF level. Normal : 0.15 - 0.45 liters of IVTF flows out for 2 minutes Excessive (abnormal) : Over 0.45 liters of IVTF flows out for 2 minutes Insufficient (abnormal) : Below 0.15 liters of IVTF flows out for 2 minutes
If the IVTF level is too high or low, follow the instructions below.
Excessive : Drain until the IVTF flows out in a thin oil stream.
Insufficient : Add until the IVTF flows out in a thin oil stream.
Install the IVTF level plug (A).
Tightening torque : 34.3 - 44 N·m
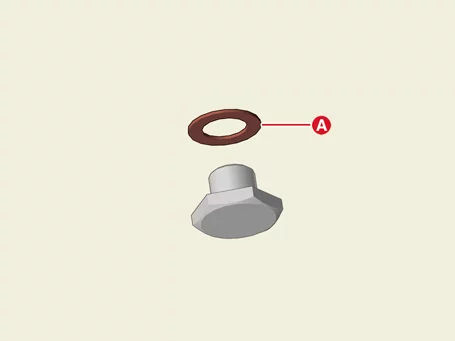
The existing IVTF level plug gasket (A) must be replaced with a new one (do not reuse).
Lower the vehicle and add the 0.3 liters (amount of oil drained during inspection) of SP-CVT1 through the IVTF filler hole.
Be sure to use the genuine IVT Fluid (SP-CVT1)
When replacing with non-genuine IVT fluid, bad shift and vibration may occur, causing damamge to the IVT.
Non-genuine IVT fluid includes after market IVT fluid indicated as interchangeable with genuine Kia fluid.
Install the IVTF filler plug (A).
Tightening torque : 34.3 - 44 N·m
The existing IVTF filler plug gasket (A) must be replaced with a new one (do not reuse).
Automatic Transaxle Fluid Inspection - G 1.6 T-GDI GAMMA ll
Inspection
Inspect the Automatic Transaxle Fluid (ATF) level
When checking the ATF level, be careful not to allow foreign substance (like dust) to enter through the filler hole.
Remove the air cleaner assembly. (Refer to Engine Mechanical System - "Air Cleaner")
Add 0.7 ℓ of ATF SP4M-1 through the ATF filler hole after removing the eyebolt (A). Recommended : ATF SP4M-1 The list of automatic transaxle fluid approved by Kia : SK ATF SP4M-1, MICHANG ATF SP4M-1, S-OIL ATF SP4M-1, Kia Genuine ATF SP4M-1
If the genuine oil that is developed for best performance is not used, it may cause the problems of transaxle performance.
The use of non-specified oil could even result in shift quality deterioration and vibrations, eventually, the transaxle failure.
Start the engine to warm up the ATF.
Do not step on the brake and accelerator simultaneously to warm up the ATF.
Check using KDS that the temperature of the ATF is between 50 - 60 °C.
Move the shift lever slowly from "P" to "D", then back to "P". Repeat this sequence two times and then move the shift lever to "P" range.
Pause in each range for more than 2 seconds.
Remove the engine room under cover. (Refer to Engine Mechanical System - "Engine Room Under Cover")
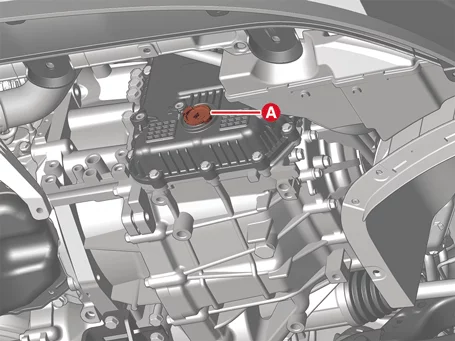
Remove the ATF level plug (A).
When removing the ATF level plug, keep the vehicle on a level ground.
Check the ATF level. Normal : ATF flows out in a thin oil stream. Excessive : Over 0.9 liters of ATF flows out for 2 minutes. Insufficient : There is no fluid flow.
If the ATF level is too high or low, follow the instructions below.
Excessive : Drain until the ATF flows out in a thin oil stream.
Insufficient : Add until the ATF flows out in a thin oil stream.
Install the ATF level plug (A).
Install the engine room under cover. (Refer to Engine Mechanical System - "Engine Room Under Cover")
Lower the vehicle and install the ATF eyebolt (A). Tightening torque : 4.9 - 5,9 N·m (0.5 - 0.6 kgf·m, 3.6 - 4.3 lb·ft, 43.4 - 52.1 lb·in)
Install the air cleaner assembly. (Refer to Engine Mechanical System - "Air Cleaner")
Vapor Hose and Fuel Filler Cap Inspection
Inspection
Vapor Hose
Check all the clamps for tightness and the connections for leakage.
Visually check the vapor lines and hoses for cracks, leaks, loose connections, or deformation.
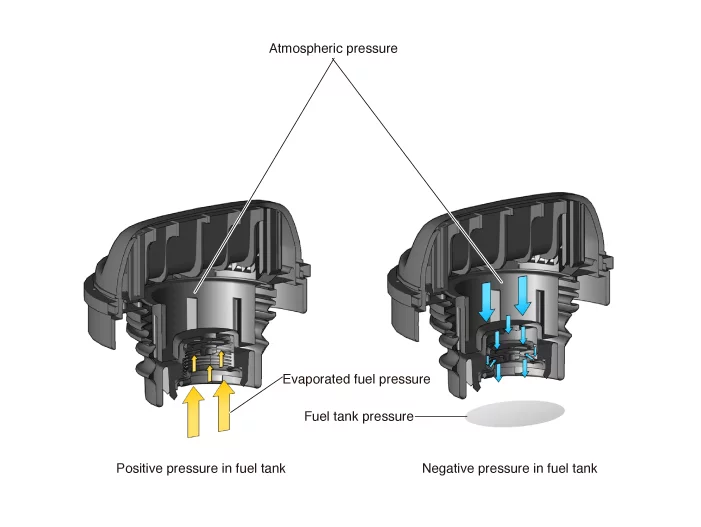
Visually check that the fuel tank cap assembly and gasket are not deformed or damaged.