Balance Shaft and Oil Pump
Repair Procedures
Removal
BSM (Balance Shaft Module) Chain System
Remove the timing chain.
(See Timing System - Timing Chain)
Install the stopper pin (A) after compressing the balance shaft chain tensioner.
Remove the balance shaft chain tensioner (B).
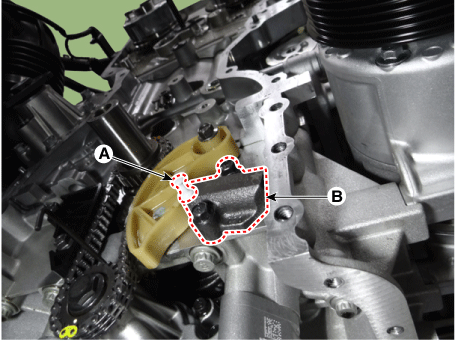
Remove the balance shaft chain tensioner arm (A).
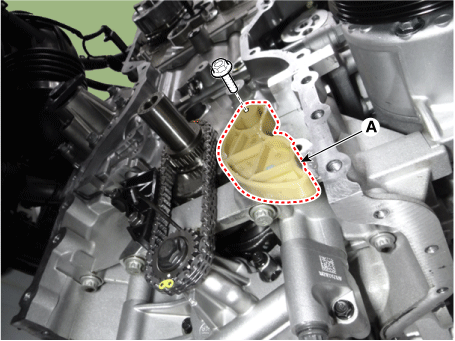
Remove the balance shaft chain guide (A).

Remove the balance shaft module (BSM) after removing the BSM mounting bolts.
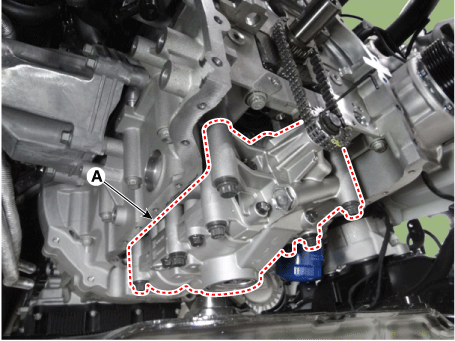
Remove the balance shaft module (BSM) (A) from the chain (B).

Remove the balance shaft chain (A).

BSM (Balance Shaft Module)
Remove the oil pan.
(See Lubrication System - Oil Pan)
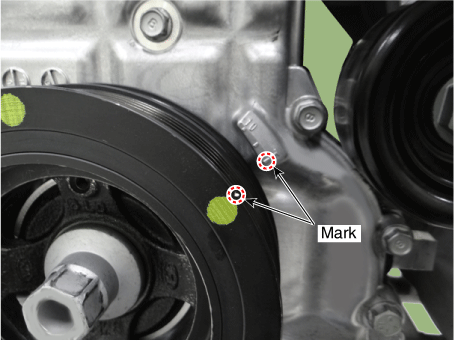
Set the No. 1 cylinder to TDC/compression.
Turn the crankshaft pulley and align its groove with the "T" timing mark on the timing chain cover.
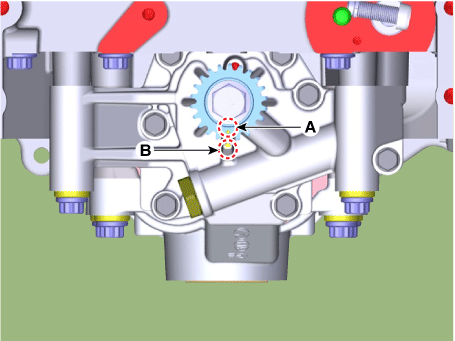
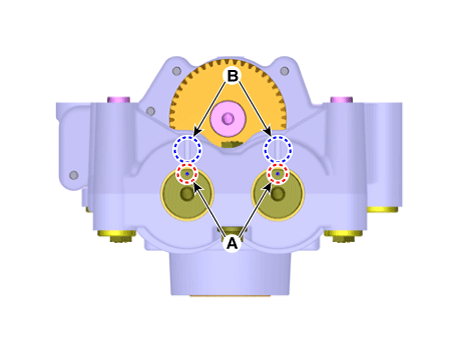
Make sure the BSM sprocket alignment mark (A) is visually aligned with the center of the adjacent casting timing mark (B).
[Front]
[Rear]
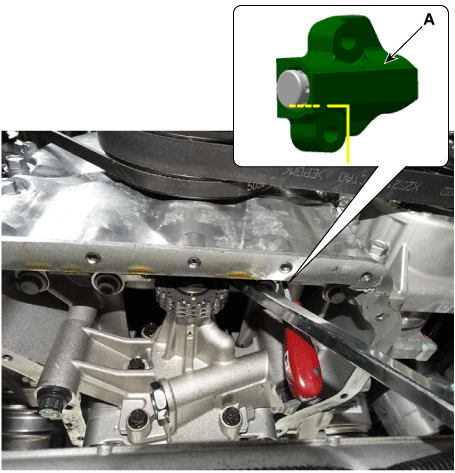
Put a mark on the timing chain (A) that matches the mark on the timing sprocket (B).

Insert the stopper pin (A) into the hole in the tensioner after compressing the balance shaft chain tensioner piston.
Loosen the BSM mounting bolts.
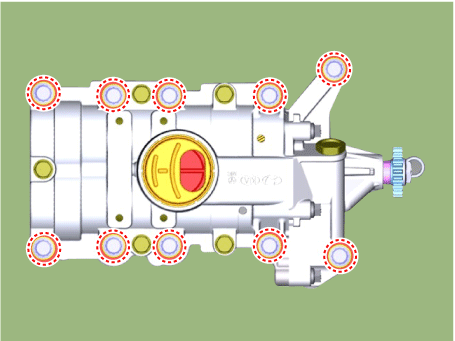
Remove the BSM (A) by removing the chain from the sprocket.

Installation
BSM (Balance Shaft Module) Chain System
The key (A) of the crankshaft must be aligned with the mating surface of the main bearing cap. As a result, the No. 1 cylinder piston is positioned at top dead center on the compression stroke.
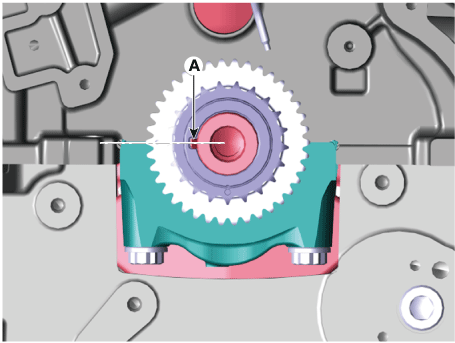
Align the alignment marks on the balance shaft chain sprocket (A) and balance the chain (B), then install the balance shaft chain (C).
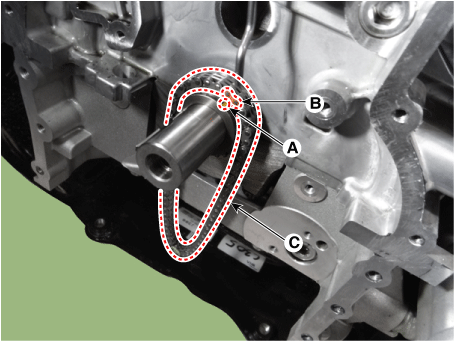
Insert the stopper pin (A) into the BSM to hold the sprocket in the reference position so that the alignment mark (B) is aligned with the timing recess (C).
[Front]
[Rear]
Install the balance shaft module (BSM).
Align the alignment marks on the balance shaft chain sprocket (A) and the balance shaft chain (B), then install the balance shaft sprocket on the chain.

Install the balance shaft module (BSM) (A).
Tighten the bolts to the specified torque of 29 N·m, then loosen the bolts.
Tighten the bolts to the specified torque and angle.
Tightening torque: 22.6–26 N·m + 43° - 47°
Install the balance shaft chain guide (A).
Tightening Torque: 9.8–11.8 N·m
Install the balance shaft chain tensioner arm (A).
Tightening Torque: 9.8–11.8 N·m
Install the balance shaft chain tensioner (B), then remove the stopper pin (A).
Tightening Torque: 9.8–11.8 N·m
Remove the stopper pin (A) from the balance shaft module.

After rotating the crankshaft 2 turns in the normal direction (clockwise when viewed from the front), make sure the alignment mark and notch are aligned with the reference position.
Install the remaining parts in the reverse order of removal.
BSM (Balance Shaft Module)
Insert the stopper pin (A) into the BSM to hold the sprocket in the reference position so that the alignment mark (B) is aligned with the timing recess (C).
[Front]
[Rear]
Install the balance shaft module (BSM).
Align the alignment marks on the balance shaft chain sprocket (A) and the balance shaft chain (B), then install the balance shaft sprocket on the chain.
Install the balance shaft module (BSM) (A).
Tighten the bolts to the specified torque of 29 N·m, then loosen the bolts.
Tighten the bolts to the specified torque and angle.
Tightening torque: 22.6–26 N·m + 43° - 47°
Remove the stopper pin (A) from the BSM.
Remove the stopper pin (A) from the tensioner.
Make sure the alignment mark on the sprocket (A) is visually aligned with the center of the adjacent cast timing notch (B).
Install the remaining parts in the reverse order of removal.
Test yourself
A quick Kia Stinger CK quiz: every answer comes with an explanation and a link to the manual page.