DC-DC Converter
Components and Component Location
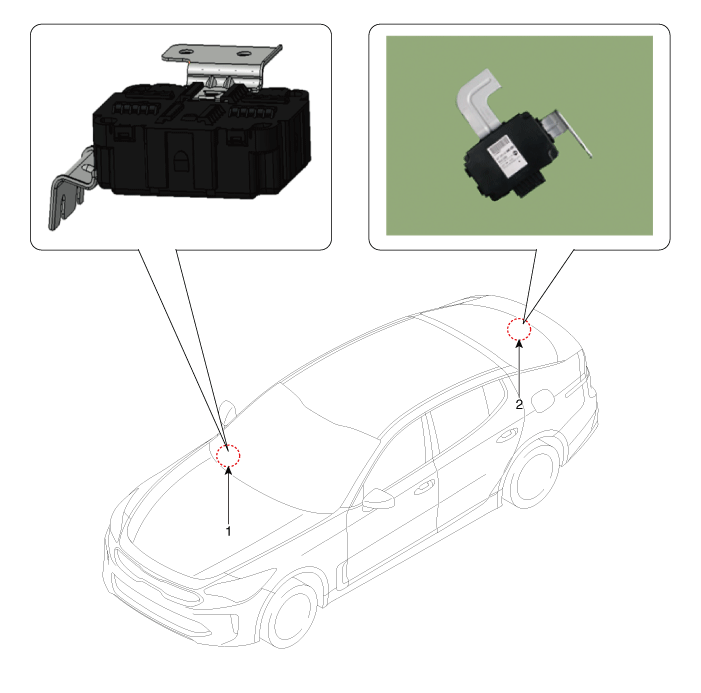
Component Location
Description and Operation
Description
Due to significantly more frequent starting, the resulting electrical load often causes voltage dips in the vehicle power network. To stabilize the power supply of some voltage-sensitive electrical components, the DC-DC converter is used in combination with the ISG function. The DC-DC converter supplies a constant voltage to the relay, which also remains constant during starting operation.
The DC-DC converter is installed behind the glove box. Via the measuring wires for the input voltage and the starter relay, the electronics determine whether power is supplied to the output via the bypass or the DC-DC converter. In bypass mode, the vehicle system voltage is not supplied through the DC-DC converter but is transmitted directly to the outputs. In the booster phase, the vehicle voltage is adapted.

Circuit Diagrams
Wiring Diagram
[200 W]

[400 W]
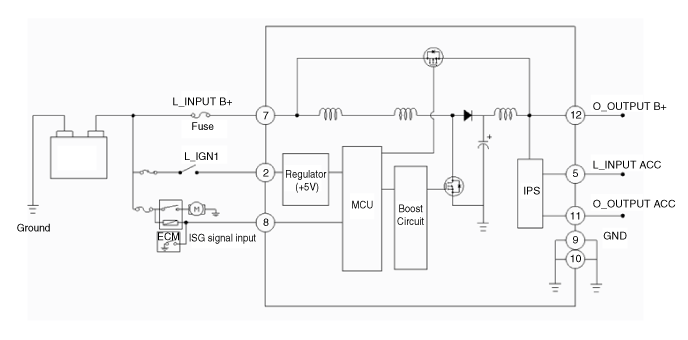
Terminal Function
[200 W]

| Pin. | Description | Pin. | Description |
| 1 | Battery Power Input (B+) | 7 | ISG Signal Input |
| 2 | - | 8 | ACC Input |
| 3 | - | 9 | ACC Output |
| 4 | Battery Power Output (B+) | 10 | Ground |
| 5 | - | 11 | - |
| 6 | IGN1 input | ||
[400 W]

| Pin. | Description | Pin. | Description |
| 1 | - | 7 | Battery Power Input (B+) |
| 2 | IGN1 input | 8 | ISG Signal Input |
| 3 | - | 9 | Ground |
| 4 | - | 10 | Ground |
| 5 | ACC Input | 11 | ACC Output |
| 6 | - | 12 | Battery Power Output (B+) |
Repair Procedures
Removal
[200 W]
Turn the ignition switch OFF and disconnect the negative (-) battery terminal.
Remove the glove box housing.
(Refer to Body (Interior and Exterior) - "Glove Box Housing")
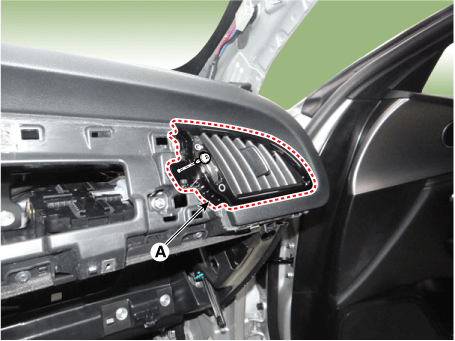
Remove the [right] side air duct (A) after loosening the mounting screw.
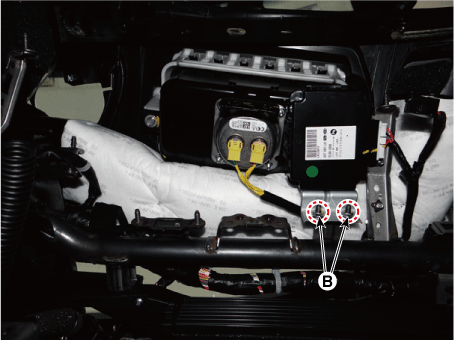
Remove the DC-DC converter after loosening the mounting bolt (A) and nut (B).

[400 W]
Turn the ignition switch OFF and disconnect the negative (-) battery terminal.
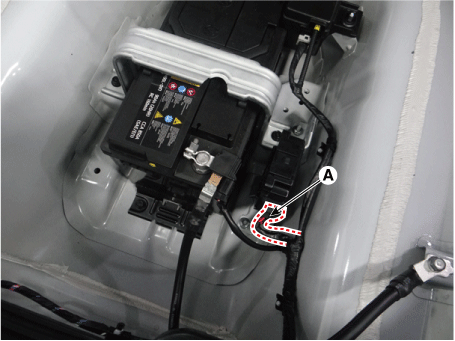
Disconnect the DC/DC converter connector (A).
Remove the DC-DC converter (A) after loosening the mounting nuts.

Installation
Install in the reverse order of removal.
Test yourself
A quick Kia Stinger CK quiz: every answer comes with an explanation and a link to the manual page.