Headlamps
Components and Component Location
Component Location
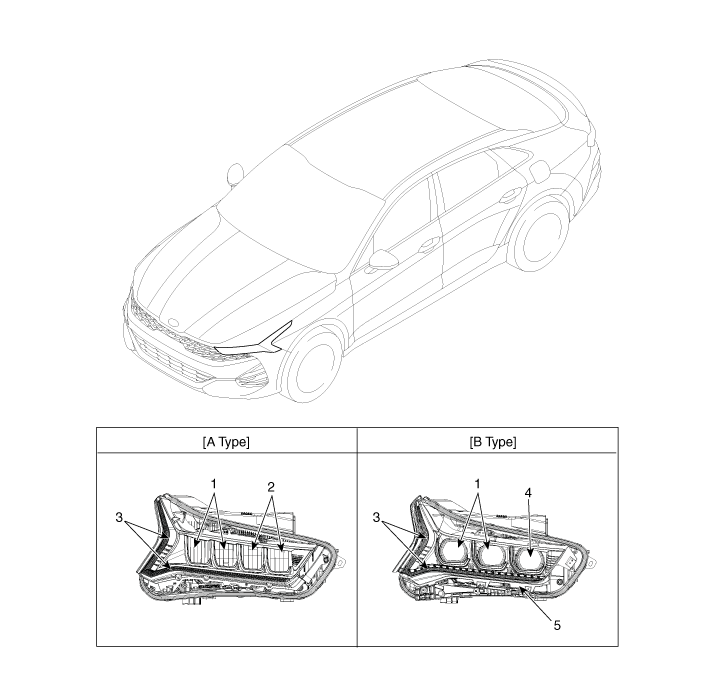
| 1. Low Beam 2. High Beam 3. Daytime Running Light/Position Light |
4. Low Beam Auxiliary Light 5. Turn Signal Lamp |
Circuit Diagrams
Connector and Terminal Function
Connector
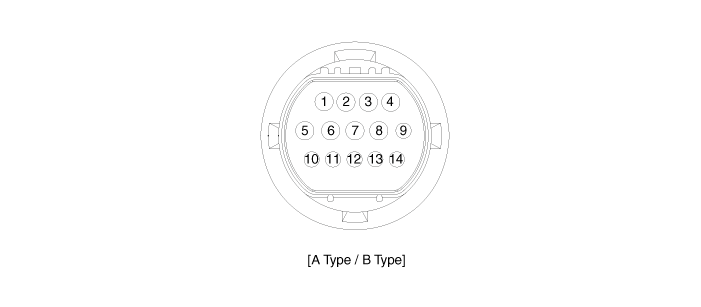
Terminal Function
| Pin | Function | |
| Type | Type B | |
| 1 | Low Beam (+) LED | Low Beam (+) LED |
| 2 | High Beam (+) LED | High Beam (+) LED |
| 3 | - | Turn Signal Lamp (+) LED |
| 4 | - | - |
| 5 | Ground (-) Low Beam | Ground (-) Low Beam |
| 6 | Ground (-) Drive | Ground (-) Drive |
| 7 | Ground (-) Position/DRL | Ground (-) Position/DRL |
| 8 | Ground (-) High Beam | Ground (-) High Beam/Turn Signal Lamp |
| 9 | Position Light (+) LED | Position Light (+) LED |
| 10 | DRL (+) LED | DRL (+) LED |
| 11 | Leveling Device (+) | Leveling Device (+) |
| 12 | Leveling Signal | Leveling Signal |
| 13 | Low Beam Signal - Fairy Tale | Low Beam Signal - Fairy Tale |
| 14 | - | Turn Signal Prompt - Fairy Tale |
Repair Procedures
Removal
Headlamps
Disconnect the negative battery cable.
Remove the front bumper assembly.
(Refer to Body - "Front Bumper Assembly")
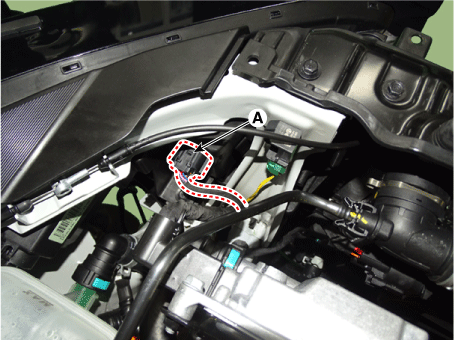
Disconnect the headlamp connector (A).
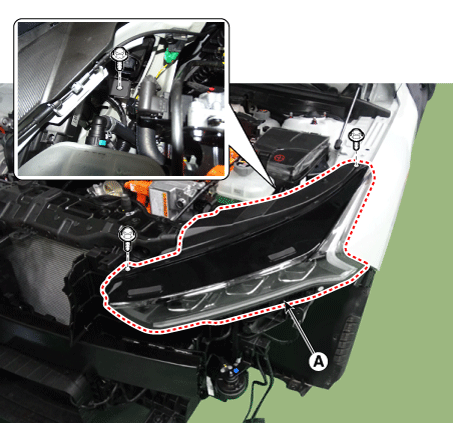
Remove the headlamp (A) by loosening the mounting bolts.
Installation
Install in the reverse order of removal.
Adjustment
Headlamp Aiming
If beam aiming equipment is not available, proceed as follows:
Inflate the tires to the specified pressure and remove any loads from the vehicle except the driver, spare tire and tools.
The vehicle must be on a level floor.
Draw vertical lines (passing through the respective headlamp centers) and a horizontal line (passing through the headlamp centers) on the screen.
If the headlamp leveling device is installed, set the headlamp leveling device switch to position 0.
When the headlamps and battery are in normal condition, aim the headlamps so that the brightest part is on the horizontal and vertical lines.
Cover the outer protrusion of the headlamp (A) and set the cutoff position.
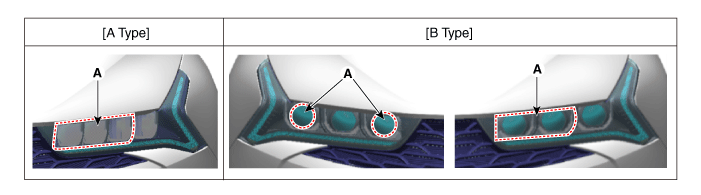
[Type]
A: Vertical (High Beam/Low Beam)
B: Horizontal (High Beam/Low Beam)
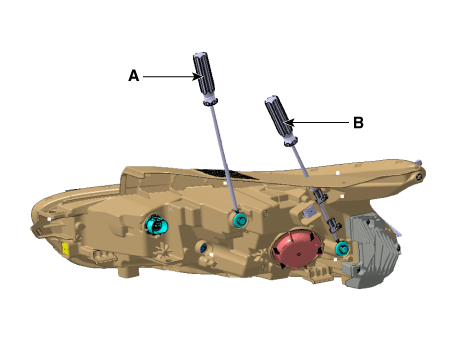
[Type B]
A: Vertical (High Beam/Low Beam)
B: Horizontal (High Beam/Low Beam)
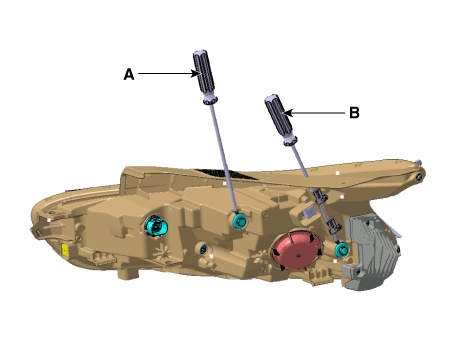
Headlamp Aiming Point
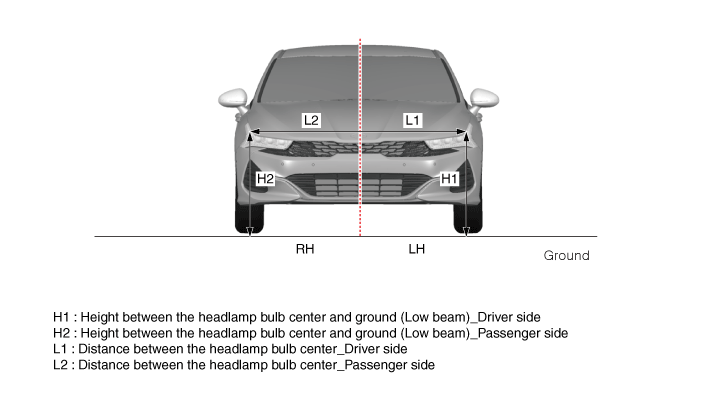
[Type]
| Vehicle Condition | H1 | L1 | L2 | NOTE |
| Empty | 698 (27,4803) | 744 (29,2913) | ALL DIMENSIONS in mm (inches) | |
| 1 Person on Board | 693 (27,2834) | |||
[Type B]
| Vehicle Condition | H1 | H2 | L1 | L2 | NOTE |
| Empty | 697 (27.4409) | 684 (26,9291) | 751 (29,5669) | 661 (26.0236) | ALL DIMENSIONS in mm (inches) |
| 1 Person on Board | 692 (27.2440) | 679 (26,7322) |
If the headlamp leveling device is installed, set the headlamp leveling device switch to position 0.
Turn on the low beam without the driver.
The cutoff line of the low beam must be projected as shown in the illustration.
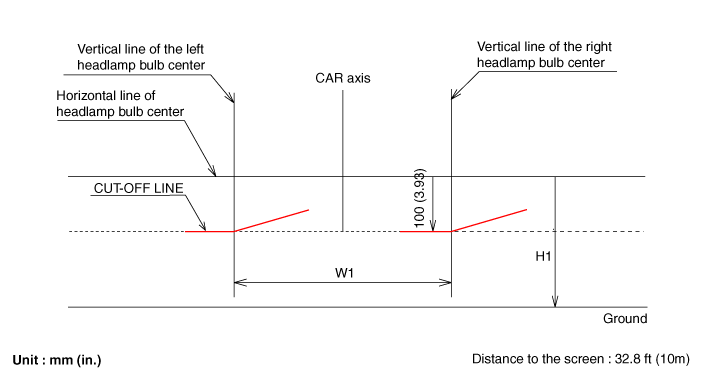
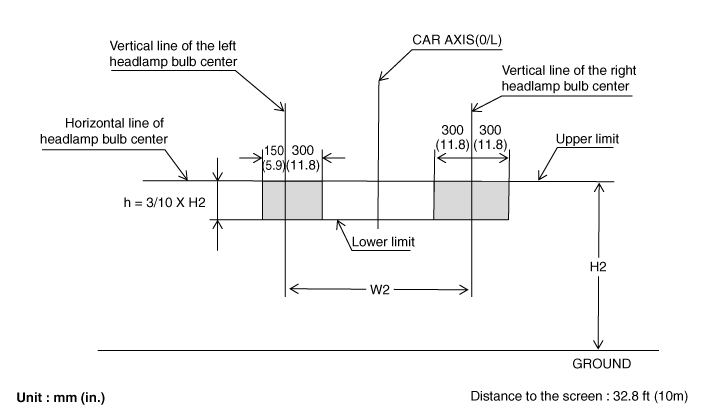
Turn on the high beam without the driver.
The hot zone must be projected within the allowable range shown in the illustration.
Test yourself
A quick Kia Optima DL3 quiz: every answer comes with an explanation and a link to the manual page.