Rheostat
Circuit Diagrams
Connector and Terminal Function

Repair Procedures
Removal
Disconnect the negative battery cable.
Remove the airbag lower panel.
(Refer to Body - "Under Cover Panel")
Remove the crash pad garnish [LH].
(Refer to Body — Crash Pad Garnish)
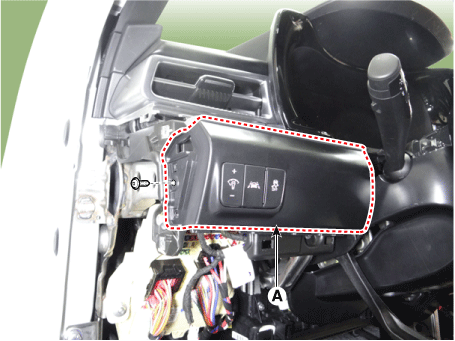
Remove the lower crash pad garnish [LH] (A) by loosening the screws.
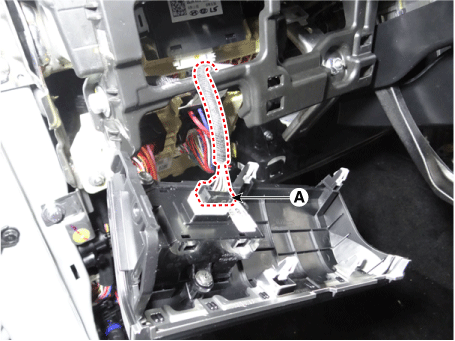
Disconnect the connector (A) from the lower side airbag cover [LH].
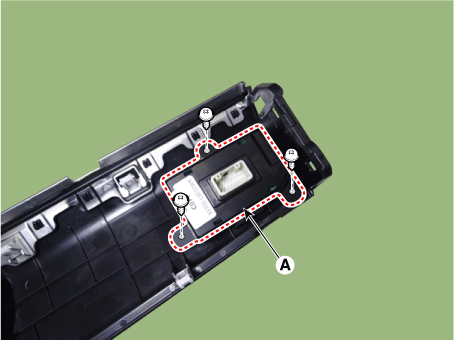
Remove the side crash pad switch (A) by loosening the mounting screws.
Installation
Install in the reverse order of removal.
Inspection
Disconnect the negative battery cable.
Remove the airbag lower panel.
(Refer to Body - "Under Cover Panel")
Remove the crash pad garnish [LH].
(Refer to Body — Crash Pad Garnish)
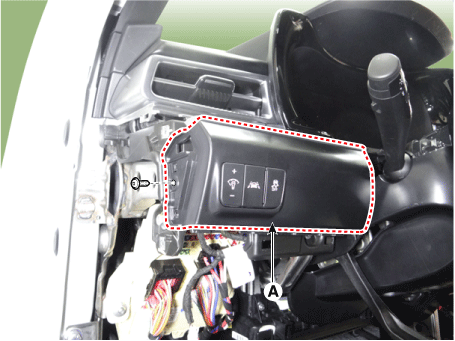
Remove the lower crash pad garnish [LH] (A) by loosening the screws.
Disconnect the connector (A) from the lower side airbag cover [LH].

Check the rheostat switch for continuity.

Test yourself
A quick Kia Optima DL3 quiz: every answer comes with an explanation and a link to the manual page.