Rear Combination Lamp
Components and Component Location
Component Location
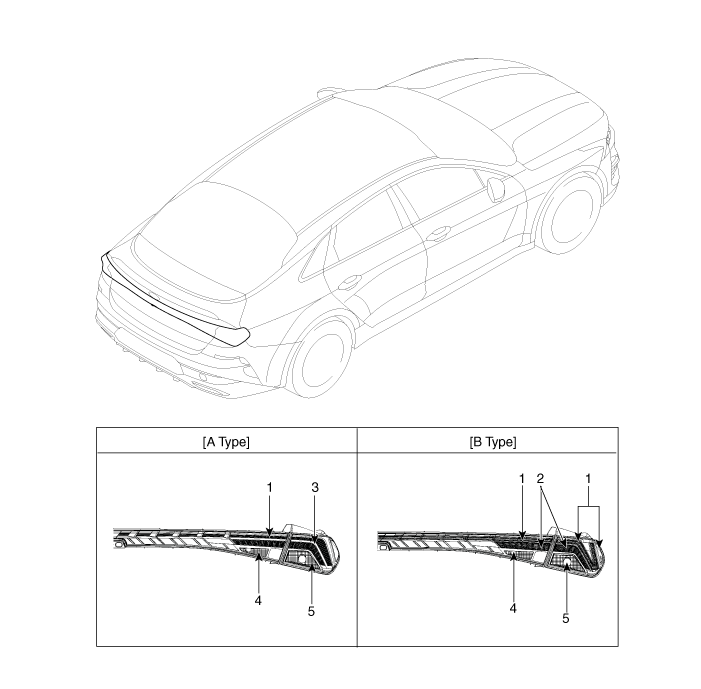
| 1. Tail Lamp 2. Stop Lamp 3. Tail/Stop Lamp |
4. Back-Up Lamp 5. Turn Signal Lamp |
Circuit Diagrams
Connector and Terminal Function
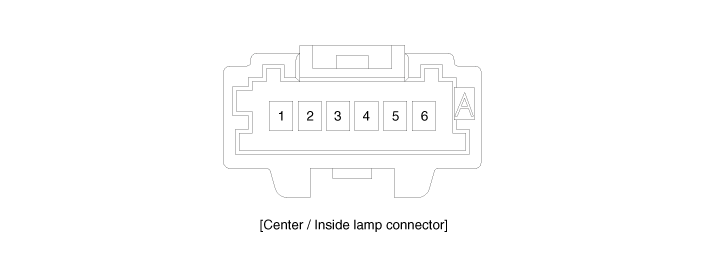
[Type]
| Pin | Function | |
| Center | Outside | |
| 1 | Tail Lamp (+) Bulb | Tail Lamp (+) Bulb |
| 2 | - | Stop Lamp (+) Bulb |
| 3 | Back-Up Lamp (+) Bulb | Turn Signal Lamp (+) Bulb |
| 4 | - | - |
| 5 | Ground (-) Bulb | Ground (-) Bulb |
| 6 | - | - |
[Type B]
| Pin | Function | |
| Center | Outside | |
| 1 | Tail Light (+) LED | Tail Light (+) LED |
| 2 | Stop Light (+) LED | Stop Light (+) LED |
| 3 | Back-Up Lamp (+) Bulb | Turn Signal Lamp (+) Bulb |
| 4 | - | - |
| 5 | Ground (-) Bulb | Ground (-) Bulb |
| 6 | Ground (-) LED | Ground (-) LED |
Repair Procedures
Removal
[Outside]
Disconnect the negative battery cable.
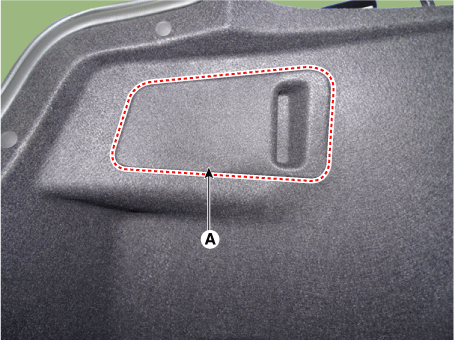
Remove the rear combination light service cover (A).
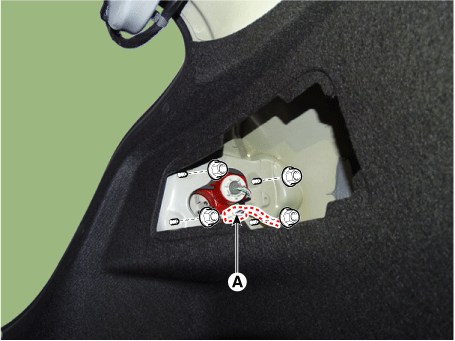
Disconnect the rear combination light connector (A) after loosening the nuts.
Remove the rear combination lamp (A).
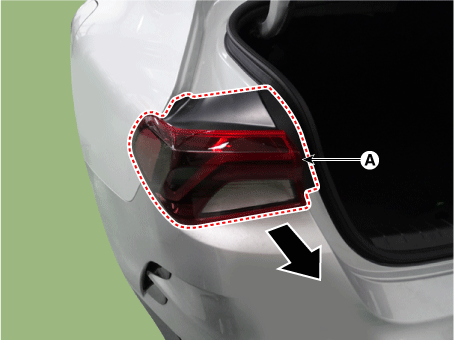
[Center]
Disconnect the negative battery cable.
Remove the trunk lid trim.
(Refer to Body - "Trunk Lid Trim")
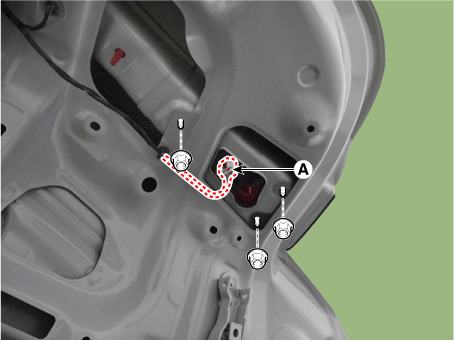
Disconnect the rear combination light connector (A) after loosening the nuts.
[LH]
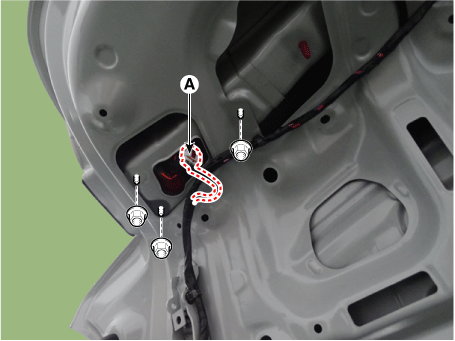
[RH]
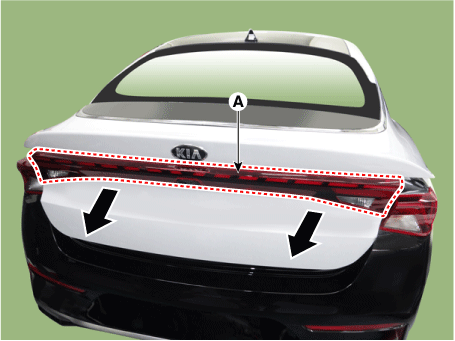
[Center]
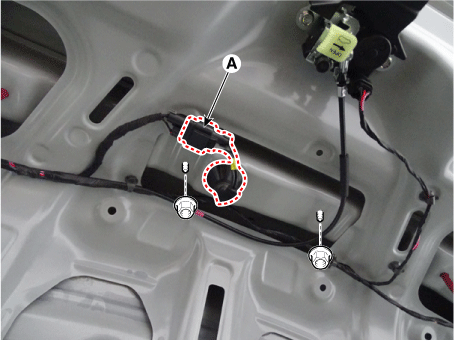
Remove the rear combination lamp (A).
Installation
Install in the reverse order of removal.
Replacement
Lamp
[Turn Signal]
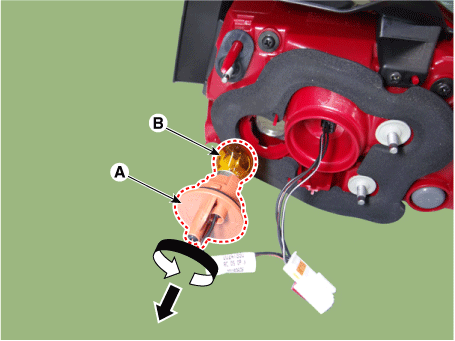
Remove the outer rear combination lamp.
Remove the socket (A) by turning it counterclockwise.
Remove the bulb (B) from the socket.
[Back-up Light]
Disconnect the negative battery cable.
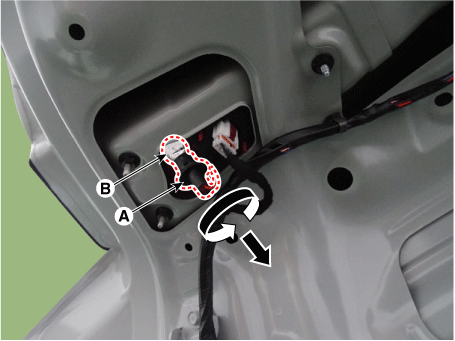
Remove the trunk lid trim.
(Refer to Body - "Trunk Lid Trim")
Remove the socket (A) by turning it counterclockwise.
Remove the bulb (B) from the socket.
Test yourself
A quick Kia Optima DL3 quiz: every answer comes with an explanation and a link to the manual page.