Rear View Monitor (RVM)
Components and Component Location
Component Location

| 1. Rear view camera 2. Audio/AVN head unit display |
3. Steering wheel angle sensor |
Description and Operation
Description
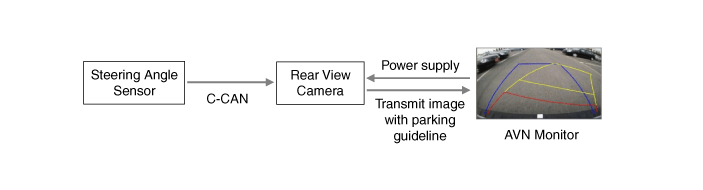
The system displays the area behind the vehicle to help the driver avoid hazards. It receives the rear image signal from the rear view camera and displays it on the monitor.
The rear view monitor is an optional device that displays the blind area on the monitor screen. It operates automatically when the transmission is in the "R" position.
It displays the estimated path with parking guidelines according to the steering wheel operating angle.
System Component (Steering Wheel Angle-Linked Rear View Monitor)
Driving Rear View Monitor (DRVM)
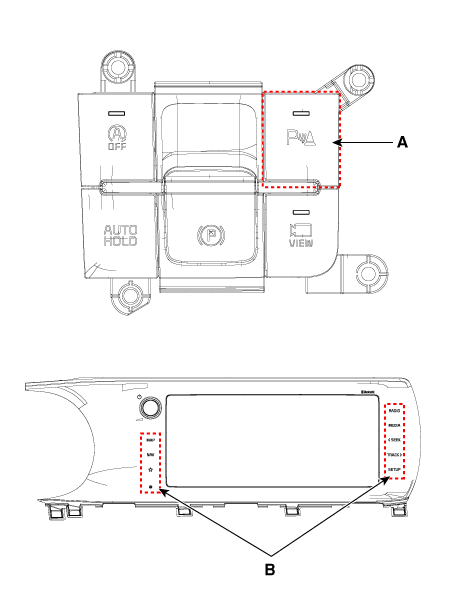
Driving Rear View Monitor (DRVM): The DRVM function is used to display the rear view while driving forward. Keep your eyes on the road ahead.
DRVM ON:
1) Start the engine and set to "ON".
2) Press the button (A) with the shift lever in "D" (Drive) or "N" (Neutral).
DRVM OFF:
1) Press the button (A) again.
2) Press the infotainment system control button (B).
Circuit Diagrams
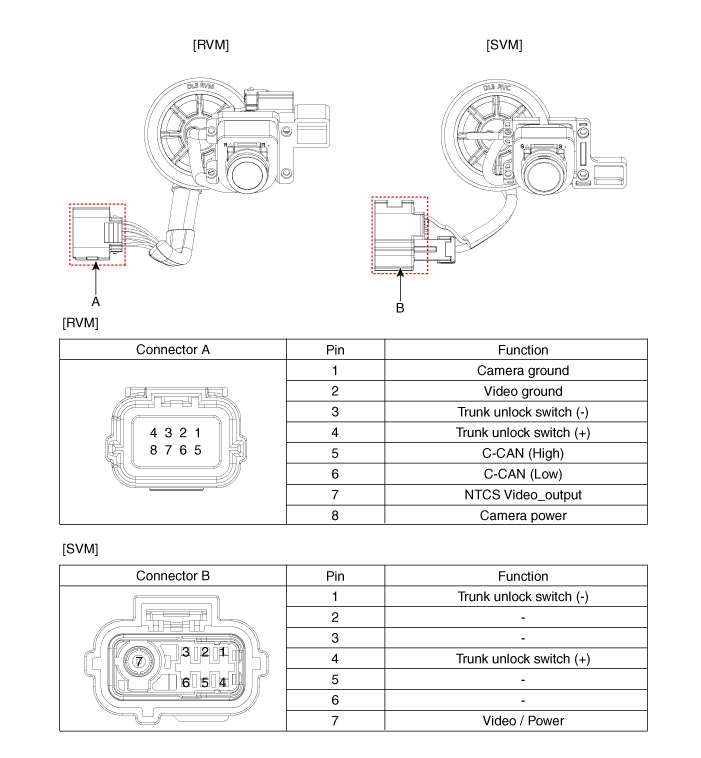
Connector and Terminal Function
Repair Procedures
Removal
Disconnect the negative battery cable.
Remove the center rear combination lamp.
(Refer to Body Electrical System - "Rear Combination Lamp")
Disconnect the trunk switch connector (A).
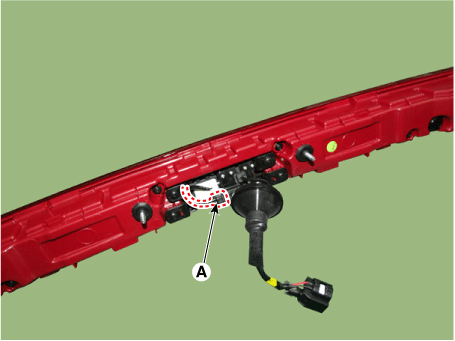
Remove the rear view camera (A) after loosening the screws.
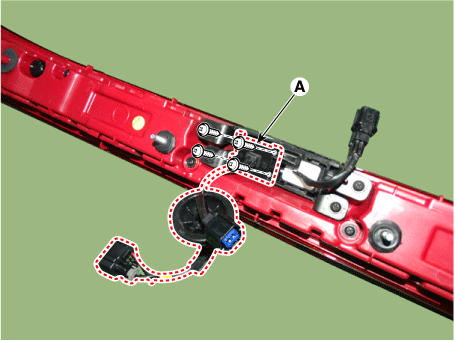
Installation
Install in the reverse order of removal.
Troubleshooting
Troubleshooting
Diagnostic Procedure for Each Symptom
| No. | Symptom | Repair |
| 1 | AVN Monitor Shows Black-Blue Screen | R-1, R-2 |
| Parking guide line and notification text are not displayed | ||
| 2 | Vehicle tilted/leaning while parking | R-3, R-4 |
| Problem with the displayed view | ||
| Difference in visibility of right/left bumper | ||
| Parking guidelines are misaligned (deviation to the left/right). | ||
| Vehicle tilted during parking | ||
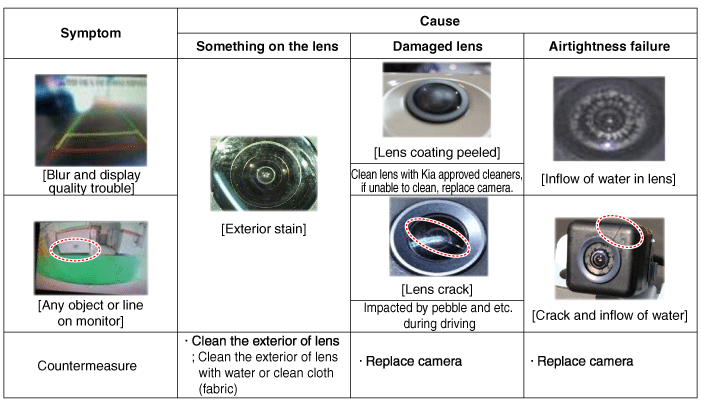
| 3 | Water intrusion in the lens | R-5 |
| Blurred video | ||
| Damaged lens coating | ||
| Red-colored video is displayed |
P-1. Check the following order of black screen occurrence (Camera - AVN direct connection specification)
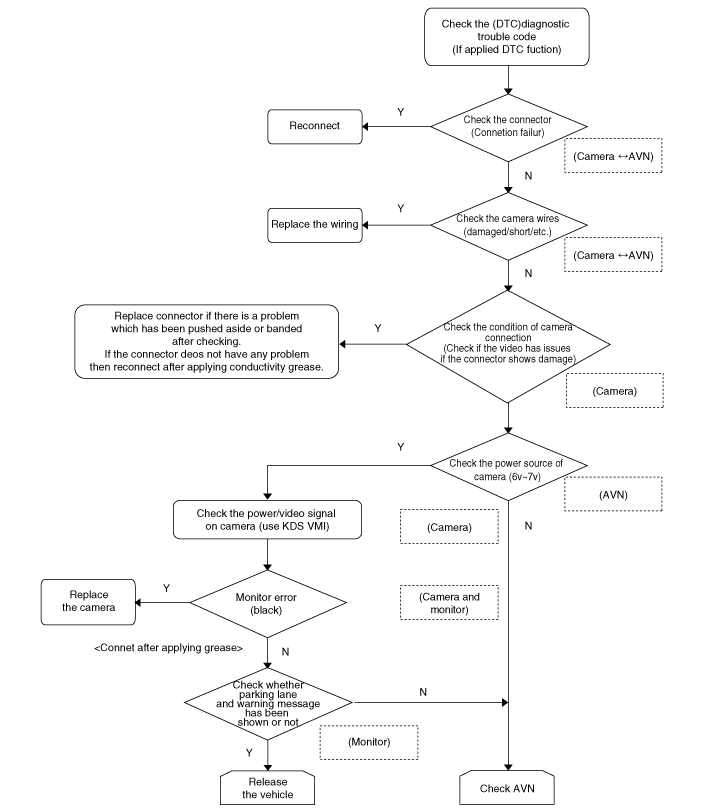
R-2. Check the camera
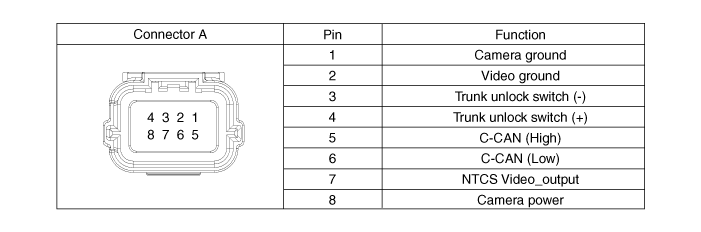
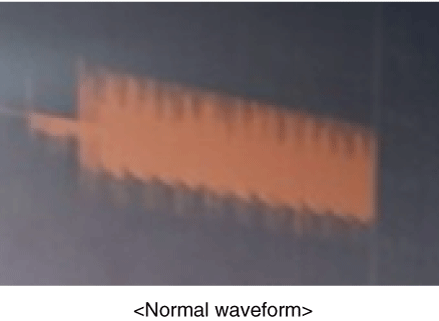
Measure the video display signal waveform and output voltage of the rear camera (using KDS and VMI).
Connect the VMI probes to pin 2 and pin 7.
Specification: 0.8 V - 1.2 V
Measure the rear camera power supply output voltage.
Connect to pin 1 and pin 8.
Specification: 6.0 V - 7.0 V
R-3. Check the symptom related to camera position after installation.
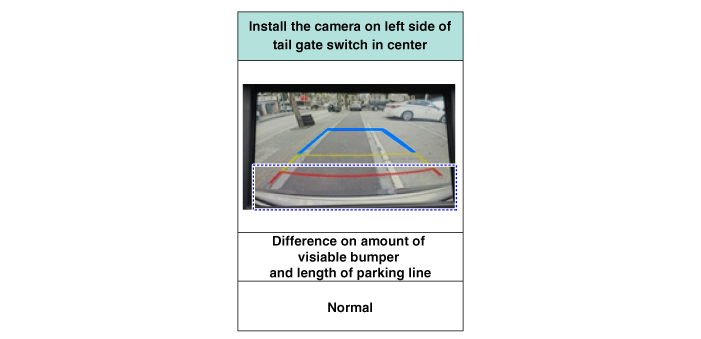
R-4. Tilted/leaning during parking.
Check the camera installation conditions.
GOOD The camera operates normally. NG Check No. 2. Measure the tilt/inclination deviation while parked.
SPEC: ± 10 cm (front wheel - rear wheel)
GOOD The camera operates normally. NG Replace the camera.
R-5. Check the monitor quality
Test yourself
A quick Kia Optima DL3 quiz: every answer comes with an explanation and a link to the manual page.