Refrigerant Line
Components and Component Location
Component Location
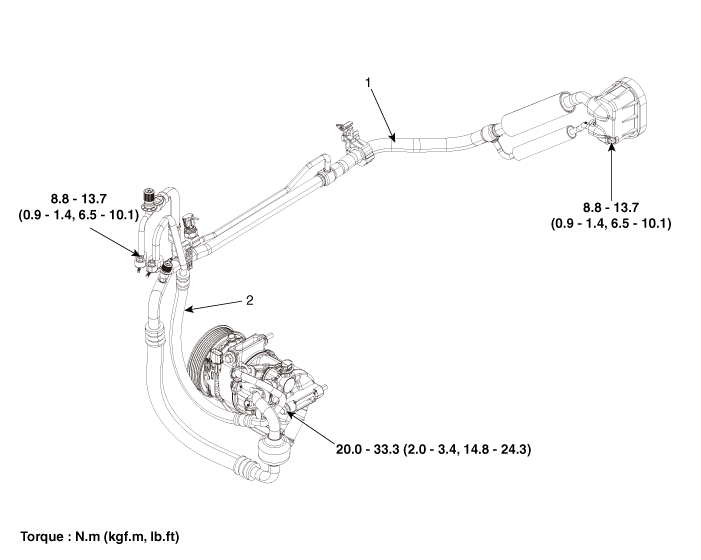
| 1. Suction and Liquid Tube Assembly | 2. Drain Hose |
Repair Procedures
Replacement
If the compressor is operating at its limit, run the engine at idle and let the air conditioner operate for several minutes, then stop the engine.
Disconnect the negative (-) battery terminal.
Recover the refrigerant using a recovery/recharging station.
Remove the engine mount support bracket.
G 2.0 NU MPI (Refer to Engine Mechanical System - "Engine Mounting")
G 2.5 GDI THETA II (Refer to Engine Mechanical System - "Engine Mounting")
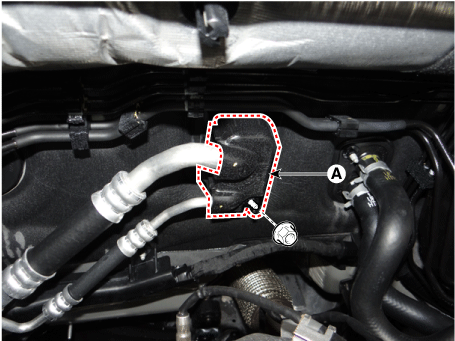
Loosen the nut and remove the expansion valve cover (A).
Tightening torque: 8.8–13.7 N·m
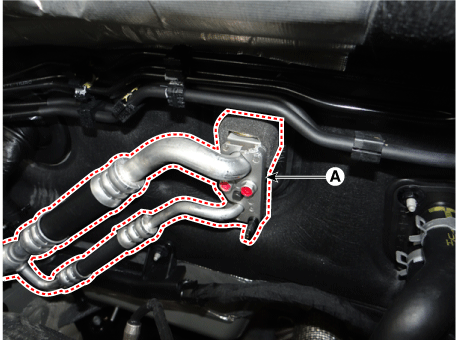
Remove the bolts and the expansion valve (A) from the evaporator core.
Tightening torque: 8.8–13.7 N·m
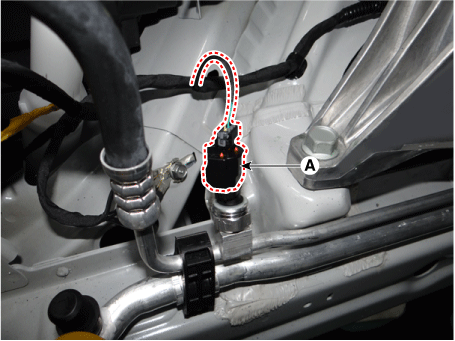
Press the lock pin and disconnect the A/C pressure sensor connector (A).
Loosen the mounting nuts, then remove the suction line (A) and discharge line (B).
Tightening torque: 8.8–13.7 N·m
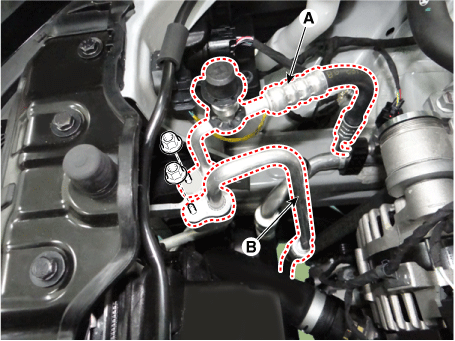
Remove the engine room cover.
G 2.0 NU MPI (Refer to Engine Mechanical System - "Engine Cover")
G 2.5 GDI THETA II (Refer to Engine Mechanical System - "Engine Cover")
Remove the bolts, then disconnect the suction line (A) and discharge line (B) from the compressor.
Tightening Torque: 21.6–32 N·m
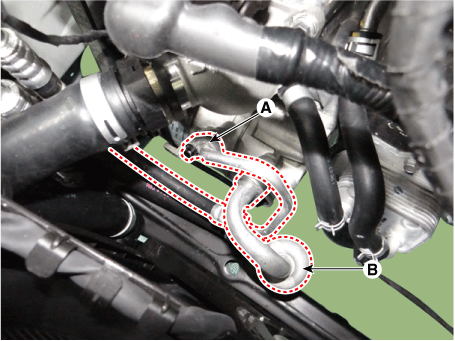
Remove the suction and liquid tube assembly (A) from the upper part of the engine compartment.
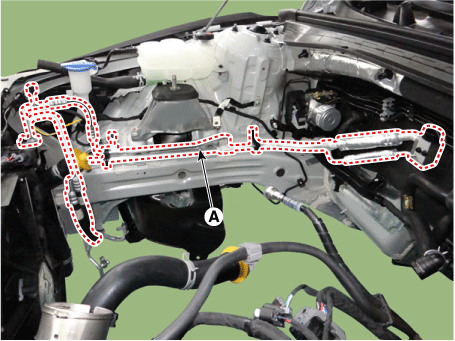
To install, reverse the removal procedure.
Specified amount
• R-134a: 600 ± 25 g (21.2 ± 0.88 oz)
• R-1234yf: 520 ± 25 g (18.3 ± 0.88 oz)
Test yourself
A quick Kia Optima DL3 quiz: every answer comes with an explanation and a link to the manual page.