Handbrake control lever
REMOVAL
Release the handbrake.
Remove the lower bolts of the exhaust downpipe.
Remove the rear rubber exhaust hanger from the exhaust line.
NOTE: hook the exhaust line to the body.
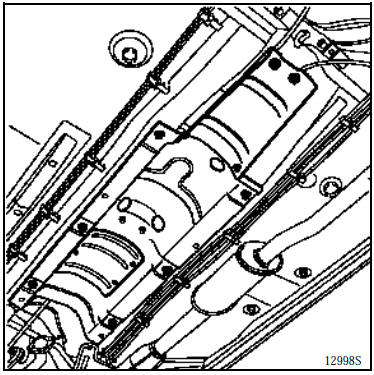
Remove the heat shields.
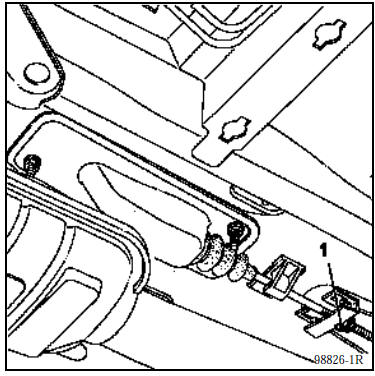
Note the handbrake adjustment dimension between the end of nut (1) and the rod.
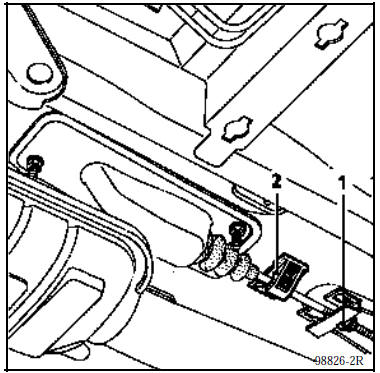
Unscrew nut (1) until both cables are released.
Disengage the rod from its clip (2).
Remove the two nuts securing the handbrake control lever.
Remove the handbrake lever and disconnect the connector.
INSTALLATION
Refit in reverse order of removal.
Refit the heat shields.
Do not forget to reconnect the handbrake connector.
Return the handbrake control rod to the dimension noted during removal.
If necessary, adjust the lever travel (see section “control adjustment”).
ADJUSTMENT
Incorrect handbrake adjustment, cable too tight:
- prevents the automatic shoe clearance adjuster from working correctly,
- causes long brake pedal travel.
Never re-tension the cables to correct this fault, as the problem will quickly return.
The handbrake is not a clearance take-up. It must only be adjusted when replacing:
- the linings,
- the cables,
- the control lever.
Any other adjustment outside these operations is prohibited.
Vehicle on a lift with pick-up points under the body: unscrew nut (1) so as to fully release the central equaliser.
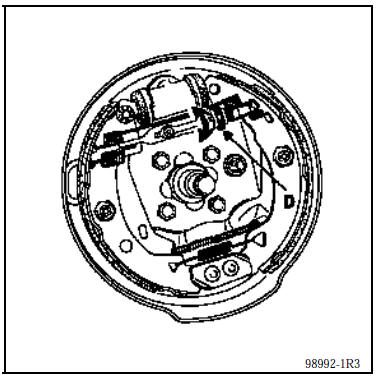
Remove:
- both rear wheels,
- both drums.
Check the automatic adjuster operation by turning the toothed segment (D) (make sure it turns in both directions), then back it off by 5 to 6 teeth.
Test yourself
A quick Renault Kangoo quiz: every answer comes with an explanation and a link to the manual page.