Chassis
External gear shift control
In this manual: Chassis
~3min read
JH3 or JR5 or ND0
Tightening torques |
|
| control housing mounting screws | 2.1 daN.m |
| battery cover screw | 0.4 daN.m |

REMOVAL
- Position the vehicle on a two-post lift.
- Disconnect the battery, starting with the negative terminal.
- Remove:
- the engine covers,
- the battery.
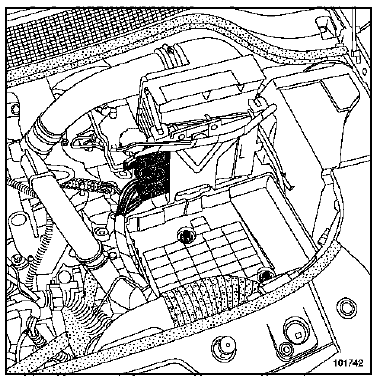
- Remove the battery tray.
- Disconnect the injection ECU.
- Remove the injection ECU.
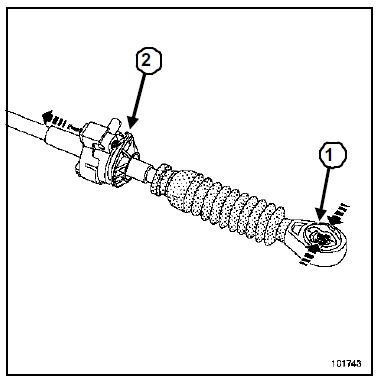
- Disconnect the two cables from the gearbox levers:
- at the anchor ball joints (1),
- at the cable sheath stops (2).
- If the anchor clip is damaged, replace it (see Mechanical Controls chapter).
- Do not adjust the adjustment system on the ND gearbox selector cable; this would change the cable length and therefore the gear shift kinematics.
- Remove:
- the gear lever knob by lifting it,
- the gear lever boot
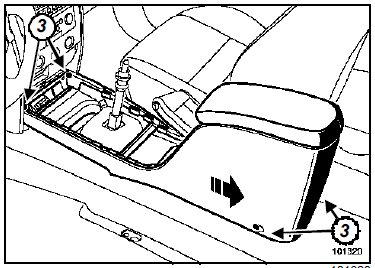
- Unclip the upper centre console trim.
- Remove the upper centre console trim.
- Remove the four screws (3) from the centre console.
- Remove the centre console.
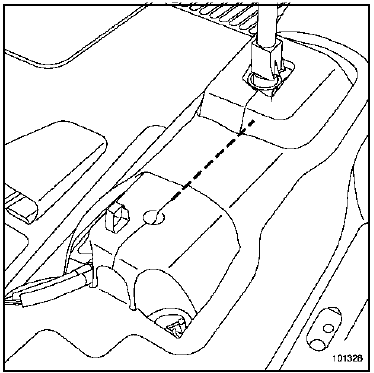
- Cut the carpet between the airbag control unit and the gear shift control housing.
- Remove the insulation covering the airbag control unit and the gear shift control housing.
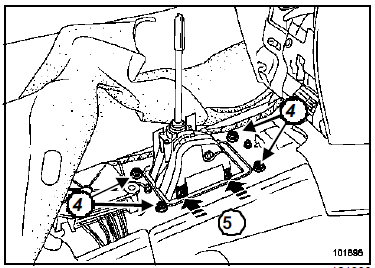
- Remove the four mounting screws (4) from the control housing.
- Press the four tabs (5) to release the control housing.
- Remove the undershield.
- Disconnect:
- the exhaust line from the exhaust manifold,
- the centre clamp.
- Move the exhaust line aside (see Turbocharging chapter).
- Remove the heat shield.
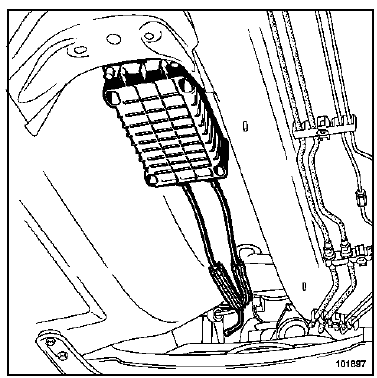
- Remove the control housing.
INSTALLATION
- Refit in the reverse order of removal.
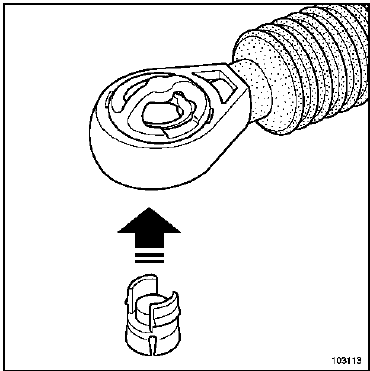
- Squeeze the clip tabs.
- Press the insert to remove the clip.
- Refit the heat shield correctly.
- Tighten the control housing mounting screws to torque (2.1 daN.m).
JH3 or JR5
GEARBOX CABLE ADJUSTMENT
- Refit the cables into their respective cable sheath stops.
- Snap the cables onto their respective ball joints.
- Check that all gears engage correctly before starting the engine.
- There is no cable adjustment system.
- The external control housing and the gearbox levers must be in the "neutral" position for the cables to be attached to the levers.
ND0
I - WITHOUT COMPONENT REPLACEMENT OR WITH GEAR SELECTOR CABLE REPLACEMENT:
Note:- There is no cable adjustment system.
- The external control housing and the gearbox levers must be in the "neutral" position for the cables to be attached to the levers.
II - WITH REPLACEMENT OF THE COMPLETE EXTERNAL CONTROL OR OF THE SELECTOR CABLE:
- Refit the control housing.
1 - Passenger compartment
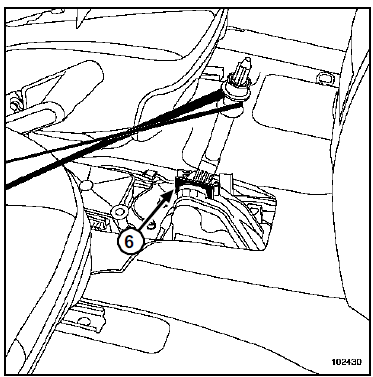
- Refit the gate in the correct direction (reverse lockout on the stop side).
- Fit a 4.6 mm shim (6) between the gate and the stop.
- Hold the lever against the shim and in the "third gear engaged" position using a strap.
2 - Engine compartment
- Set the gearbox selector lever to "third gear engaged".
- Refit the cables into their respective cable sheath stops.
- Unlock the clip on the selector cable (using a screwdriver).
- Adjust the cable length accordingly.
- Snap the selector cable onto the lever ball joint.
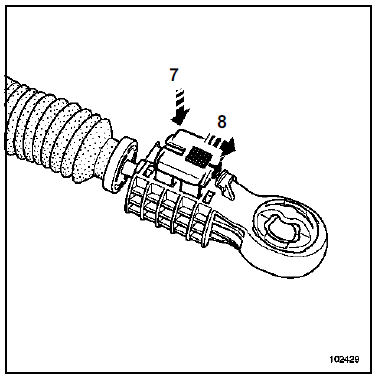
- Lock the clip by pressing it (7) and secure it against sliding by moving the latch (8).
- Snap the gate cable onto the lever ball joint.
- Check that all gears engage correctly before starting the engine.
Connect the battery; carry out the necessary relearn procedures (Chapter Battery).
- Torque the battery cover screws (0.4 daN.m).
Test yourself
A quick Renault Megane quiz: every answer comes with an explanation and a link to the manual page.
Was this page helpful?