Heating, Ventilation, and Air Conditioning
Repair Procedures
In this manual: Heating, Ventilation, and Air Conditioning
12steps
~72min
3/5difficulty
Done 0 of 12
Refrigerant System Service Basics
Refrigerant Recovery: Use only service equipment that is UL listed and certified to meet SAE J2210 requirements for removing HFC-134a (R-134a) from air conditioning systems.
|

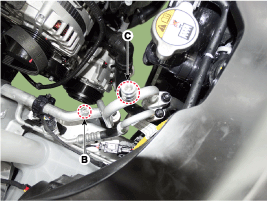
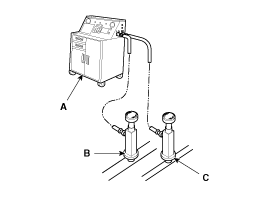
- Connect the R-134a Refrigerant Recovery/Recycling/Charging System (A) to the high pressure service port (C) and the low pressure service port (B), as shown, according to the equipment manufacturer's instructions.
- Measure the amount of refrigerant oil removed from the air conditioning system after the recovery process is complete. Be sure to add the same amount of new refrigerant oil back into the air conditioning system before charging.
|
- When the air conditioning system has been opened to the atmosphere, for example during installation or repair, it must be evacuated using an R-134a refrigerant recovery/recycling/charging system. (If the system has been open for several days, the receiver/drier should be replaced and the system should be evacuated for several hours.)
- Connect the R-134a Refrigerant Recovery/Recycling/Charging System (A) to the high pressure service port (C) and the low pressure service port (B), as shown, according to the equipment manufacturer's instructions.
- If the low pressure does not exceed 93.3 kPa (700 mmHg, 27.6 inHg) within 10 minutes, there may be a leak in the system. Partially charge the system and check for leaks (Refer to Leak Test).
- Remove the low-pressure valve from the low-pressure service port.
|
- Connect the R-134a Refrigerant Recovery/Recycling/Charging System (A) to the high pressure service port (C), as shown, according to the equipment manufacturer's instructions.
- Add the same amount of new refrigerant oil as was removed during recovery. Use only the specified refrigerant oil. Charge the system with R-134a refrigerant. Do not overcharge the system, or the compressor will be damaged. Capacity: Theta 2.4 GDI: 575 ± 20 g (20.2 ± 0.70 oz.), Theta 2.0 T-GDI / Gamma 1.6 T-GDI: 525 ± 20 g (18.5 ± 0.70 oz.)
|

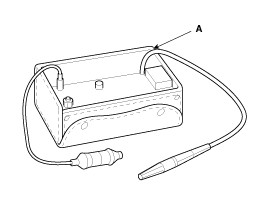
- Check the torque on the connection fittings and, if loose, tighten to the specified torque. Check for refrigerant leaks using a leak detector (A).
- If the leak continues even after the fitting has been tightened, discharge the refrigerant from the system, disconnect the fittings and inspect their sealing surfaces for damage. Always replace the fitting, even if the damage is minor.
- Check the compressor oil and add oil if necessary.
- Charge the system and recheck for refrigerant leaks. If no leaks are found, evacuate and recharge the system again.
Test yourself
A quick Hyundai Sonata LF quiz: every answer comes with an explanation and a link to the manual page.
Was this page helpful?