Instrument Panel Illumination
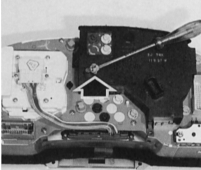
The socket and the bulb of the instrument lighting form a single unit. The illustration shows the bulb removed (arrow).
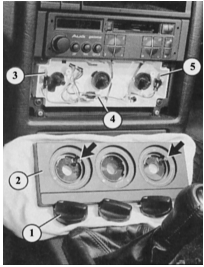
Three small bulbs (3, 4 and 5) provide illumination for the heater controls. To replace them, detach the rotary switch (1), loosen the bolts (arrows) and remove the panel (2).
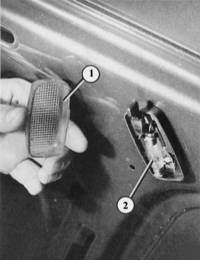
Engine compartment light: squeeze the upper part of the light (1) slightly at the sides and remove it from the guides. The festoon bulb is then accessible.
Ashtray and Cigarette Lighter Illumination:
1 – built-in panel;
2 – hexagon bolt;
3 – bulb.
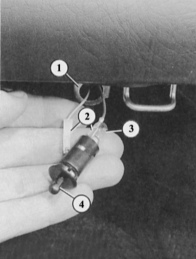
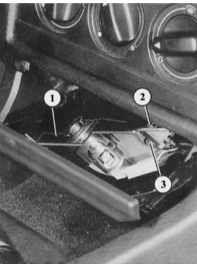
The glove box light unit is shown in the illustration removed from its mount (1)
2 – connecting wire;
3 – bulb;
4 – button.
Instrument Illumination
Only the instrument illumination is covered here. For the indicator lamps, also located in the instrument cluster, see the Equipment and Auxiliary Devices chapter.
PROCEDURE
Remove the steering wheel (see chapter Wheel Suspension and Steering).
Remove the instrument cluster unit (see chapter Equipment and Auxiliary Devices).
At the rear of the instrument cluster, turn the instrument illumination bulb holder counterclockwise and pull it out.
Bulbs with a glass base are integrated with the holder.
Reinsert the bulb holder into the instrument cluster unit and turn it clockwise until it stops.
Heater Panel Illumination
PROCEDURE
Remove the knobs of the three heating and ventilation rotary controls.
Remove the two Phillips-head screws located below them. Remove the panel.
The three bulbs with glass bases are now visible.
The bulbs can be removed from the holder one at a time.
Ashtray and Cigarette Lighter Illumination
PROCEDURE
Remove the removable ashtray insert.
Using a long socket wrench, unscrew the hexagon bolt behind the cigarette lighter.
Turn the cigarette lighter built-in panel over and remove the bulb holder from the underside.
Remove the glass-base bulb from the holder.
On vehicles equipped with additional equipment, the cigarette lighter is located next to the parking brake lever.
To replace the bulbs, remove the rear section of the center console.
Cigarette lighter illumination on vehicles with additional equipment: remove the center console.
Glove Box Light
The glove box light lamp housing contains an contact switch. Power is supplied only when the parking lights or headlights are on.
PROCEDURE
On the rear side of the glove box, turn the 4 W bulb counterclockwise (the bulb faces forward in the direction of travel) and pull it upward (bayonet fitting).
To remove the entire unit, disconnect the plugs and push the holder out of its mount toward the passenger compartment.
Automatic Transmission Selector Indicator Illumination
The glass-base bulb (1.2 W, DIN form W) illuminates the automatic transmission mode indicator on the selector lever when the ignition is on.
PROCEDURE
Remove the center console, see the Interior section.
Unscrew the bulb holder from the automatic transmission selector lever console.
Remove the glass-base bulb from the holder.
Additional Equipment Illumination
PROCEDURE
Remove the center console, see the Interior section.
Turn the bulb holders on the rear side of the additional equipment unit counterclockwise and remove them.
Test yourself
A quick Audi 80 quiz: every answer comes with an explanation and a link to the manual page.