Engine Control System/Fuel System

Heated Oxygen Sensor (HO2S)

6steps
~46min
3/5difficulty
2special tools
02040608010045.133N·mlb·ft
Tightening torque found on this page
Done 0 of 6

Description and Operation

Description

A heated oxygen sensor (HO2S), consisting of zirconia and alumina, is installed both before and after the Manifold Catalytic Converter (MCC) to determine the air/fuel ratio and send it to the ECM. For proper operation of this sensor, the sensor tip temperature must be above 370 °C. For this reason, a heater controlled by the ECM operating signal is built into the sensor. When the exhaust gas temperature is below the specified value, the heater warms the sensor tip.
Hyundai Palisade. Description and operation

Specifications

Specification

Heated Oxygen Sensor (HO2S) [Bank 1, 2 / Sensor 1] ▷ Type: Zirconia (ZrO2) [Linear] Type ▷ Specification
Item Specification
Heater Resistance (Ω) 2,4–4,0 [20 °C]
Operating Voltage (V) 12
Pin 6

Heated Oxygen Sensor (HO2S) [Bank 1, 2 / Sensor 2] ▷ Type: Zirconia (ZrO2) [Binary] Type ▷ Specification
Item Specification
Heater Resistance (Ω) 3,3–4,1 [20 °C]
Pin 4

Circuit Diagrams

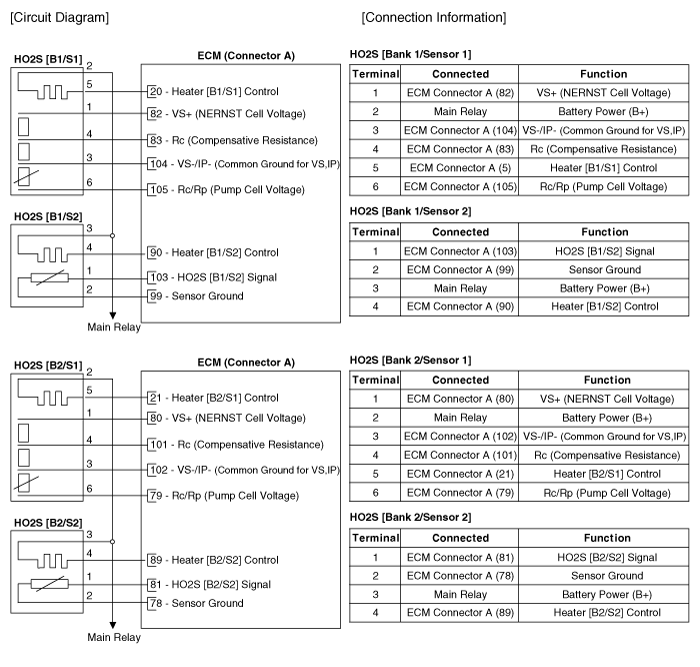
Wiring Diagram

Hyundai Palisade. Schematic diagrams

Repair Procedures

Inspection

  1. Turn the ignition off.
  2. Disconnect the HO2S connector.
  3. Measure the resistance between terminals 2 and 5 of the HO2S [Bank 1 / Sensor 1, Bank 2 / Sensor 1]. Measure the resistance between terminals 1 and 2 of the HO2S [Bank 1 / Sensor 2, Bank 2 / Sensor 2].
  4. Check that the resistance is within specification. Specification: 2.4–4.0 Ω [20 °C] [Bank 1 / Sensor 1, Bank 2 / Sensor 1] 3.3–4.1 Ω [20 °C] [Bank 1 / Sensor 2, Bank 2 / Sensor 2]

Removal

  1. Turn the ignition switch OFF and disconnect the negative (-) battery terminal.
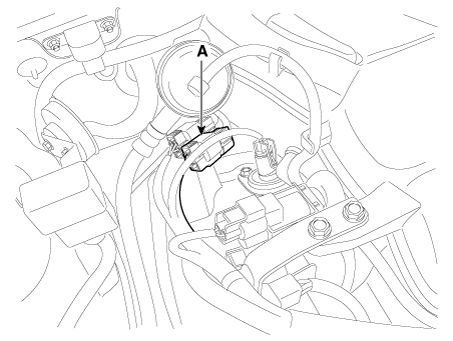
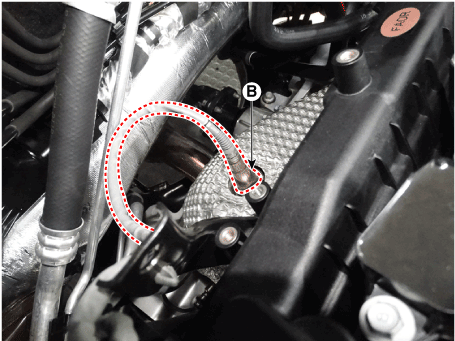
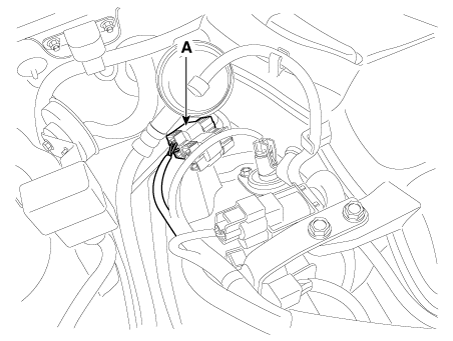
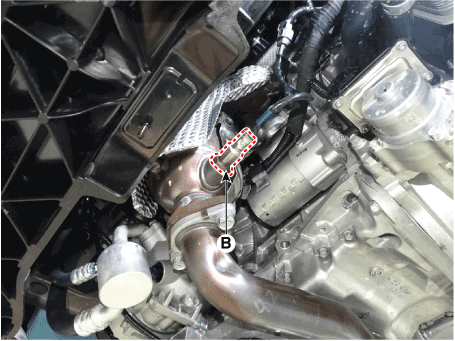
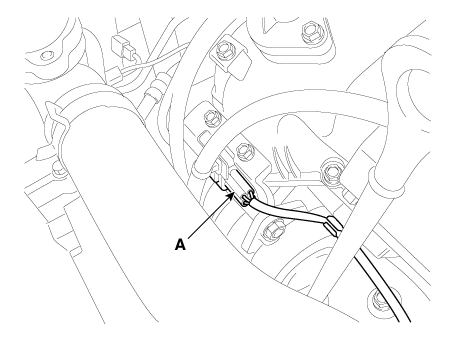
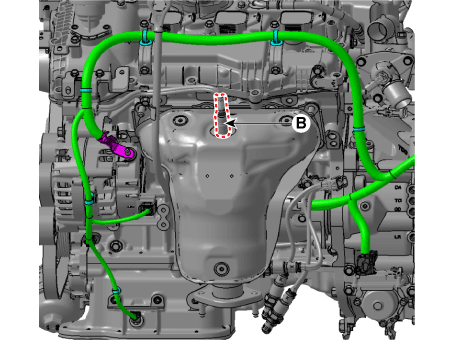
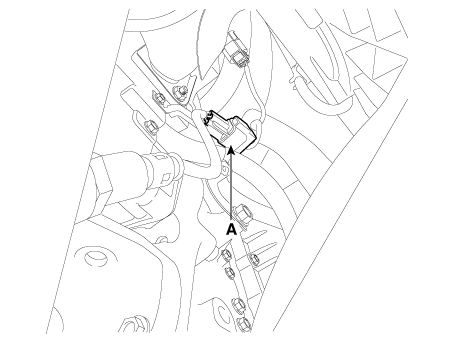
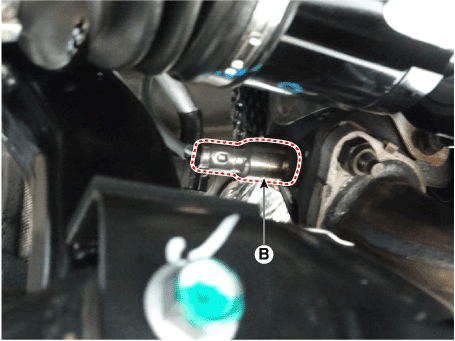
  2. Remove the oxygen sensor (B) after disconnecting the connector (A).
    Hyundai Palisade. Repair procedures
    • Note that the SST (part No. 09392-2H100 or 09392-1Y100) can be used to remove the heated oxygen sensor.
    Heated oxygen sensor: 35.3–45 N·m [Bank 1 / Sensor 1]
    Hyundai Palisade. Repair procedures
    Hyundai Palisade. Repair procedures
    [Bank 1/Sensor 2]
    Hyundai Palisade. Repair procedures
    Hyundai Palisade. Repair procedures
    [Bank 2 / Sensor 1]
    Hyundai Palisade. Repair procedures
    Hyundai Palisade. Repair procedures
    [Bank 2 / Sensor 2]
    Hyundai Palisade. Repair procedures
    Hyundai Palisade. Repair procedures

Installation

Hyundai Palisade. Repair procedures
  • Install the component to the specified torque.
  • Note that internal damage may occur if the component is dropped. If the component has been dropped, inspect it before installation.
  • Do not allow cleaner, spray, or grease to contact the sensing element or connector, as oil substances may cause sensor malfunction.
  • The sensor and its wiring may be damaged if they contact the exhaust system (e.g., exhaust manifold, catalytic converter).
  1. Install in the reverse order of removal.

Test yourself

A quick Hyundai Palisade quiz: every answer comes with an explanation and a link to the manual page.