Front Washer Motor
Components and Component Location
Component Location
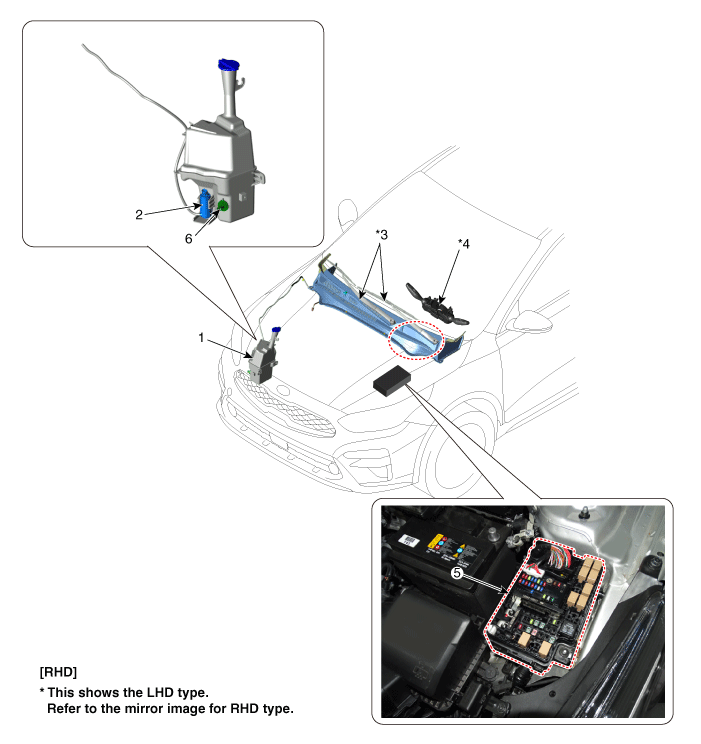
| 1. Washer Reservoir Assembly 2. Washer Motor and Pump Assembly 3. Wiper Arm and Blade |
4. Multifunction Switch 5. Wiper/Washer Relay. 6. Washer Fluid Level Sensor. |
Repair Procedures
Inspection
Front Washer Motor
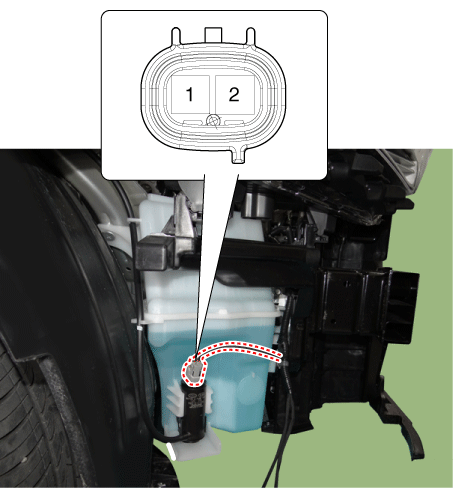
After connecting the washer motor to the reservoir, fill the reservoir with washer fluid.
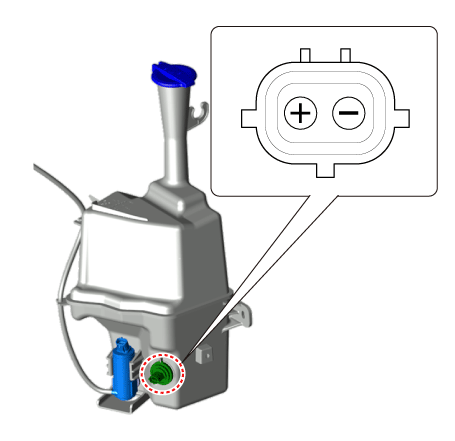
Connect the positive (+) battery cable to terminal 2, and the negative (-) battery cable to terminal 1, respectively.
Make sure the wiper motor operates normally, the washer motor operates, and water sprays from the front nozzles.
If abnormal, replace the washer motor.
Washer Fluid Level Sensor
Disconnect the negative (-) battery terminal.
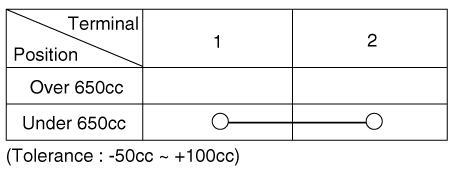
Drain less than 650 mL of washer fluid.
Check the continuity between terminals No. 1 and No. 2 in each float position.
There should be continuity when the float is lowered.
There should be no continuity when the float is raised.
If the continuity does not meet the specification, replace the washer fluid level switch.
Removal
Front Washer Motor
Disconnect the negative (-) battery terminal.
Remove the engine room cover.
Nu 2.0 MPI (Refer to Engine Mechanical System - "Engine Room Under Cover")
Gamma 1.6 MPI (Refer to Engine Mechanical System - "Engine Room Under Cover")
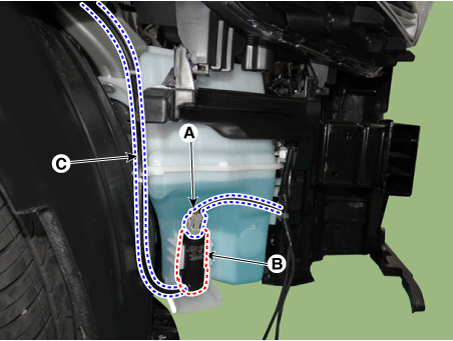
Disconnect the connector (A), then remove the washer motor (B) and remove the nozzle (C) from the motor.
Washer Fluid Level Sensor
Disconnect the negative (-) battery terminal.
Remove the engine room cover.
Nu 2.0 MPI (Refer to Engine Mechanical System - "Engine Room Under Cover")
Gamma 1.6 MPI (Refer to Engine Mechanical System - "Engine Room Under Cover")
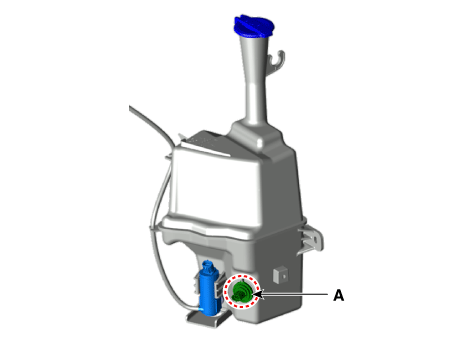
Remove the washer fluid level sensor switch (A) after disconnecting the connector.
Reservoir
Disconnect the negative (-) battery terminal.
Remove the front bumper assembly.
(Refer to Body - "Front Bumper Assembly")
Remove the front wheel guard [RH].
(Refer to Body - "Front Wheel Guard")
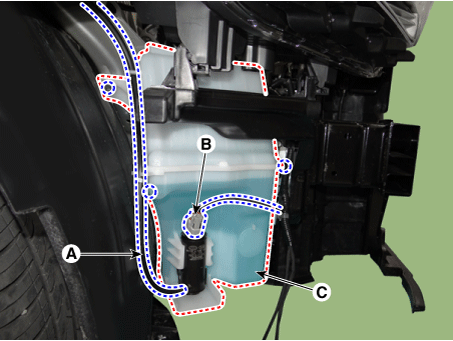
Disconnect the nozzle (A) and connector (B), then remove the reservoir (C) by loosening the bolts and screw.
Installation
Install in the reverse order of removal.
Test yourself
A quick Kia Forte BD quiz: every answer comes with an explanation and a link to the manual page.