Single-Use Parts
Propeller Shaft Assembly
In this manual: Single-Use Parts
8steps
~48min
2/5difficulty
Done 0 of 8
Contents:
Propeller Shaft Components and Components Location
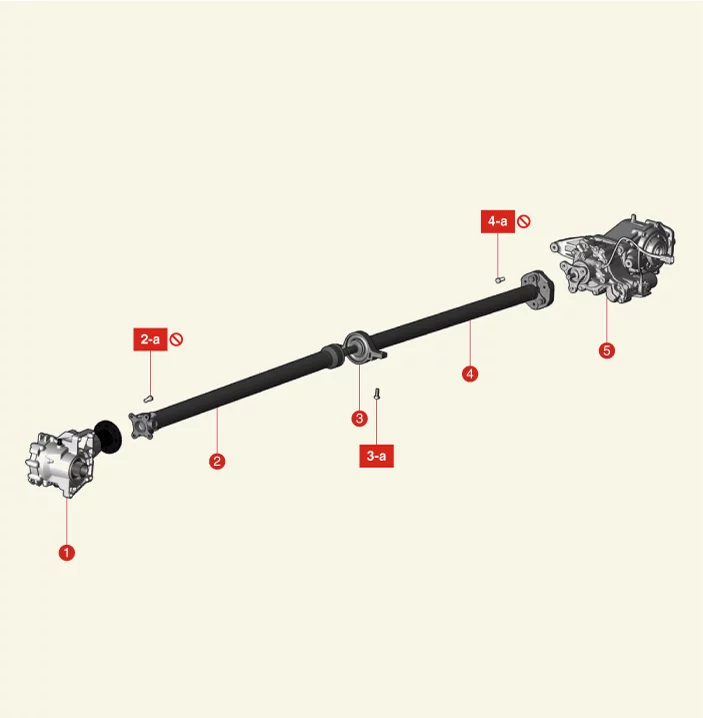
| 1. Front Transfer Assembly 2. Front Propeller Shaft 2-a. 49.0 - 69 N·m |
3. Center Bearing Bracket 3-a. 49.0 - 69 N·m 4. Rear Tube 4-a. 60.8 - 66 N·m 5. Coupling Assembly and Rear Differential Carrier Assembly |
Propeller Shaft On Vehicle Inspection
Inspection
- Shift gear to neutral or 'N'.
- Lift up the vehicle.
- Check the CV joint boot for damage. Replace the propeller shaft in case of excessive damage.
- Check the CV joint for excessive free play or noise. If excessive free play or noise occurs, replace the propeller shaft.
Propeller Shaft Removal and Installation
Removal
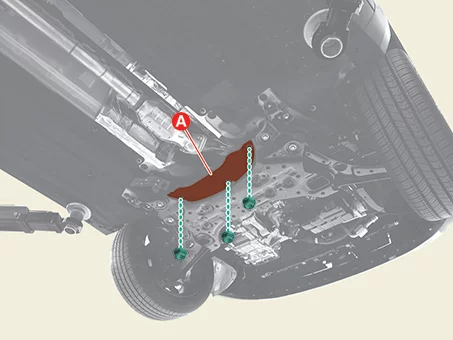
- Remove the front sub frame under cover (A) after removing the bolts.
Tightening torque : 9.8 - 11,8 N·m
- Mark the front transfer assembly and propeller shaft mounting position and then remove the mounting bolts (A).
Tightening torque : 49.0 - 69 N·m
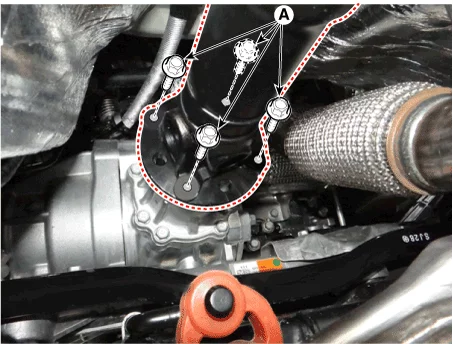

- Do not reuse the front propeller shaft mounting bolts.
- If the direction of mounting bolts, washers and propeller shafts is assembled differently from the initial state, abnormal vibration may occur at high speed due to propeller shaft imbalance.
- If the propeller shaft is replaced with a new one or there is abnormal vibration, balance the propeller shaft with a propeller shaft balancing equipment.
- If the front propeller shaft mounting bolts are removed and neglected without a jack, internal damage can occur. support the propeller shaft with a jack.
- Mark the rear tube rubber coupling and rear differential companion mounting position (A), and then remove the mounting bolts (B).
Tightening torque : 49.0 - 69 N·m
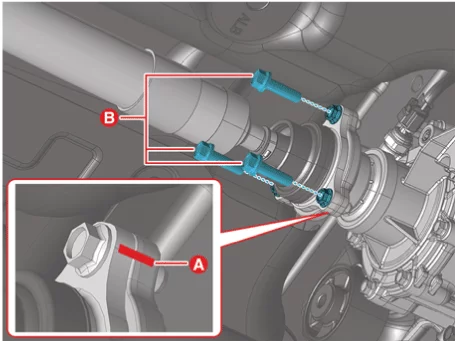
- Do not reuse the rear tube mounting bolts.
- If the direction of mounting bolts, washers and propeller shafts is assembled differently from the initial state, abnormal vibration may occur at high speed due to propeller shaft imbalance.
- If the rear tube mounting bolts are removed and neglected without a jack, internal damage can occur. support the propeller shaft with a jack.
- Remove the center bearing bracket mounting bolts, and then remove the propeller shaft (A).
Tightening torque : 49.0 - 69 N·m
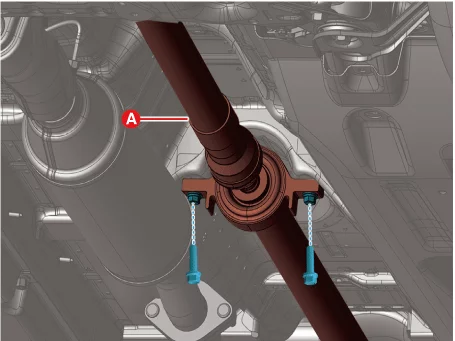
- Mark the position of the propeller shaft mounting bolt to prevent incorrect installation.
- If the direction of mounting bolts, washers and propeller shafts is assembled differently from the initial state, abnormal vibration may occur at high speed due to propeller shaft imbalance.
Installation
- Install in reverse order of removal.
Was this page helpful?