Single-Use Parts
Transfer Assembly
In this manual: Single-Use Parts
21steps
~126min
4/5difficulty
Done 0 of 21
Contents:
Transfer Oil Inspection
Inspection
|

- Remove the engine room under cover. G 1.6 T-GDI GAMMA II (Refer to Engine Mechanical System - "Engine Room Under Cover") G 2.0 MPI NU (Refer to Engine Mechanical System - "Engine Room Under Cover")
- Remove the filler plug (A).
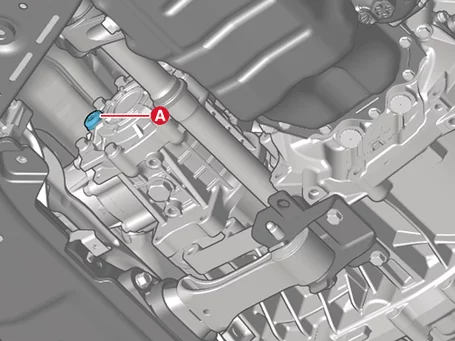
- Remove the drain plug (A), wait for at least 10 minutes until the oil is fully drained, and then reinstall the drain plug.
Tightening torque : 39.2 - 59 N·m


- Do not reuse the drain plug gasket (A).
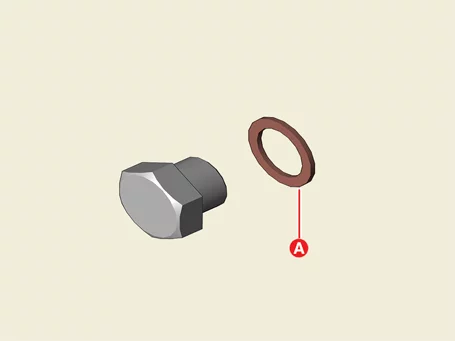
- Apply Loctite 592 or equivalent on thread (A) before installing new drain plug.
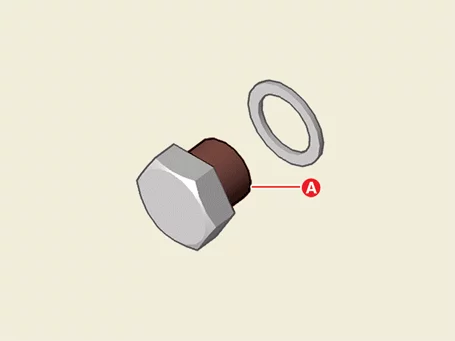
- Do not reuse the drain plug gasket (A).
- Check the amount of drained oil and fill the specified amount of oil through the filler plug hole.
Capacity : About 0.50 ℓ (0.13 U.S.gal., 0.52 U.S.qt, 0.43 Imp.qt.) Recommended : Hypoid gear oil API GL-5 SAE 75W/85 (SK HCT-5 gear oil 75W/85) or equivalent - Install the filler plug (A).
Tightening torque : 39.2 - 59 N·m
Do not reuse the filler plug gasket (A).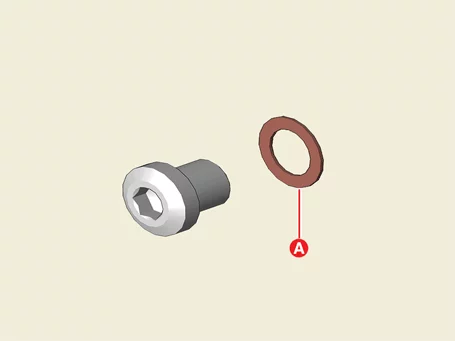
- Install the engine room under cover. G 1.6 T-GDI GAMMA II (Refer to Engine Mechanical System - "Engine Room Under Cover") G 2.0 MPI NU (Refer to Engine Mechanical System - "Engine Room Under Cover")
Transfer Oil Replacement
Replacement
- Remove the engine room under cover. G 1.6 T-GDI GAMMA II (Refer to Engine Mechanical System - "Engine Room Under Cover") G 2.0 MPI NU (Refer to Engine Mechanical System - "Engine Room Under Cover")
- Remove the drain plug (A) and drain transfer oil, and then reinstall the drain plug (A).
Tightening torque : 39.2 - 59 N·m
- Do not reuse the drain plug gasket (A).
- Apply Loctite to the thread (A) before installing a new drain plug.
- Do not reuse the drain plug gasket (A).
- Remove the filler plug (A) and refill with oil.
Capacity : Fill to the bottom of the oil filler hole Recommended : Hypoid gear oil API GL-5 SAE 75W/85 (SK HCT-5 gear oil 75W/85) or equivalent
- Install the filler plug (A).
Tightening torque : 39.2 - 59 N·m
Do not reuse the filler plug gasket (A). - Install the engine room under cover. G 1.6 T-GDI GAMMA II (Refer to Engine Mechanical System - "Engine Room Under Cover") G 2.0 MPI NU (Refer to Engine Mechanical System - "Engine Room Under Cover")
Front Transfer Assembly Components and Components Location
Component Location

| 1. Front Transfer Assembly 2. Front Propeller Shaft 2-a. 49.0 - 69 N·m |
3. Center Bearing Bracket 3-a. 49.0 - 69 N·m 4. Rear Tube 4-a. 60.8 - 66 N·m 5. Coupling Assembly and Rear Differential Carrier Assembly |
Front Transfer Assembly Removal and Installation
Removal
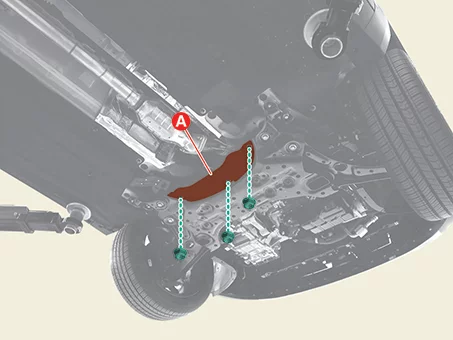
- Remove the front sub frame under cover (A) after removing the nuts.
Tightening torque : 7.8 - 11,8 N·m
- Mark the front transfer assembly and propeller shaft mounting position and then remove the propeller shaft (A) after removing the bolts.
Tightening torque : 49.0 - 69 N·m
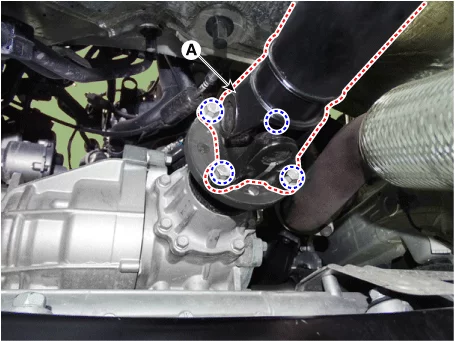
Leaving the front propeller shaft without a jack may result in internal damage. Support the propeller shaft with a jack. - Remove the engine room under cover. G 1.6 MPI GAMMA (Refer to Engine Mechanical System - "Engine Room Under Cover") G 1.6 T-GDI GAMMA II (Refer to Engine Mechanical System - "Engine Room Under Cover") G 2.0 MPI NU (Refer to Engine Mechanical System - "Engine Room Under Cover")
- Remove the RH front driveshaft and inner shaft. (Refer to Driveshaft and Axle - "Front Driveshaft")
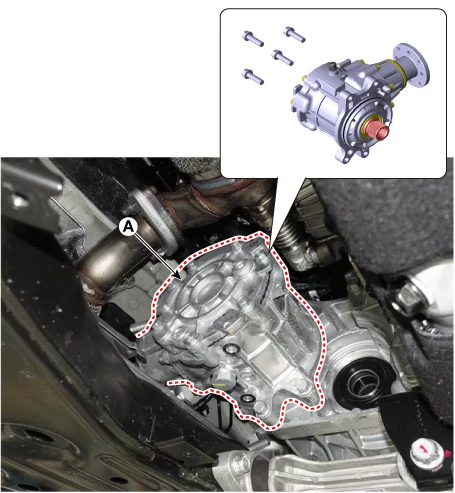
- Remove the bolts, and then remove the transfer assembly (A).
Tightening torque : 60.8 - 66 N·m
Installation
- Install in reverse order of removal.
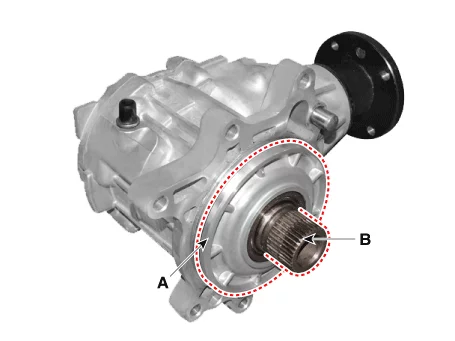
- Be careful not to damage the O-ring (A) when installing transfer assembly.
- Apply extreme pressure grease to spline (B).
Recommended grease : TECHRUBE MEGAMAX-ALPHA, CASMOLY CSG 101 M or equivalent Capacity : 2 - 5 g
- Do not reuse the propeller shaft mounting bolts (Loctite applied)
- Match the marks before tightening bolts when installing propeller shaft.
- If the transfer aasembly is replaced with a new one or there is abnormal vibration, balance the propeller shaft with a propeller shaft balancing equipment.
Oil Seal Replacement
Special Service Tool
| Tool Name / Number | Illustration | Description |
| Oil seal installer 09473 - D3600 |
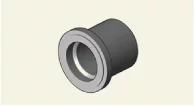 |
Used for installing transfer case oil seal (Used with the handle) |
| Handle 09231 - H1100 |
 |
Used for installing transfer case oil seal (Used with the oil seal installer) |
Replacement
- Remove the front transfer assembly. (Refer to Transfer Assembly - "Front Transfer Assembly")
- Remove the oil seal (A).
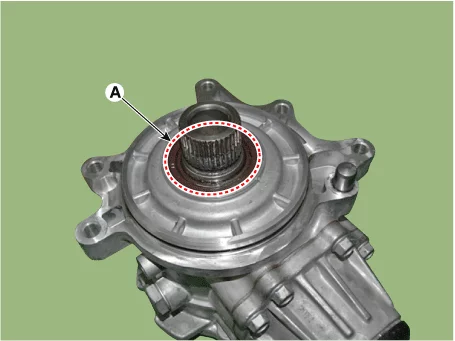
- Install a new oil seal using the SST (09473 - D3600, 09231 - H1100).

- Check the oil level and refill as required. (Refer to Transfer Assembly - "Transfer Oil")
- Install the transfer assembly. (Refer to Transfer Assembly - "Front Transfer Assembly")
Was this page helpful?