Hood Crossmember Assembly
Components and Component Location
Component Location
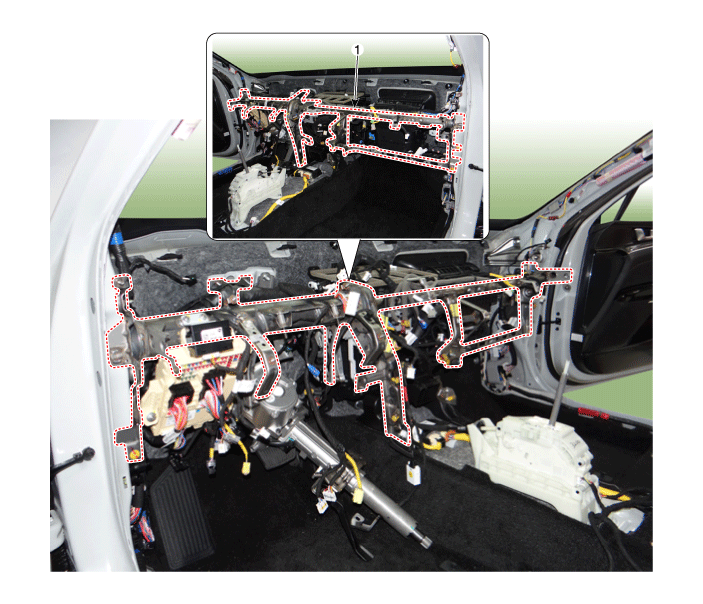
| 1. Hood Crossmember Assembly |
Repair Procedures
Replacement
Disconnect the negative (-) battery terminal.
Remove the driver airbag module assembly.
(Refer to Airbag - "Main Airbag Assembly")
Remove the knee airbag (KAB).
(Refer to Restraint System - "Knee Airbag (KAB)")
Disconnect the steering column connectors.
(Refer to Steering System - "Steering Column and Shaft")
Loosen the mounting nuts and through bolts at the front and lower steering column.
(Refer to Steering System - "Steering Column and Shaft")
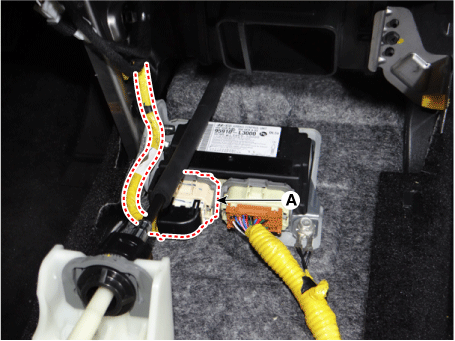
Press the stopper pin and disconnect the airbag control module connector (A).
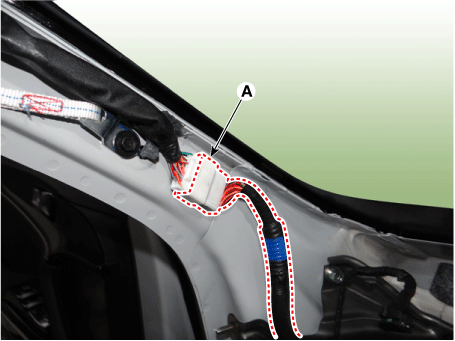
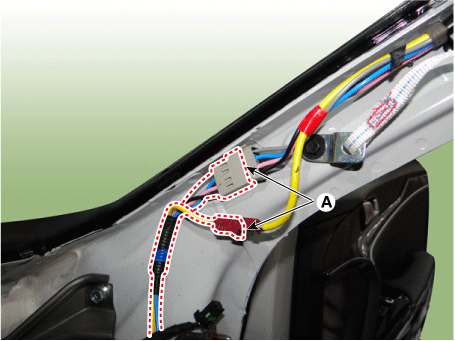
Remove the clips at the front pillar area and disconnect the various connectors (A).
[Driver]
[Passenger]
Disconnect the junction block connectors in the cabin (A).
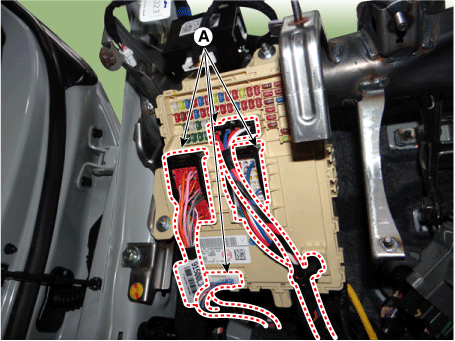
Disconnect the multi-box connectors (A).
[Driver]
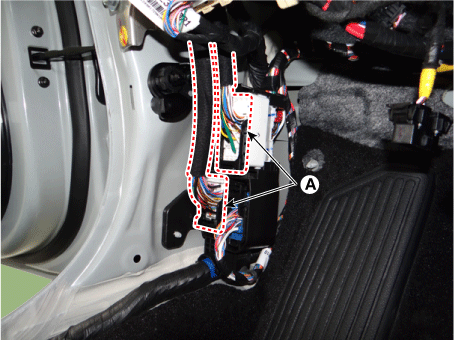
[Passenger]
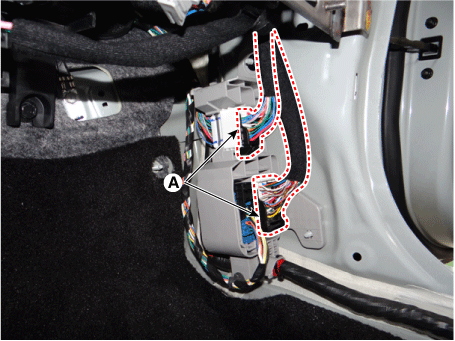
Disconnect the heater and blower unit connector.
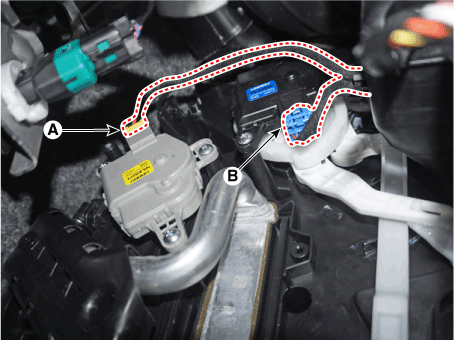
[Driver]
Disconnect the temperature control actuator connector (A) and the mode control actuator connector (B).
[Passenger]
Disconnect the connector of the automatic defogging system actuator (A).
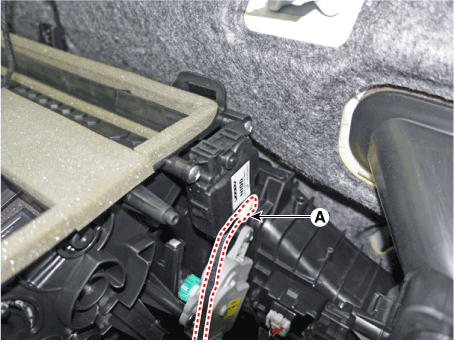
Disconnect the intake actuator (A), cluster ionizer (B), and temperature control actuator connectors (C).
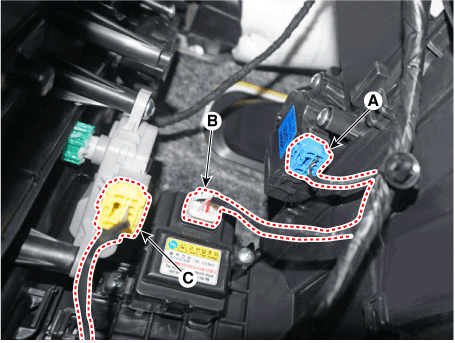
Disconnect the evaporator sensor connector (A) and the power connector (B).
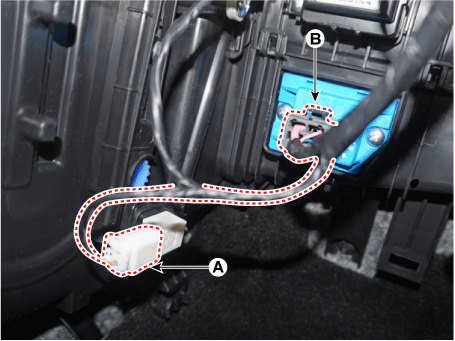
Remove the plug hole cover (A) and loosen the side mounting bolts of the cowl cross member.
[LH]
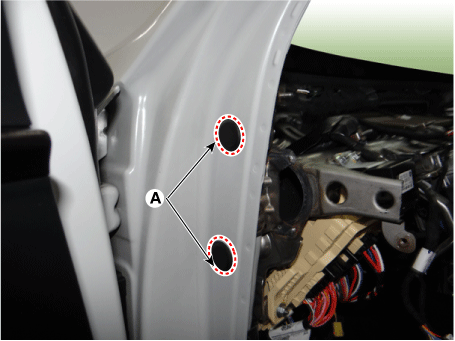
[RH]
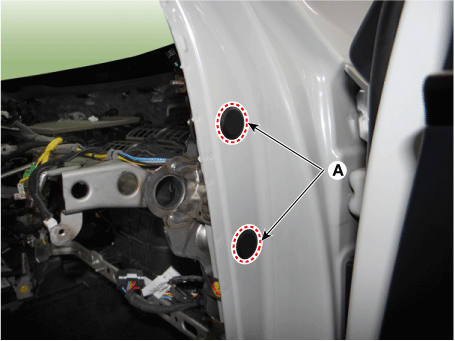
Remove the battery.
G 2.0 NU MPI (Refer to Engine Electrical System - "Battery")
G 2.5 GDI THETA II (Refer to Engine Electrical System - "Battery")
Loosen the bolts securing the engine compartment cowl crossmember.
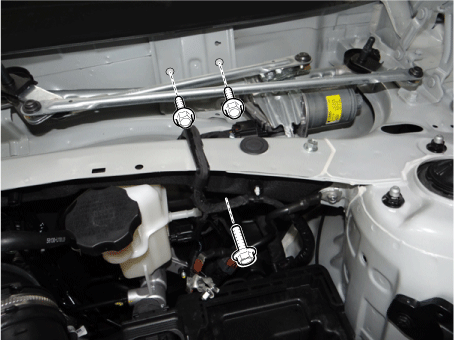
Loosen the mounting bolts and remove the cowl cross member assembly (A).
Tightening torque: 16.7–23 N·m
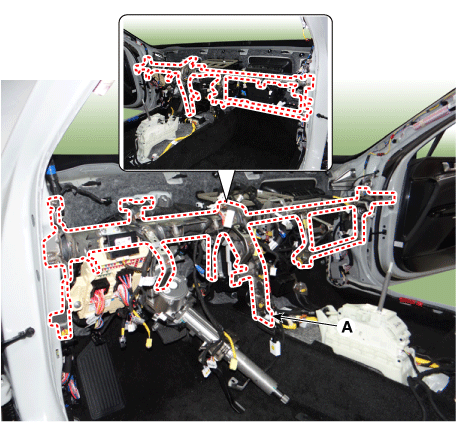
Separate the main wiring harness (A) from the cowl cross member assembly.
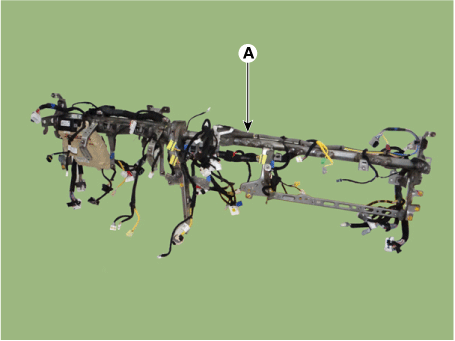
To install, reverse the removal procedure.
Test yourself
A quick Kia Optima DL3 quiz: every answer comes with an explanation and a link to the manual page.