Replacing headlight, position light, turn signal and fog light bulbs
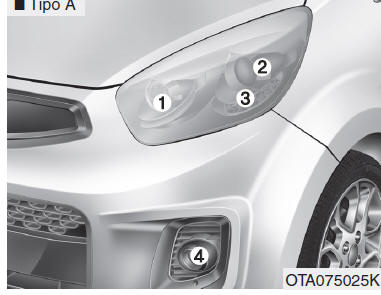
Type A
- Front turn signal lamp
- Headlight (high beam/low beam)
- Position light + DRL (LED type)* or Position light (LED type)*
- Front fog light*
*: if equipped
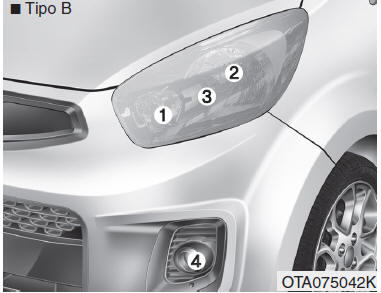
Type B
- Front turn signal lamp
- Headlight (high beam/low beam)
- Position light (bulb type)*
- Front fog light* or DRL* or Front fog light + DRL*
*: if equipped
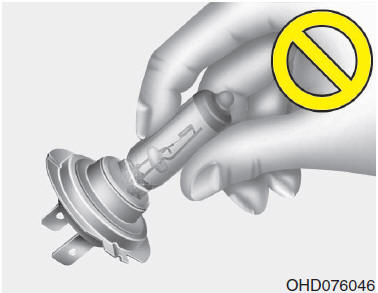
CAUTION - Halogen bulbs
- Halogen bulbs contain pressurized gas which, if broken, may cause glass fragments to fly out.
- Always handle them with care to avoid cuts and abrasions. If the bulbs are on, avoid contact with liquids. Never touch the glass with bare hands.
Any oil residue may cause the bulb to overheat and burst when switched on. Switch on the bulb only after it has been installed in the headlight.
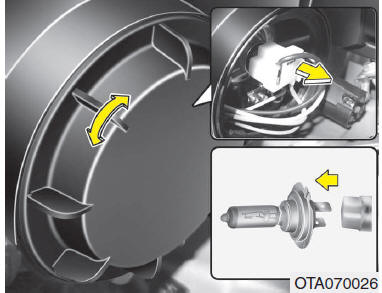
Headlights/Position lights (Bulb type) (if equipped)
- Open the hood.
- Remove the headlight bulb cover by turning it counterclockwise.
- Disconnect the headlight bulb holder connector.
- Remove the bulb from the headlight.
- Install the new headlight bulb assembly.
- Connect the headlight bulb holder connector.
- Install the headlight bulb cover by turning it clockwise.
NOTE If the headlight assembly needs to be aimed again after reinstallation, consult an authorized Kia dealer.
❋ Driving side change (for Europe) The low beam light distribution is asymmetrical.
If you travel abroad to a country with the opposite driving side, this asymmetry could dazzle drivers coming from the opposite direction. To prevent this, ECE regulations provide various technical solutions (e.g., automatic switching system, stickers, lowered aiming). These headlights are specifically designed to avoid dazzling drivers coming from the opposite direction.
Therefore, it is not necessary to change the headlights when traveling to a country with the opposite driving side.
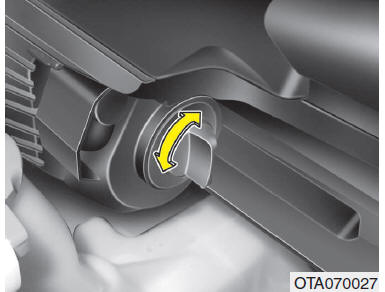
Turn signals
- Remove the bulb holder from the lamp unit by turning it counterclockwise until the tabs of the bulb holder align with the notches of the lamp unit.
- Remove the bulb from the bulb holder by pressing and turning the bulb counterclockwise until its tabs align with the notches of the bulb holder. Pull the bulb out of the bulb holder.
- Insert a new bulb into the bulb holder by turning it until it locks in place.
- Install the bulb holder on the lamp unit by aligning its tabs with the notches of the unit. Insert the bulb holder into the unit and turn it clockwise.
Position light + DRL (LED type) or Position light (LED type) (if equipped) If the bulb does not work, have the vehicle checked by an authorized Kia dealer.
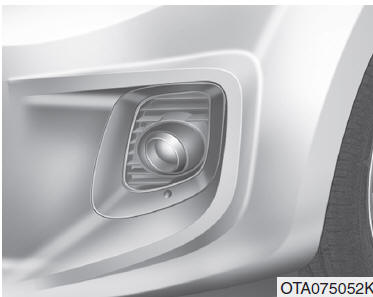
Front fog light or DRL or Front fog light + DRL (if equipped)
- Remove the lower cover by turning the screws.
- Reach your hand in from the back of the front bumper.
- Disconnect the power connector from the bulb holder.
- Remove the bulb holder from the housing by turning it counterclockwise until the tabs of the bulb holder align with the slots of the housing.
- Install the new bulb holder in the housing by aligning its tabs with the slots of the housing.
Insert the bulb holder into the housing and turn it clockwise.
Test yourself
A quick Kia Picanto JA quiz: every answer comes with an explanation and a link to the manual page.