Headlamps
Description and Operation
Description
BI TYPE
Definition
Headlamp with Integrated High and Low Beam Functions
The light is controlled by rotating a screen inserted into the lens. (A solenoid is applied.)
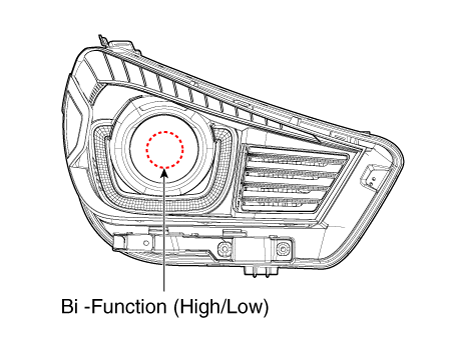
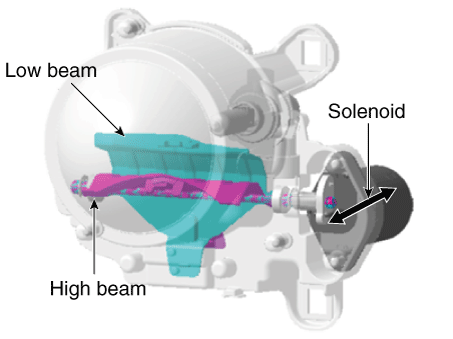
Structure and Mechanism
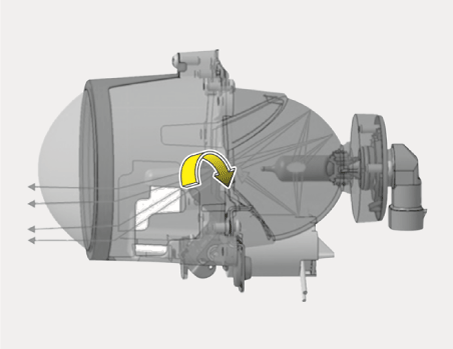
When operating the low beam
: The lamp illuminates the limited low beam area by blocking light with the stopped shield.
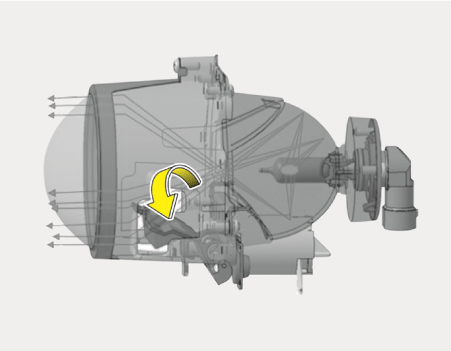
When operating as a high beam
: Light is not blocked by the open screen, and light illuminates the high beam area.
Static Bending Light (SBL)
Definition
Provides visibility into the corner when turning at night.
The L / R static bending light turns on/off depending on the vehicle speed and steering wheel angle.
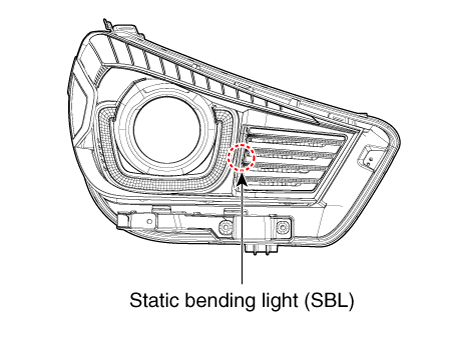
Vehicle input factors: vehicle speed, steering wheel angle.
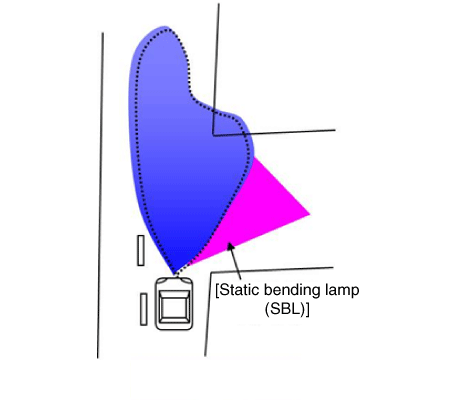
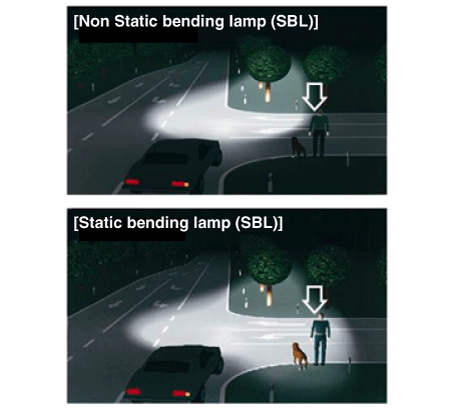
Repair Procedures
Headlamp Aiming Instructions
[Mechanical Aiming]
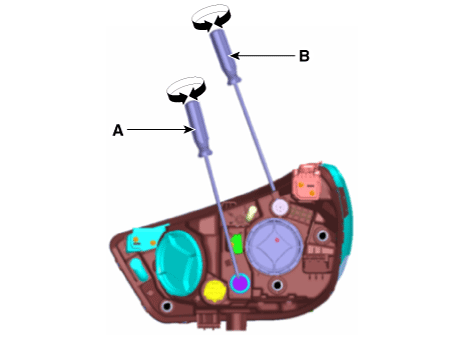
Aim the headlamps using suitable beam aiming equipment, and follow the equipment manufacturer's instructions.
Alternatively, turn the adjusting gear to adjust the headlamp aim. If beam aiming equipment is not available, perform the following steps:
Inflate the tires to the specified pressure and remove any loads from the vehicle except the driver, spare tire and tools.
The vehicle must be on a level floor.
Draw vertical lines (passing through the respective headlamp centers) and a horizontal line (passing through the headlamp centers) on the screen.
When the headlamps and battery are in normal condition, aim the headlamps so that the brightest part is on the horizontal and vertical lines.
A: Vertical
B: Horizontal
[Standard Type]
(Multi-Focus Reflector (MFR))
[Projection Type]
(Bi-Function)
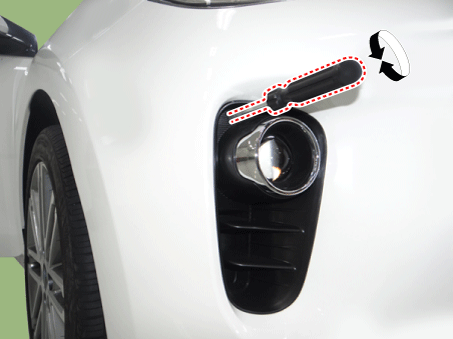
Front Fog Lamp Aiming
The front fog lamps should be aimed in the same way as the headlamps.
With the front fog lamps and battery in normal condition, aim the front fog lamps by turning the adjusting screw (A) with a screwdriver.
Headlamp and Fog Lamp Aiming Point
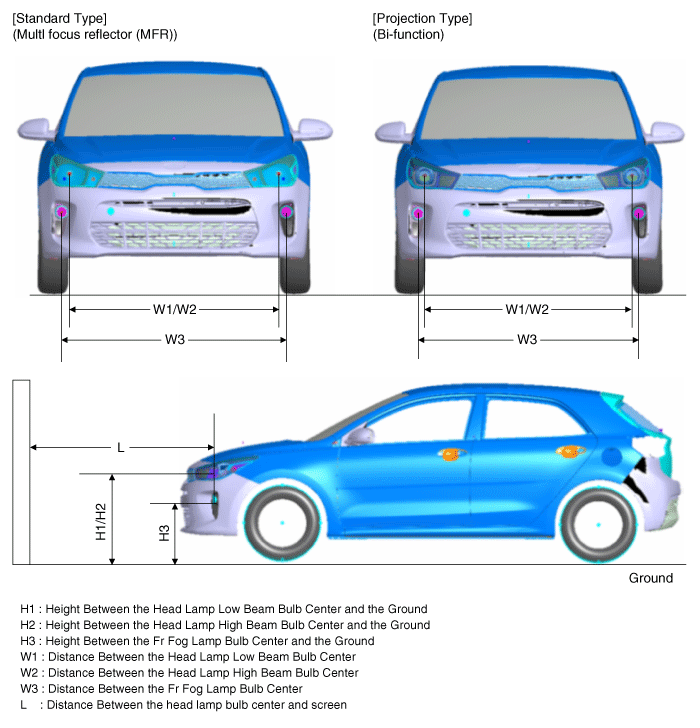
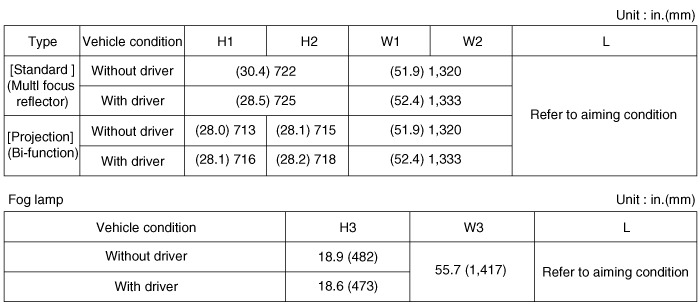
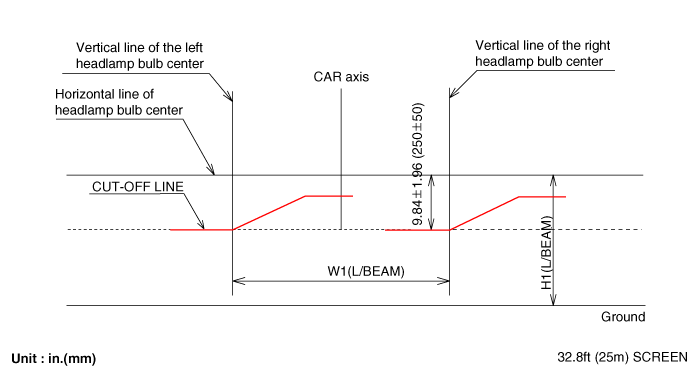
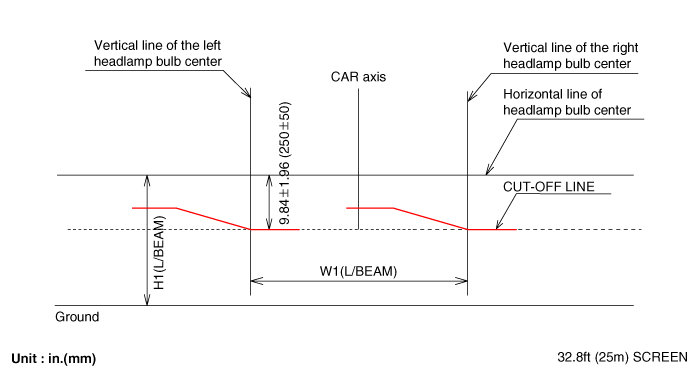
Headlamp (low beam)
Turn on the low beam without the driver.
The light-dark boundary line should project onto the light-dark boundary line shown in the figure.
If the headlamp leveling device is installed, set the headlamp leveling switch to 0 position.
[Left-hand drive]
[Right-hand drive]
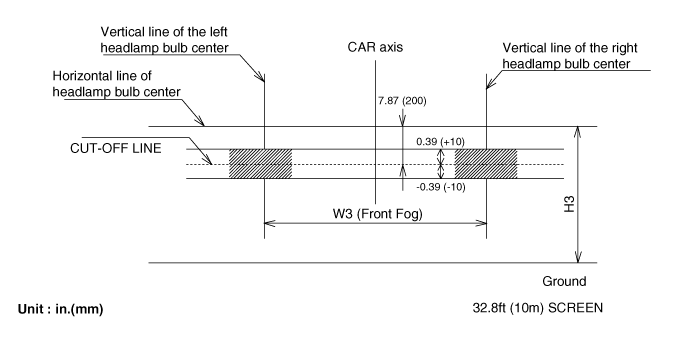
Turn on the front fog lamps without the driver.
The cutoff line must be projected within the allowable range (shaded area).
Removal
Headlamp
Disconnect the negative (-) battery terminal.
Remove the front bumper assembly.
(Refer to Body - "Front Bumper Assembly")
Remove the headlamp (A) after loosening the bolts.
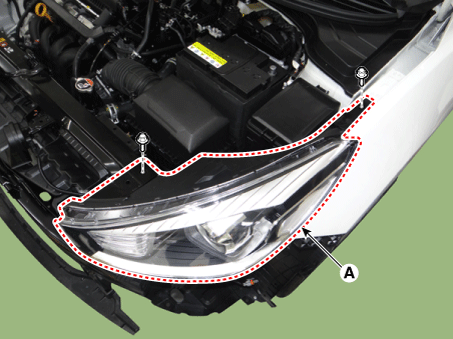
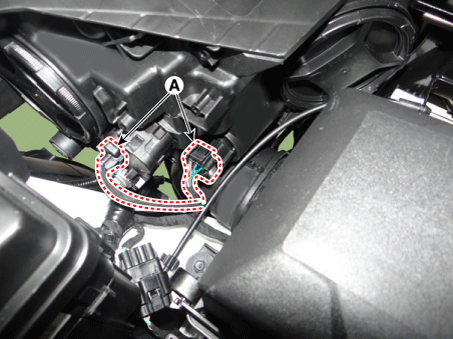
Disconnect the headlamp connectors (A).
Installation
Install the headlamp assembly.
Install the front bumper assembly.
Connect the negative (-) battery terminal.
Replacement
Bulb (high/low)
Remove the headlamp.
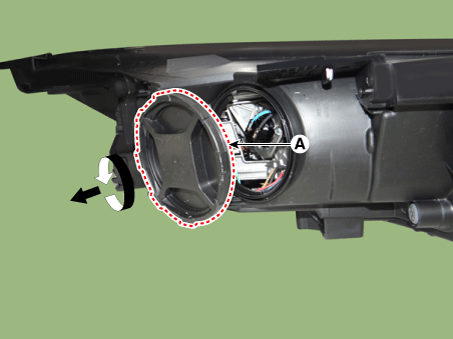
Remove the dust cap (A) from the headlamp assembly by turning it counterclockwise.
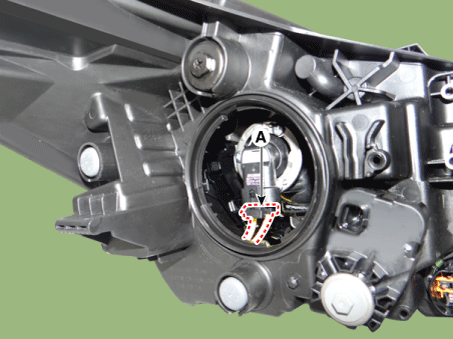
Disconnect the high/low beam bulb connector (A) of the headlamp.
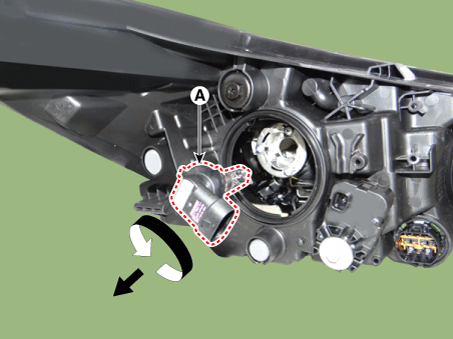
Remove the high/low beam headlamp bulb (A) from the headlamp assembly by turning it counterclockwise.
Install in the reverse order of removal.
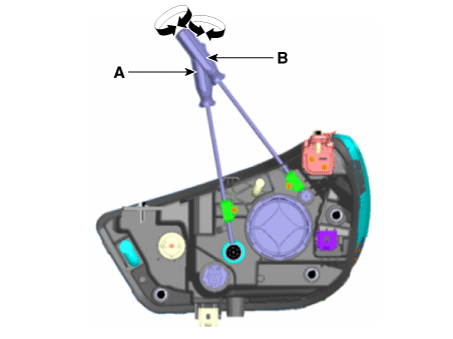
Static Bending Light (SBL)
Turn off the headlight switch.
Remove the dust cap (A) from the headlamp assembly by turning it counterclockwise.
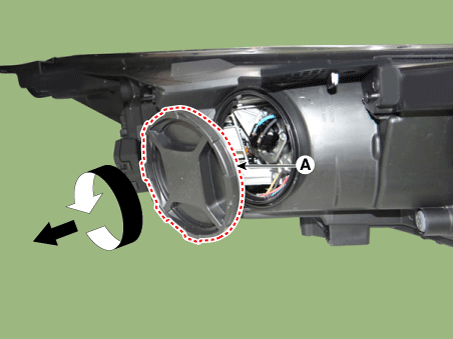
Remove the static bending light bulb (B) after removing the socket (A).
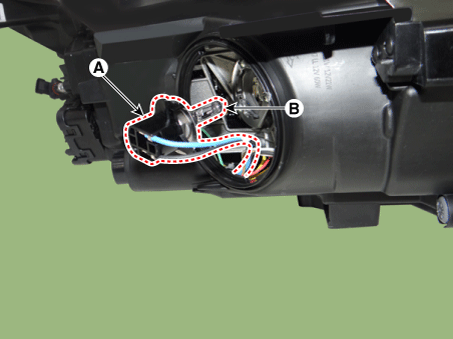
Install in the reverse order of removal.
Turn Signal Indicator
Turn off the headlamp switch.
Remove the dust cap (A) from the headlamp assembly by turning it counterclockwise.
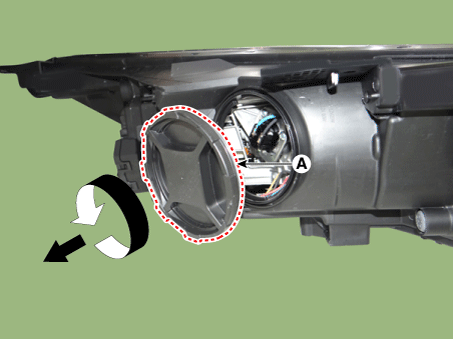
Remove the bulb socket (A) and bulb (B) from the headlamp assembly.
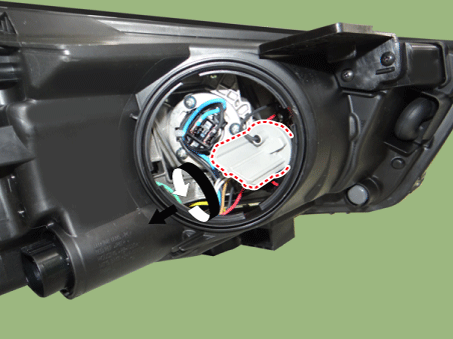
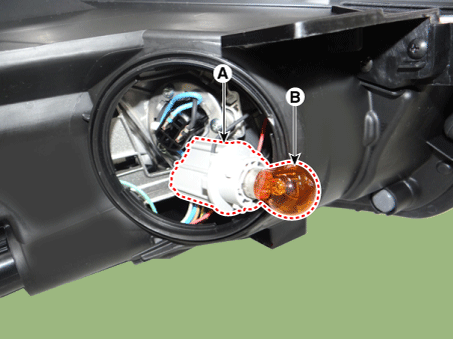
Install in the reverse order of removal.
Moisture Absorber
Removal
Turn off the headlamp switch.
Remove the dust cap (A) from the headlamp assembly by turning it counterclockwise.
[LH]
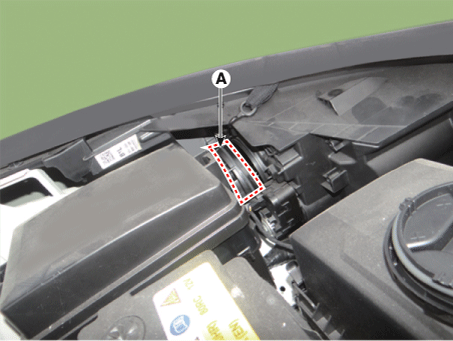
[RH]
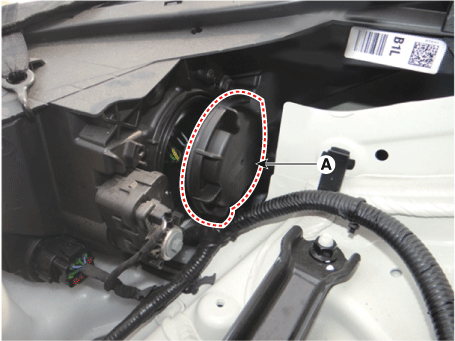
Remove the moisture absorber bracket (A) from the dust cap after loosening the mounting screws (B).
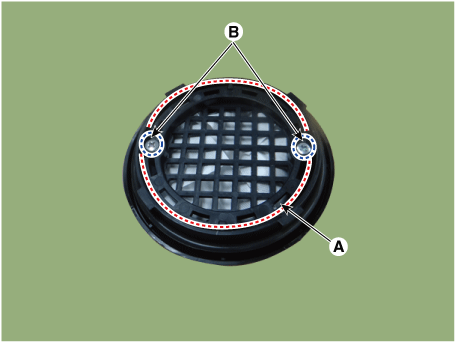
Remove the moisture absorbing element (A) from the dust cap (B).
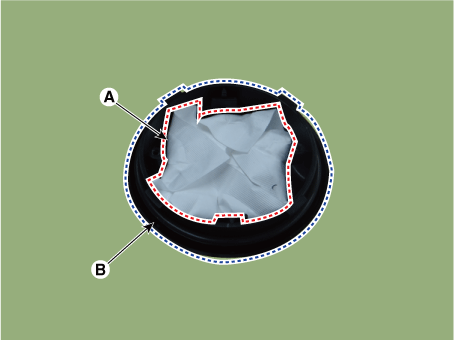
Installation
[LH/RH]
Insert the moisture absorber (A) with the bent sides facing up.
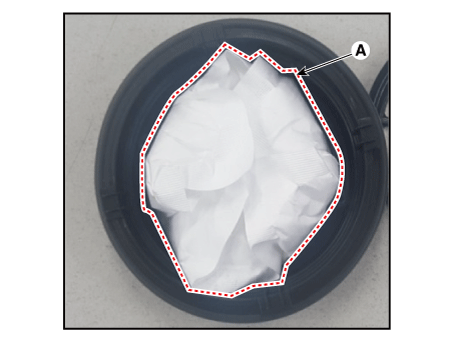
After installing the moisture absorber bracket (A), tighten the mounting screws (B).
Install the dust cap.
Test yourself
A quick Kia Rio YB quiz: every answer comes with an explanation and a link to the manual page.