Fuel level sender
Inspection
PROCEDURE
1. Before inspecting the fuel level sensor, fill the vehicle's fuel tank completely.

2. Remove the rear seat and the fuel pump assembly access cover with the sensor (screws securing the cover are indicated by arrows).
3. Disconnect the fuel level sensor connector located at the top of the tank.
4. Measure the sensor resistance between the pink (+) and black (–) wire terminals. Set the ohmmeter to the 200 ohm range.
5. With the tank full, sensor resistance should be approximately 4 ohms.
6. Connect the connector. Drive the vehicle until the fuel tank is almost empty (fuel may also be drained into a container using a hand pump. Do not siphon fuel by mouth).
7. Check the sensor resistance. Resistance should now be approximately 110 ohms.
8. If the sensor resistance differs from the specified values, replace the sensor.
* The sensor can also be checked by removing it from the tank. Measure the resistance with the float fully lowered (empty tank) and at the highest float position (full tank). Resistance should change from 110 ohms to 2–4 ohms.
Replacement
PROCEDURE
1. Remove the fuel pump and fuel level sensor assembly from the fuel tank (see subsection 5.4).
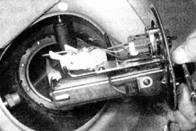
2. Carefully tilt the sensor to avoid damaging the float arm while removing it from the tank (the float is located at the bottom of the pump-sensor assembly).
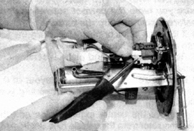
3. Disconnect the connectors from the sensor.
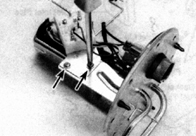
4. Remove the screws securing the sensor to the bracket (indicated by arrows) and remove the sensor.
5. Install the sensor in the reverse order.
Test yourself
A quick Toyota Corolla quiz: every answer comes with an explanation and a link to the manual page.