Alternator

Alternator Components (typical) 1. Rear cover
2. Brush holder
3. Insulating bushing
4. Rectifier assembly
5. Rubber bumper
6. Rear housing flange
7. Retainer
8. Dust deflector
9. Tension regulator
10. Brush holder cover
11. Rectifier contact plate
12. Rotor
13. Bearing cover
14. Rear bearing
15. Front bearing
16. Pulley
17. Front cover (complete with stator)
18. Retainer
19. Bearing cover
20. Thrust washer
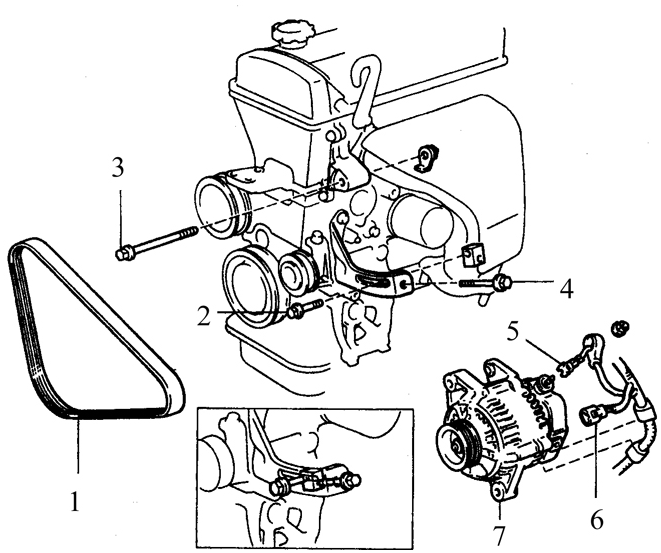
Alternator Mounting and Drive Components 1. Drive belt
2. Adjusting bolt (clamp bolt)
3. Locking bolt
4. Alternator main wire
5. Adjusting bolt
6. Alternator
7. Connector
Removal
PROCEDURE
1. Disconnect the battery from ground.
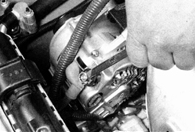
2. Disconnect the connectors from the generator.
3. Loosen the adjusting, pivot and lock bolts of the generator (see figure Generator Mounting and Drive Components).
4. Remove the adjusting and pivot bolts from the generator adjusting bracket.
5. Remove the generator and bracket from the engine.
6. If you decide to replace the generator, take the old generator with you when purchasing the new unit. Make sure the new (or remanufactured) generator exactly matches the one being replaced. Pay attention to the terminals: their number, size and relative position must be the same as on the unit being replaced. Finally, check the markings. The markings must be either stamped on the housing or printed on a label affixed to the housing. Make sure the numbers on the new and old units match.
7. Many new (or remanufactured) generators do not have pulleys, so it will be necessary to transfer the pulley from the old unit. When purchasing a new generator, consult about pulley installation. At some workshops and sales outlets, this consultation is provided free of charge.
Test yourself
A quick Toyota Corolla quiz: every answer comes with an explanation and a link to the manual page.