Radiator and Expansion Tank
Removal and installation
PROCEDURE
1. Disconnect the battery ground cable.
2. Drain the coolant into a container (see subsection 2.8.4).
3. Disconnect the upper and lower radiator hoses.
4. Disconnect the reservoir hose from the radiator filler neck.
5. Remove the fan.
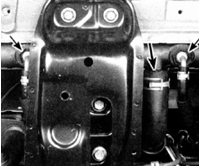
6. On vehicles equipped with an automatic transmission, disconnect the transmission fluid cooler lines from the radiator fittings. Place a drain pan under the fittings to catch spilled fluid, and plug the fittings.
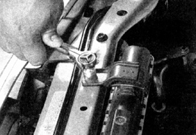
7. Remove the two upper radiator mounting brackets.
* At the bottom, the radiator sits on two pins fitted with rubber bushings. The pins fit tightly into the holes in the body.
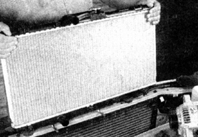
8. Remove the radiator by lifting it upward. Do not lose the rubber bushings, which should be in place before installing the radiator. Be careful of spilled fluid and sharp radiator fins.
9. Check the radiator for leaks, mechanical damage, and cleanliness of the internal passages. If repair is required, contact a specialized workshop or a dealer service center, as special equipment and technology are required.
10. Remove insects and dirt from the spaces between the radiator fins by blowing with compressed air and cleaning with a soft brush. When cleaning, do not bend the radiator fins.
11. Install the radiator in the reverse order. Make sure the rubber bushings are on the radiator mounting pins.
12. After installing the radiator, fill the cooling system with coolant with the correct water and antifreeze ratio.
13. Start the engine and check for leaks from all disturbed connections. Warm up the engine to operating temperature, checking by the heating of both radiator hoses. Check the coolant level again and top up if necessary.
14. On vehicles equipped with an automatic transmission, check the transmission fluid level and top up if necessary.
Expansion tank
PROCEDURE
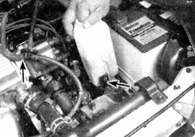
1. On most vehicles, the tank is simply removed from the bracket located next to the battery. Move the tee fitting away from the tank (indicated by the arrow) and remove the tank from the bracket (right arrow).
2. Drain the fluid from the tank into a container. Inspect the tank and check for cracks and dents. If signs of damage are found, replace the tank.
3. Install the tank in the reverse order.
Test yourself
A quick Toyota Corolla quiz: every answer comes with an explanation and a link to the manual page.