Removal
1. REMOVE REAR WHEELS
Torque: 131 N·m
2. SUPPORT REAR AXLE HOUSING WITH JACK
3. REMOVE SHOCK ABSORBER
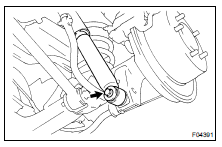
(a) Remove the bolt and disconnect the shock absorber from the axle housing.
Torque: 98 N·m
(b) Employ the same manner described above to the other side.

(c) While holding the piston rod, remove the nut, 2 retainers, cushion and shock absorber.
Torque: 69 N·m
(d) Remove the 2 retainers and cushion from the shock absorber.
4. DISCONNECT LH AND RH STABILIZER BAR BRACKETS
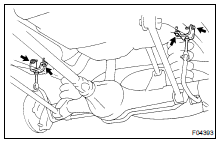
Remove the 4 bolts and disconnect the LH and RH stabilizer bar brackets.
Torque: 18 N·m
5. DISCONNECT LATERAL CONTROL ROD
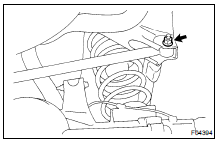
Remove the nut, washer, bolt and disconnect the lateral control rod.
Torque: 150 N·m
HINT: At the time of installation, after stabilizing the suspension, torque the nut and bolt.
6. DISCONNECT BREATHER HOSE
7. REMOVE COIL SPRING
(a) Begin to lower the axle housing.
NOTICE: Be careful not to snap the brake line and parking brake cable.

(b) While lowering the axle housing, remove the coil spring and insulator.
HINT: At the time of installation, please refer to the following items.
- Check that the coil spring end is installed correctly.
- If the coil spring end is not in the correct position, reinstall the coil spring.
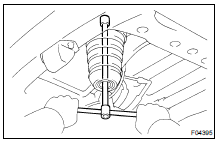
(c) Remove the bolt and follow spring from the frame.
Torque: 28 N·m
Test yourself
A quick Toyota Land Cruiser quiz: every answer comes with an explanation and a link to the manual page.