Removal and Installation of Front Brake Pads
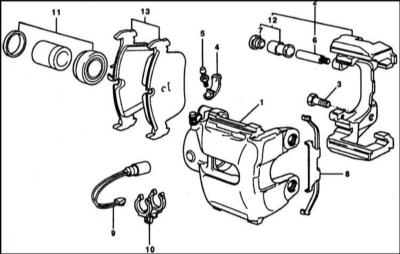
Front Disc Brake Caliper
1 — caliper
2 — caliper bracket
3 — bolt, 110 N·m
4 — dust boot
5 — bleed screw
6 — guide pin
7 — protective cap
8 — spring
9 — brake pad wear sensor
10 — wear sensor holder
11 — seal kit
12 — guide sleeve repair kit
13 — brake pads (asbestos-free)
REMOVAL
1. Mark the position of the wheel relative to the hub with paint. This allows the balanced wheel to be refitted in its original position. Loosen the wheel bolts while the vehicle is standing on the ground. Raise the vehicle and support it on stands, then remove the wheel.
* If the brake pads are to be reinstalled, mark them before removal. Do not interchange pads from right to left or vice versa. This may lead to uneven braking. Only original BMW pads or pads approved by BMW may be installed. Always replace both front brake pads, even if only one is worn.
2. Disconnect the brake pad wear sensor plug connector on the left caliper (arrow in the accompanying illustration) by hand. Do not pull on the cable.
3. Remove the plastic caps of the mounting screws with a screwdriver (arrows in the accompanying illustration).
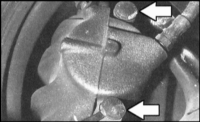
4. Unscrew both mounting bolts located under the plastic caps using a 7 mm Allen key.
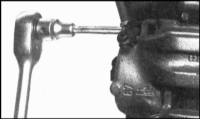
5. Remove the caliper bracket with a screwdriver.
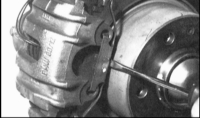
6. Move the caliper off to the rear and secure it with wire to the suspension.
* Do not disconnect the brake hose, otherwise the air must be bled from the brake system after installation. Make sure the brake hose is not stretched.
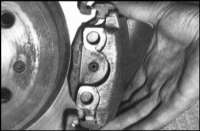
7. Remove the outer brake pad.
8. The inner brake pad is secured in the brake piston by a spring (6). Remove the brake pad.
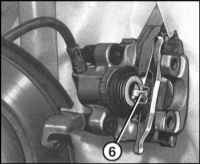
Do not depress the brake pedal while the brake pads are removed, otherwise the piston may be forced out of the caliper body.
INSTALLATION
1. Inspect the brake pad wear indicator. If the insulation of the contact plate is worn, the cable insulation is damaged, or the plastic element is worn off, replace the sensor.
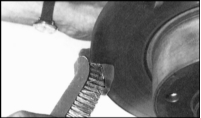
2. Clean the brake pad guide surface in the caliper bore with a soft metal brush or wipe it with a cloth moistened with alcohol. Do not use solvents containing mineral oils or tools with sharp edges. If the pads will be reused, clean them as well.
3. Before installing the pads, check the brake disc for scoring by running your fingers over it. If scoring is present, replace the disc. Clean a brake disc that has a gray or blue discoloration before installing new brake pads.
4. Measure the brake disc thickness. Refer to Brake Disc Thickness Measurement.
5. Inspect the protective cap (2) on the piston. If damaged, replace it, as dirt entering the cylinder may cause loss of caliper sealing. The caliper must be removed and disassembled for this (dealer service).

6. Press the piston back using a special tool. A wooden block (for example, a hammer handle) may also be used for this purpose. Take special care that the piston does not tilt and that the protective cap is not damaged.
* When the piston is pressed in, brake fluid is forced from the cylinder into the reservoir. Monitor this and, if necessary, remove fluid by suction.
Use a plastic bottle to suck out the fluid. Do not use a bottle for drinking liquids. Brake fluid is poisonous. Never draw it into your mouth through a hose. After replacing the brake pads, do not allow the brake fluid level in the reservoir to exceed the MAX mark, as the fluid expands when heated. Fluid overflowing from the system runs down the master cylinder, damaging the paint and causing corrosion.
* If the brake pads are heavily worn, check that the piston moves freely. To do this, insert a wooden block into the caliper and have an assistant depress the brake pedal. The piston should extend and retract easily. Take care not to push the piston out completely. If the piston moves with difficulty, the caliper requires repair.
7. To prevent brake disc squeal, lubricate the following parts with special paste. The following may be used as such paste: Plastilube, Tunap VC 582/S, Chevron SRJ/2, Liqui Moly LM-36 or LM-508-ASC.
a) Contact surface between the piston and the brake pad.
b) Clean the contact surface (3) of the caliper and apply a thin layer of paste to the areas shaded in the accompanying illustration.
c) Clean the caliper bracket at the guide pins and apply a thin layer of special paste to the areas shaded in the accompanying illustration.
* Paste must never get onto the protective cap, the brake pad or the brake disc. If paste gets onto these surfaces, wipe it off immediately with alcohol or replace the protective cap.
Do not lubricate the backing plate of the brake pad.
8. Insert the brake pad with the spring into the piston.
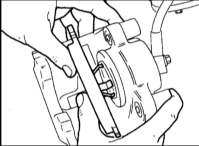
9. Insert the outer brake pad (9) into the caliper and install the caliper onto the brake disc. Make sure the brake pads are clean.
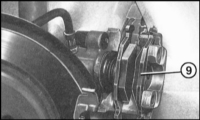
10. Visually inspect the two caliper mounting bolts. If necessary, clean dirt from the threads, and chase the threads in the caliper with a tap. Replace bolts with damaged threads or signs of corrosion. Tighten the bolts with a 7 mm hex key to a torque of 30 N·m.
* Clean the bolts only; do not lubricate them.
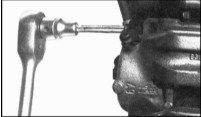
11. Install the caps on the bolts.
12. Connect the wear sensor plug connector on the left side of the vehicle. The wire must pass through the loop of the bleeder screw cap.

13. Install the bracket onto the caliper.
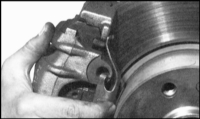
14. Install and secure the front wheels. Do not lubricate the wheel bolts with oil. Install the wheels so that the marks made during removal align. Lower the vehicle onto its wheels and tighten the wheel bolts in a crisscross sequence to a torque of 100 N·m.
* Press the brake pedal down firmly several times until resistance is felt. This will push the brake pads against the disc and bring them into their working position.
15. Check the brake fluid level in the reservoir. If necessary, top up to the MAX mark.
Caution, check the reliability of:
a) Brake hoses are secured.
b) Brake hose is secured in its bracket.
c) Bleeder screw is tightened.
d) Brake fluid in the reservoir is sufficient.
e) With the engine running, check the system for leaks. To do this, depress the brake pedal with a force of 200 - 300 N (20 - 30 kgf) and hold it for 10 s. The pedal force must not decrease.
f) Check all connections for leaks.
16. New brake pads must be bedded in. To do this, brake the vehicle several times from 80 km/h down to 40 km/h using light pedal pressure. Allow the brakes to cool between applications.
* Do not brake the vehicle heavily during the first 200 km of driving.
* Dispose of brake pads properly. Do not dispose of them with household waste.
Test yourself
A quick BMW 1 quiz: every answer comes with an explanation and a link to the manual page.