Battery Cable Inspection and Replacement
PROCEDURE
1. Regularly inspect the battery cables along their entire length for signs of mechanical damage, cracks, and burnt insulation, as well as corrosion. Remember that poor electrical connection at the battery terminals can cause starting difficulties and reduced engine output.
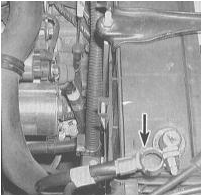
2. Check the cable terminal clamps for cracks, signs of exposed copper strands, and corrosion. White powdery deposits accumulated under the insulation near the cable terminals indicate corrosion and the need to replace the cable. Check the battery terminals and the cable terminal clamps for deformation, loose bolts, and corrosion.
3. The negative cable is always disconnected from the battery first and connected last. Be sure to disconnect the negative cable even if only the positive cable is being replaced.
Always disconnect the negative cable first and connect it last. If the vehicle's radio is equipped with an anti-theft code, make sure you have the correct code before disconnecting the battery!
4. Disconnect the old cables from the battery (negative first), then trace each cable to its opposite end and disconnect it from the starter solenoid (positive) and the ground connections (negative). Note the routing of both cables so that you can follow the same routing when installing the new cables.
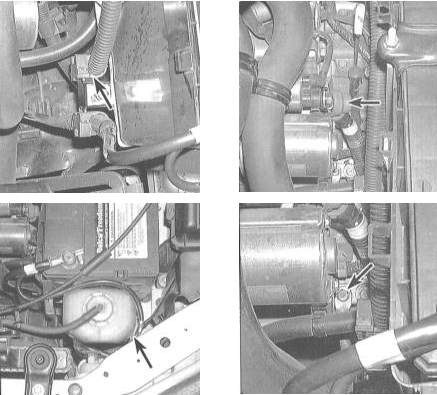
5. Take the cable being replaced to the parts store as a sample. It is extremely important that the cable terminal design matches the shape of the connection terminals on the vehicle.
Cables are easy to tell apart by insulation color: always black for negative and red for positive. In addition, the positive cable usually has a larger cross-section.
6. Clean the threads on the starter solenoid and ground connection terminals with a wire brush. After removing all corrosion, lightly apply acid-free petroleum jelly to the threads to prevent future corrosion.
7. Connect the cable to the starter solenoid/ground terminal and tighten the nut/bolt securely.
8. Before connecting the new cable to the battery terminal, make sure it reaches without excessive stretching. Thoroughly clean the battery terminal posts, then lightly apply acid-free petroleum jelly.
9. Always connect the positive cable to the battery first, then the negative cable.
Test yourself
A quick Honda Accord quiz: every answer comes with an explanation and a link to the manual page.