Adjustment and Replacement of Transmission Position Switch
INSPECTION
PROCEDURE
1. The switch wiring connector can be accessed from the engine compartment.
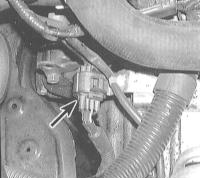
2. Disconnect the 10-pin transmission position switch connector.
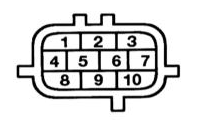
3. Check the switch continuity against the continuity chart. Move the selector lever to each position in turn.
4. If the inspection results are not satisfactory, adjust the switch. If the switch cannot be adjusted, replace it.
ADJUSTMENT
PROCEDURE
1. Move the selector lever to the "N" position and loosen the switch mounting nuts.
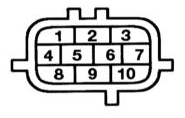
2. Disconnect the 10-pin connector and connect an ohmmeter to terminals 1 and 3.
3. Remove the cover and slightly loosen the switch mounting bolts. Turn the switch to the "N" position; a click should be heard and the ohmmeter should show continuity.
4. Tighten the mounting bolts, install the cover and connect the connector.
REPLACEMENT
PROCEDURE
1. Raise the vehicle and support it on safety stands.
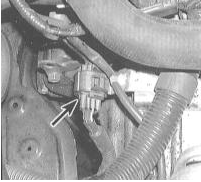
2. Disconnect the 10-pin connector. Remove the wiring harness holder bolt.
3. Move the selector lever to the "N" position.
4. Remove the AT position switch cover, then remove the switch mounting bolts.
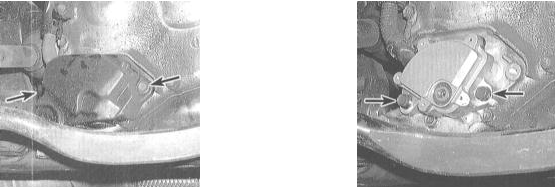
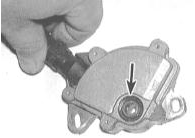
5. Set the new switch to the position corresponding to "N", and make sure the selector lever is also in the "N" position.
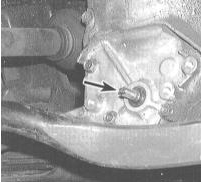
6. Install the switch on the control shaft and, making sure it stays in the "N" position, tighten the mounting bolts.
7. Connect the wiring, secure the harness and install the cover.
8. Make sure the engine starts only in the "N" and "P" selector lever positions.
Test yourself
A quick Honda Accord quiz: every answer comes with an explanation and a link to the manual page.