Replacing Bulbs in the Rear Combination Lights
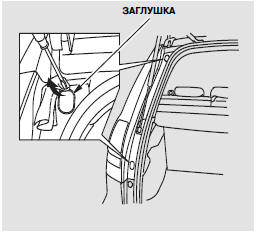
1. Open the tailgate. To prevent scratches, place a cloth on the edge of the cap. Remove the caps by carefully prying them off with a small flat-blade screwdriver.

2. Using a Phillips screwdriver, remove the rear combination light mounting screws under each cap.
3. Remove the rear combination light from the rear pillar.
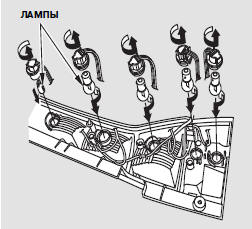
4. Determine which bulb has burned out:
Stop/tail light, back-up light, turn signal light, parking light, or rear fog light (driver's side only).
5. Turn the socket one-quarter turn counterclockwise and remove it.
6. Except for the tail light bulb: turn the socket with the burned-out bulb a quarter turn counterclockwise and remove the socket with the bulb.
Rear Combination Light Bulb
Without turning the bulb, pull it out of the socket. Push the new bulb into the socket until it stops.
7. Insert the socket into the combination light and turn it clockwise until it locks.
8. Turn on the lights and check that the new bulb works.
9. Align the tabs on the light with the mating holes in the body. Press the light into place. Install and tighten the two light mounting screws securely. Install the caps.
Test yourself
A quick Honda CR-V quiz: every answer comes with an explanation and a link to the manual page.