Installation
PROCEDURE
1. Install the guide pins through the piston into the connecting rod, and install the piston pin from the other side of the piston.
The guide pins determine the position of the connecting rod in the piston. After installing the piston, connecting rod, piston pin and piston pin installer tool into the inserts, the guide pins also determine their position in the clamp.
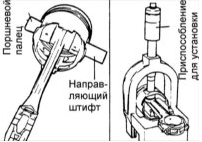
2. The guide pins determine the position of the connecting rod in the piston. After installing the piston, connecting rod, piston pin and piston pin installation tool into the inserts, the guide pins also determine their position in the clamp.
3. Check the correct relative position of the piston and connecting rod, and, turning the knurled nut, secure the numbered bushing on the shaft.
4. Insert the shaft through the hole in the clamp arch. Press the piston pin into the connecting rod until the bushing on the shaft contacts the upper part of the clamp arch; the guide pin should come out of the piston.
Piston pin press-in force must not exceed 22500 N.
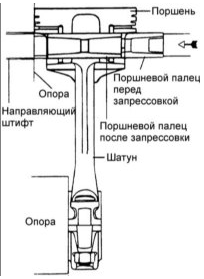
Press-fit depth: 0.3–0.5 mm
5. Make sure the marks on the piston and connecting rod face the front of the engine.
6. After installing the connecting rod caps, check that the cylinder number on the connecting rod and cap matches.
7. When installing a new connecting rod, make sure the bearing support recesses are on the same side as on the other connecting rods.
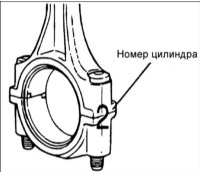
8. Tighten the connecting rod cap nuts.
Torque: 32–35 N•m
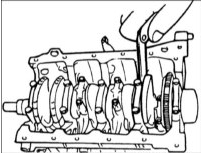
9. Using a feeler gauge inserted between the connecting rod and the crankshaft, measure the connecting rod side clearance.
Standard connecting rod side clearance: 0.10–0.25 mm
Maximum allowable clearance: 0.40 mm
Test yourself
A quick Hyundai Accent quiz: every answer comes with an explanation and a link to the manual page.